Add Fields In The JS Help Desk!
Add Field
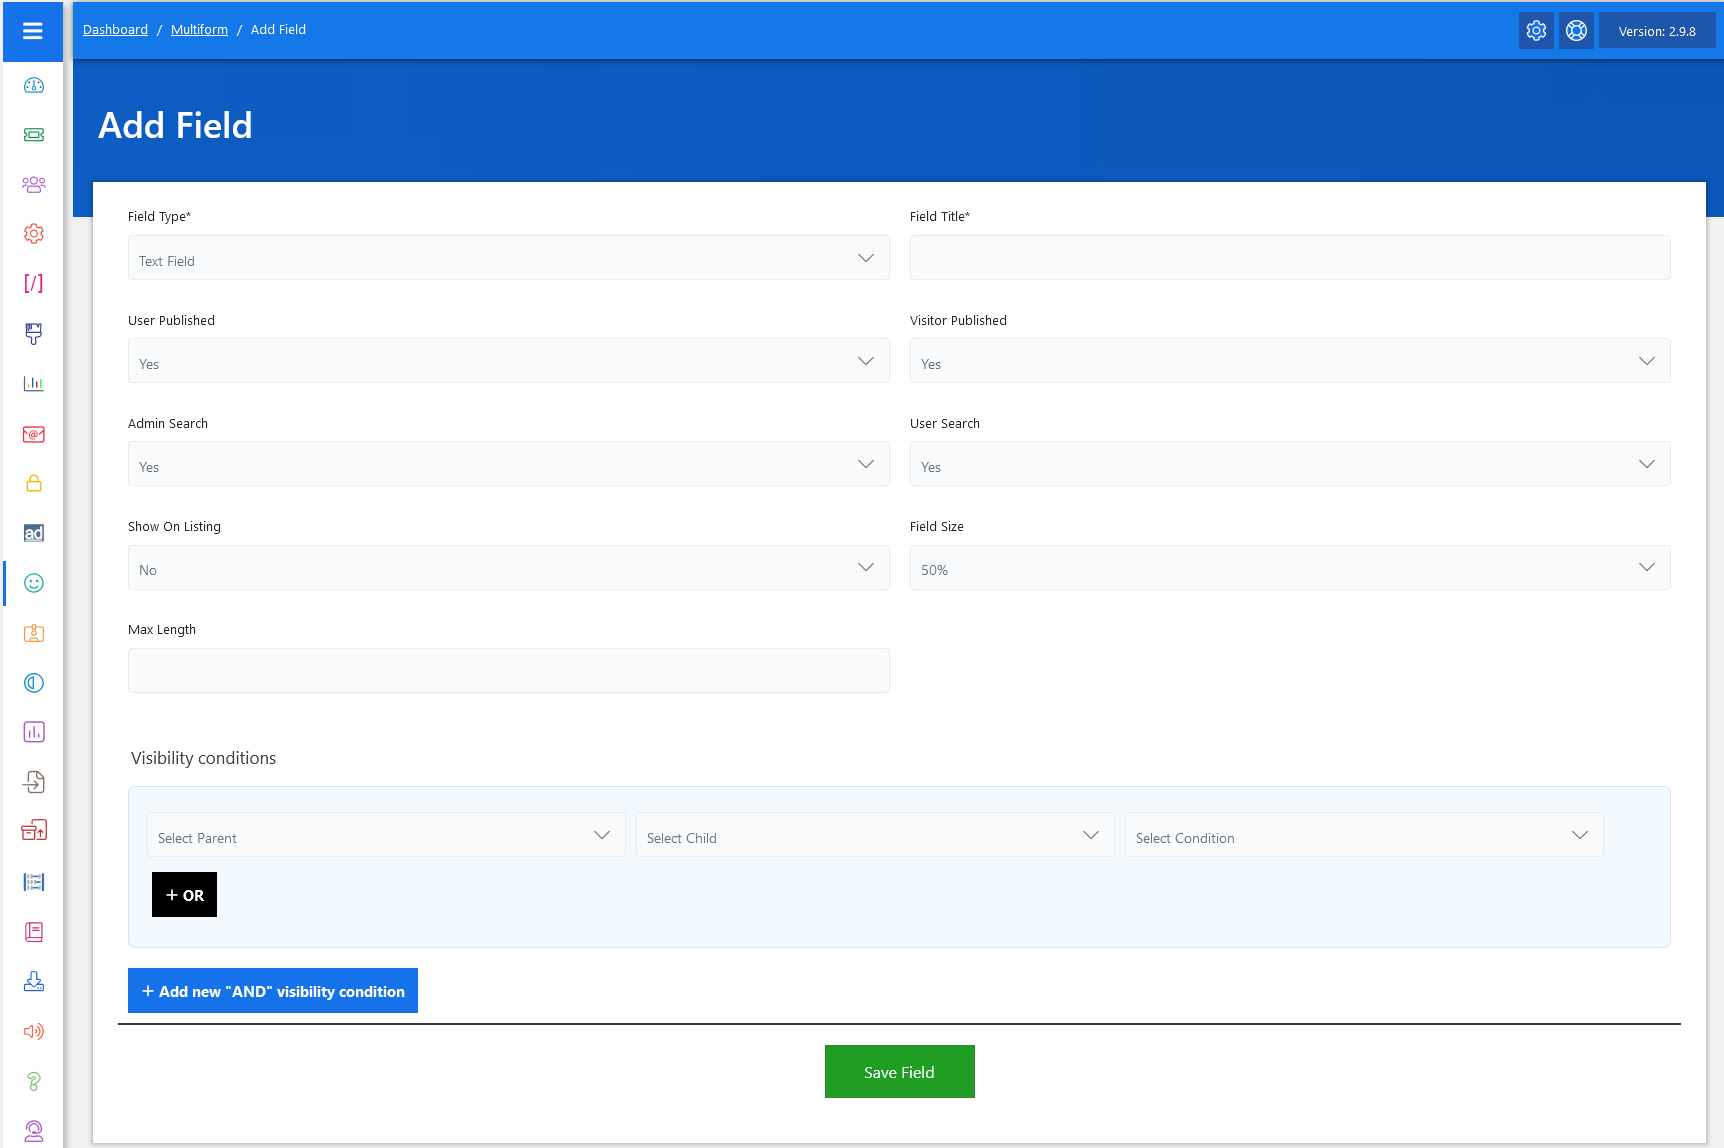
On the Add Field screen, follow these steps to create a custom field for the feedback form:
- Select Field Type: Choose the appropriate field type from the options available in the JS Help Desk. Options may include text input, dropdown, checkbox, etc., depending on what information you need to collect.
- Field Title: Enter a descriptive name for your custom field to indicate its purpose.
- User Published: Choose whether this field should be displayed in the feedback form page.
- Visitor Published: Controls the visibility of fields in the feedback form page on the visitor side.
- Admin Search: Select “Yes” if you want this field to be searchable, allowing the admin to filter ticket searches based on this field.
- User Search: Select “Yes” if you want this field to be searchable, allowing the user to filter ticket searches based on this field.
- Show On Listing: YES/NO controls the visibility of fields on the ticket listing page.
- Field Size: Set the field size from the dropdown “50% or 100%”.
- Max Length: Set the max length of the field.
Visibility Conditions

To add a child field with visibility conditions linked to a parent field, follow these steps:
Set Up Visibility Conditions:
- Parent Field: In the visibility condition settings, select the previously added dropdown field as the parent field.
- Child Field: Choose one of the values from the dropdown field that will determine the visibility of the multi-select field.
- Condition: Set the condition to “equal”. This means the multi-select field will only be visible on the ticket form when the parent field is set to “YES”.
The visibility condition interface is divided into two logical groups:
- OR Conditions
- AND Conditions
-
In OR logic, the field becomes visible if any of the listed conditions are met.
-
In AND logic, the field becomes visible only if all of the listed conditions are met simultaneously.
Working With OR Conditions

You’ll find the OR condition block. You can add multiple condition sets here. Each row lets you select:
-
A Parent Field (e.g., “Department”)
-
A Child Field (e.g., “Issue Type”)
-
A Condition (e.g., “is equal to”, “contains”, “is not”, etc.)
Adding Multiple OR Conditions
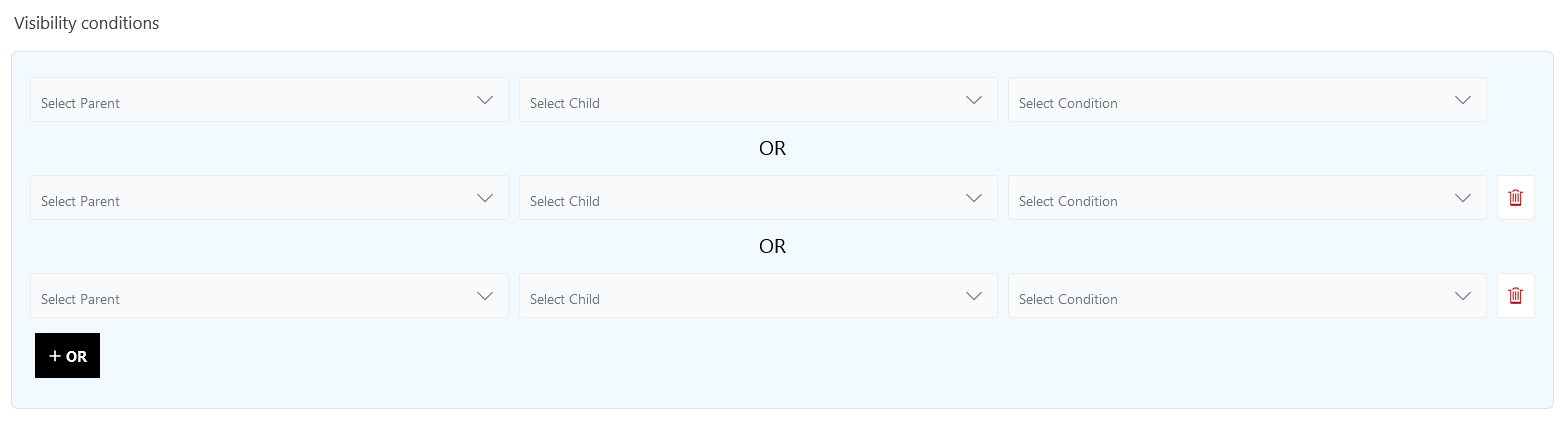
You can easily add more OR rules using the “+ OR” button. Each added rule increases the chances of the field being shown, as only one needs to match. You can also delete individual OR conditions using the trash icon.
Working With AND Conditions
The AND section works slightly differently. It lets you group multiple conditions that must all be true at the same time for the field to become visible. This is ideal when a narrower combination is required to show a field.
Adding AND Groups
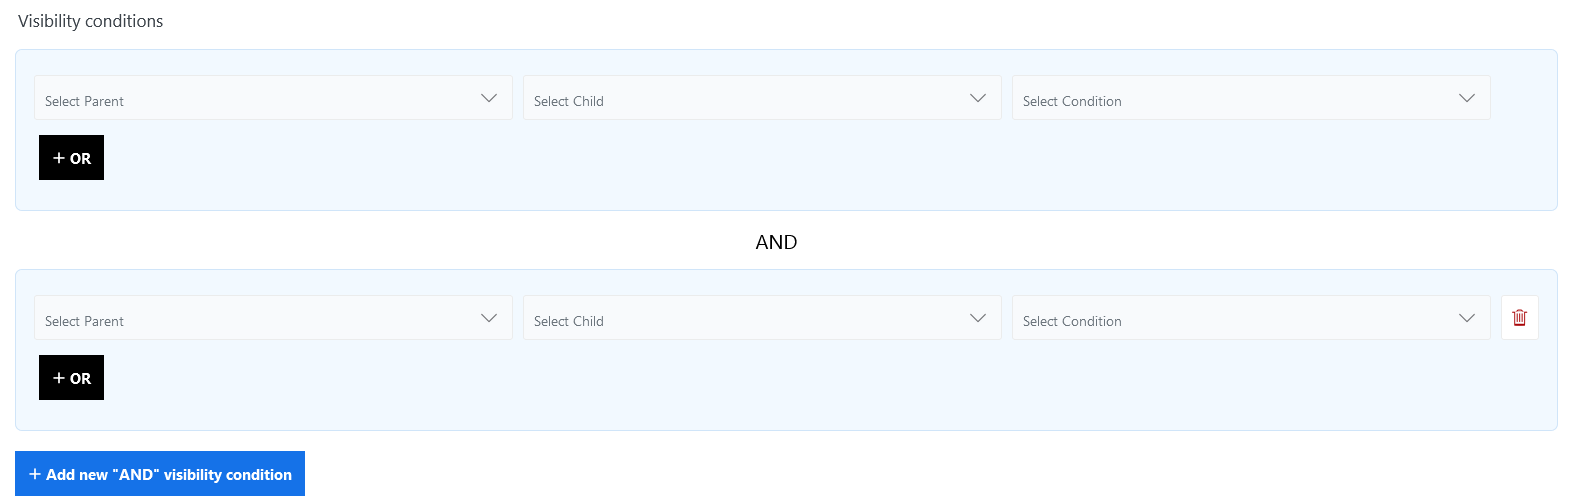
You can add a new AND group using the “+ Add new ‘AND’ visibility condition” button. Each group is evaluated as a separate condition set that must be satisfied for the field to be shown. This gives you fine-grained control over when each field appears on the form.
Save Field: After configuring the visibility condition and ensuring everything is set up correctly, click the Save Field button.