“Import Data” In The JS Help Desk!
Import Data
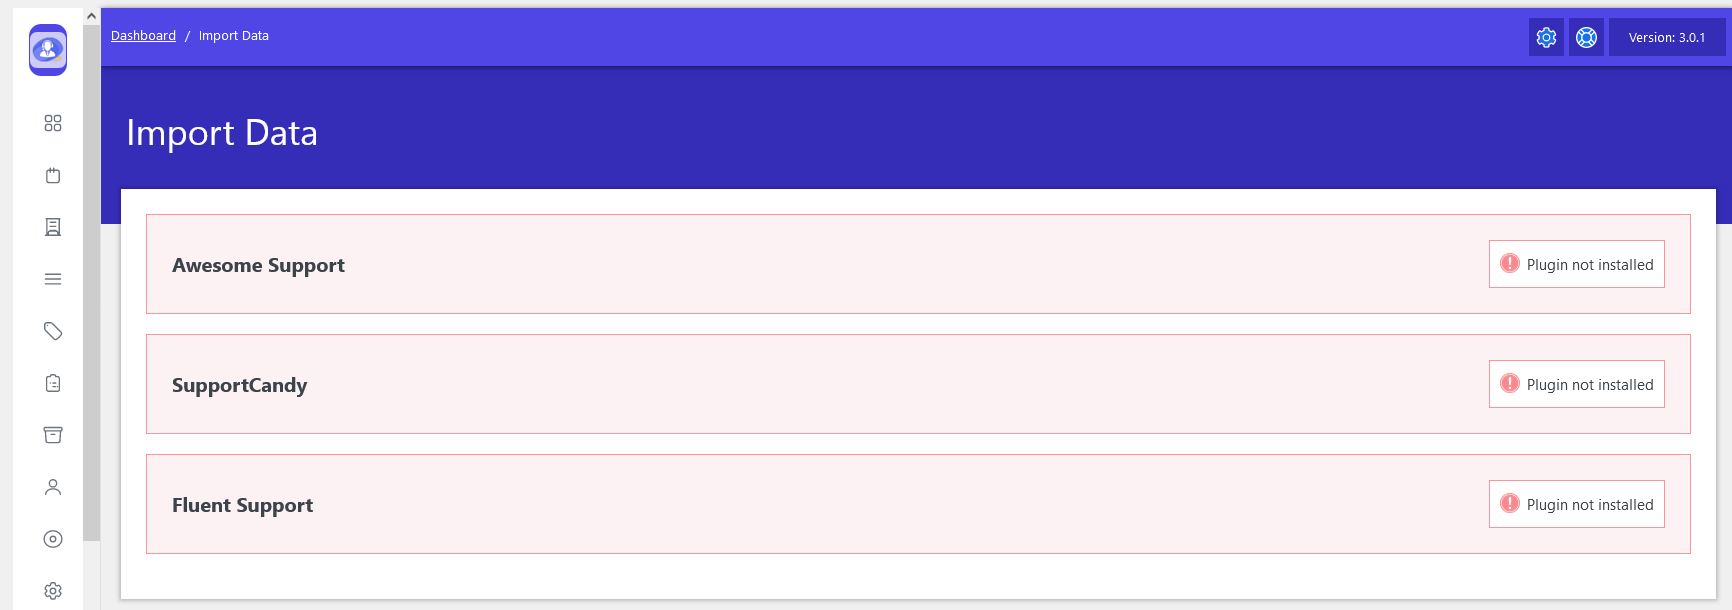
From your admin dashboard, navigate to the Admin Dashboard > Dashboard Menu > Import Data.
The Import Data section in JS Help Desk is designed to help administrators migrate data from other popular WordPress support plugins into JS Help Desk in a structured and reliable way. As shown on the Import Data screen, JS Help Desk currently supports imports from Awesome Support, SupportCandy, and Fluent Support. Each option represents a dedicated importer that understands the data structure of that specific plugin, ensuring compatibility and accuracy during migration.
Before starting the import process, the source plugin must be installed and active on the same WordPress site. In the screenshot, the message “Plugin not installed” indicates that JS Help Desk cannot detect the selected plugin. For example, if you want to import tickets from SupportCandy, you must first install and activate the SupportCandy plugin. Once the plugin is detected, the warning message is removed, and the import option becomes available.
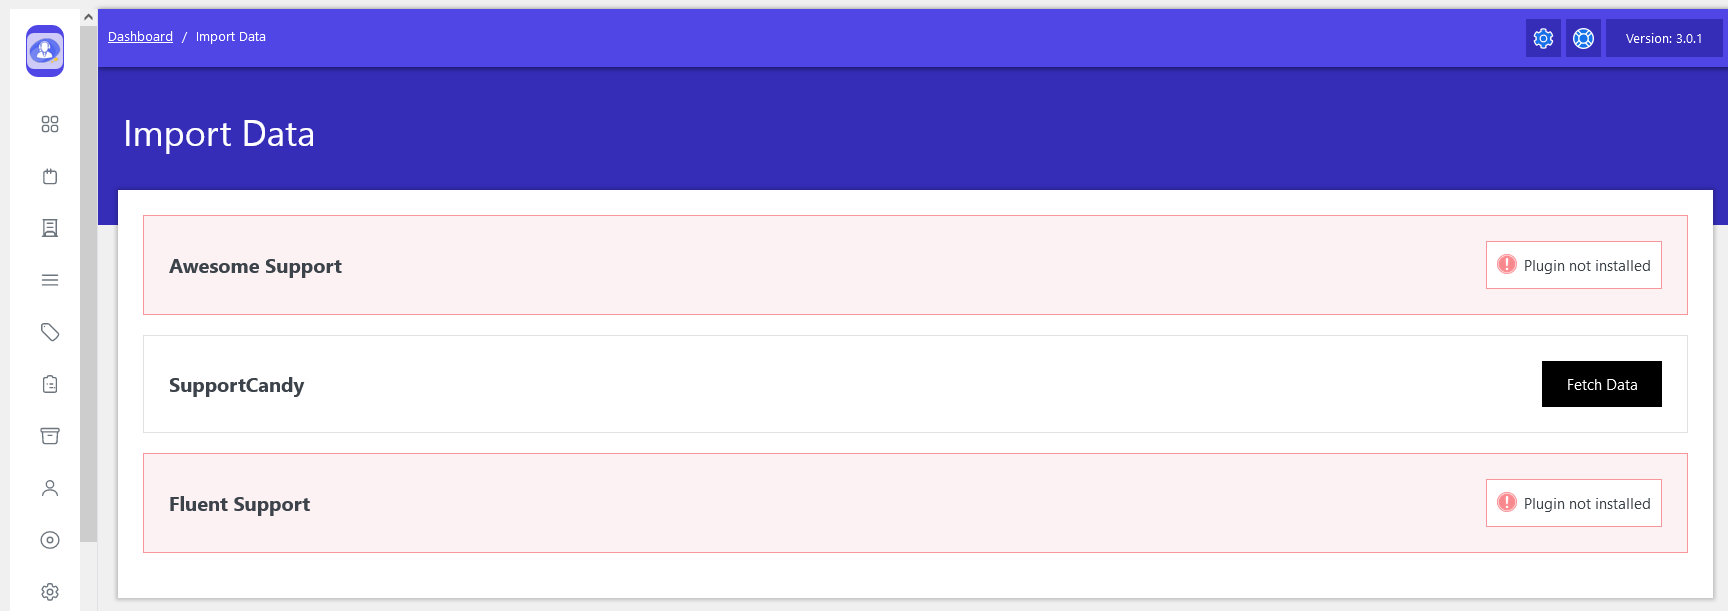
When a supported plugin like SupportCandy is installed and activated, JS Help Desk automatically detects it and enables the import option. In this case, a Fetch Data button becomes visible, as shown in the screenshot. Clicking this button allows JS Help Desk to read existing data from the SupportCandy database. This includes tickets, users, departments, priorities, statuses, agents, and agent roles without requiring any manual file uploads.
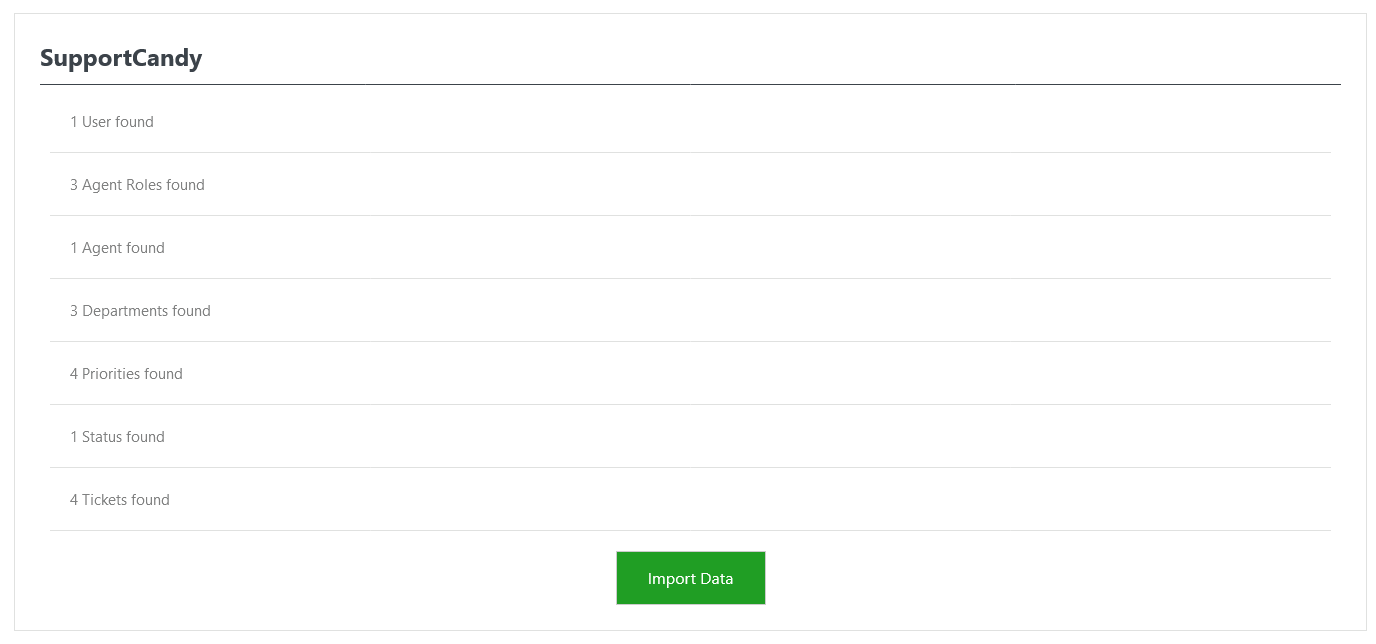
After clicking Fetch Data for a supported plugin such as SupportCandy, JS Help Desk scans the source plugin’s database and displays a clear summary of all detected records. As shown on the screen, the system lists how many users, agent roles, agents, departments, priorities, statuses, and tickets are found. This step is important because it gives the administrator full visibility into what data is available before starting the actual import.
Each item in the list represents data that will be recreated inside JS Help Desk. For example, “3 Departments found” means that all existing departments from SupportCandy will be added to JS Help Desk, while “4 Priorities found” indicates that priority levels like Low, Medium, or High will be mapped accordingly. Similarly, detected agents and agent roles ensure that support agent permissions and responsibilities are preserved after migration.
Once the admin confirms the displayed data, clicking the Import Data button starts the final import process. JS Help Desk then creates all records automatically and links them correctly. For example, tickets are connected to their users, agents, departments, and priorities. The system handles this in the background to ensure data integrity and avoid duplication.
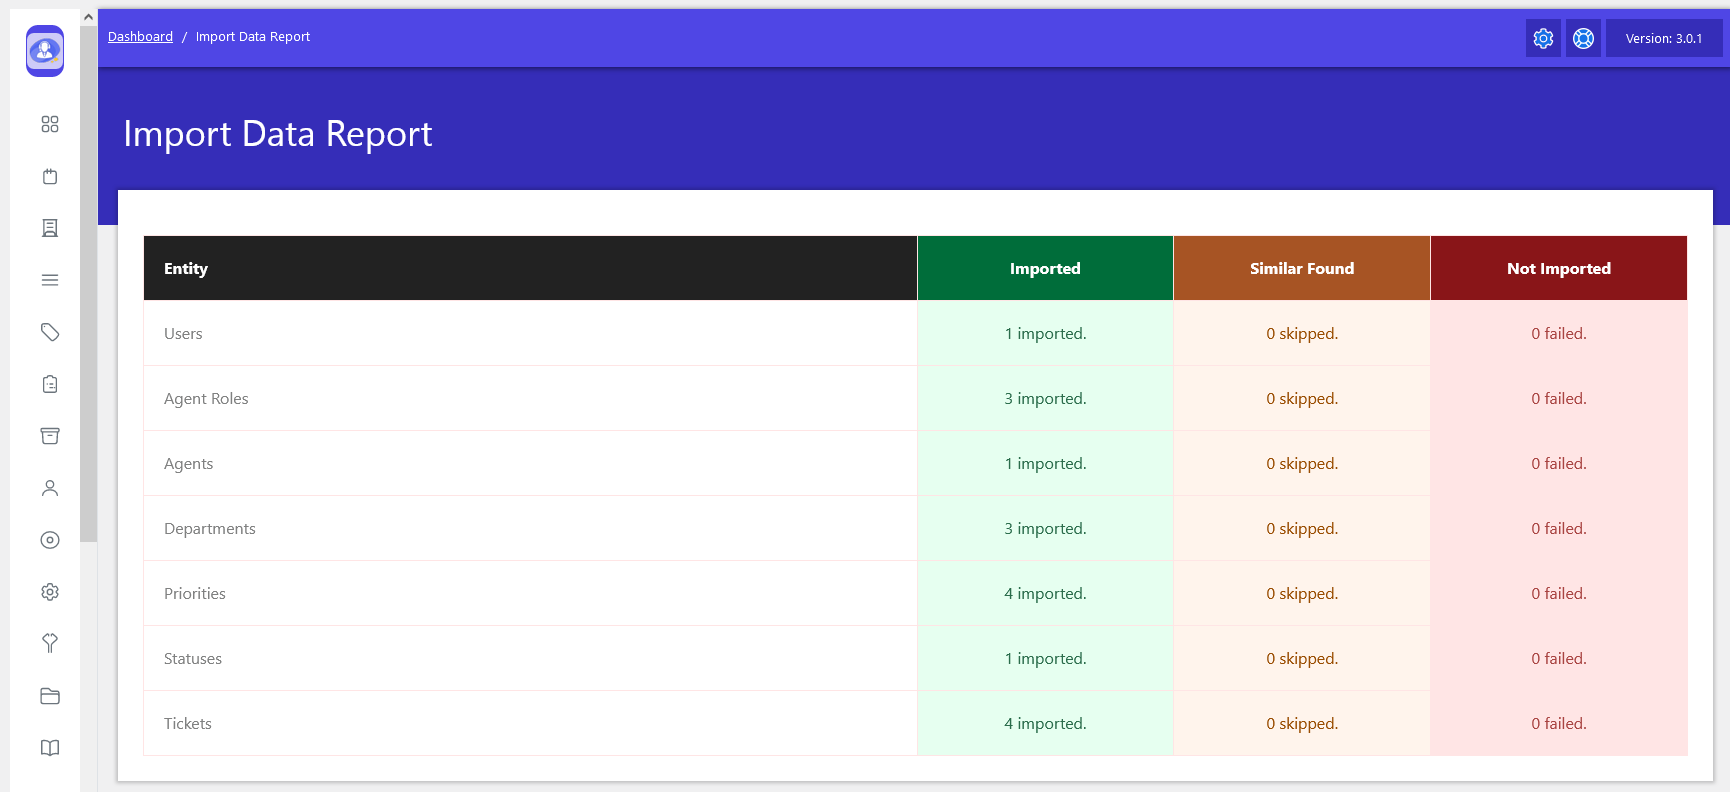
After the import process is completed, JS Help Desk displays a detailed Import Data Report that clearly summarizes the results of the migration. This report provides transparency and confidence by showing exactly what data was successfully imported, what was skipped due to duplication, and if anything failed during the process. It acts as the final confirmation that the migration was completed correctly. Each row in the report represents a specific entity, such as Users, Agent Roles, Agents, Departments, Priorities, Statuses, and Tickets.
The Imported column shows how many records were successfully created in JS Help Desk. For example, “4 imported” under Tickets confirms that all detected tickets were transferred successfully. This allows administrators to quickly verify that critical support data is now available in the new system.
The Similar Found column highlights records that were skipped because matching entries already existed in JS Help Desk. For instance, if a department with the same name already existed, it would be counted here instead of being duplicated. This smart handling prevents data redundancy and keeps the system clean while still preserving existing configurations.
The Not Imported column shows any records that could not be imported due to errors or missing requirements. In the shown example, all values are “0 failed,” indicating a successful and error-free import. If any failures occurred, the admin could use this information to identify and resolve issues before retrying the import.