Add Agent Role In The JS Help Desk!
Add Agent Role
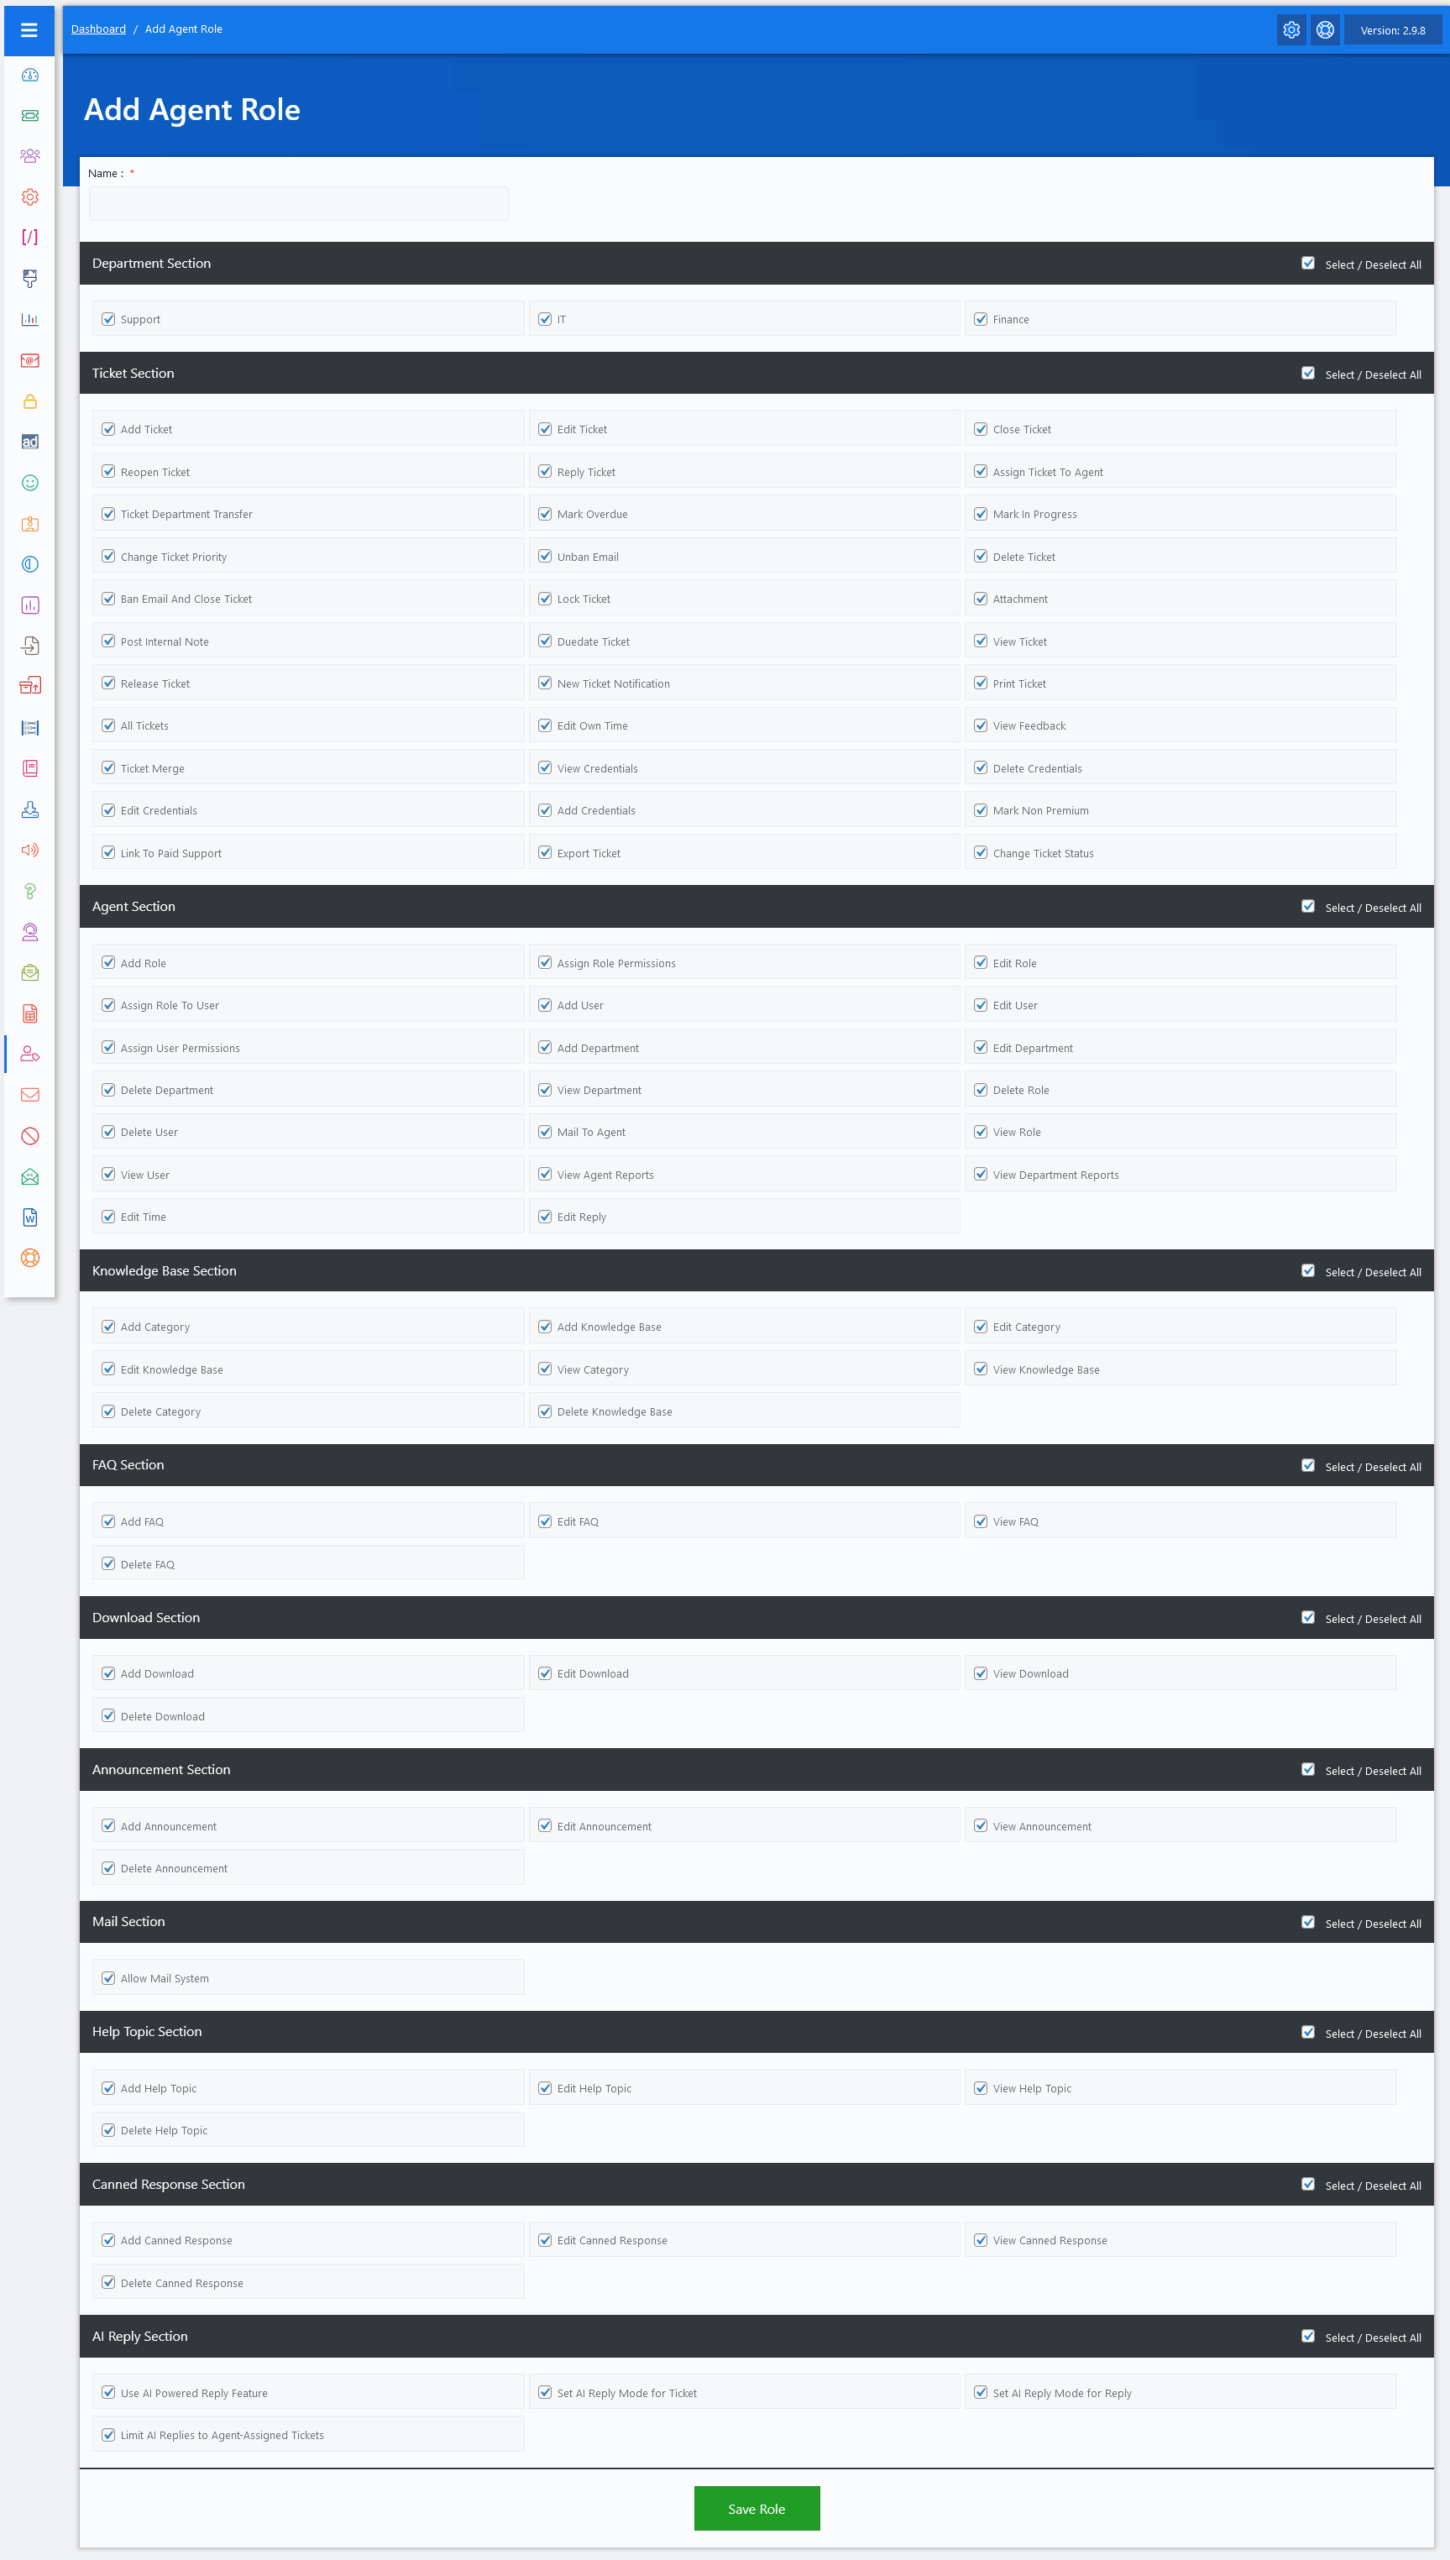
Now, let’s walk through the step-by-step process of adding an agent role from the admin end. From your admin dashboard, navigate to the Admin Dashboard > Dashboard Menu > Agent Roles > click on the Add Role button to start adding an agent role effectively. On the ‘Add Role’ form, we will provide all the necessary details for adding an agent role.
In JS Help Desk, the Add Role feature empowers agents to create custom agent roles with fine-tuned permissions, enabling precise control over what different agents can access and perform within the help desk system. This is essential for organizations that need to delegate specific responsibilities to various agents while maintaining security, efficiency, and accountability.
When adding a new role, you start by giving it a name that reflects its purpose, such as “Billing Agent”, “Junior Support”, or “Technical Manager.” Naming roles meaningfully helps you and other agents quickly identify what permissions are attached to each role. For instance, a “Finance Agent” may only need access to the Finance department and basic ticket features, while a “Manager” might need full control across all departments.
The Add Role feature in JS Help Desk makes it easy to scale support operations with clear boundaries and flexible access. Whether your team has three members or three hundred, role-based permissions help ensure the right people have the right permissions, no more, no less.
Lastly, the Save Role button finalizes your setup. Once saved, this role can be assigned to any agent, and the permissions instantly apply.
Click here to read about the permissions