Email Piping In The JS Help Desk!
Email Piping
Enable IMAP In Gmail
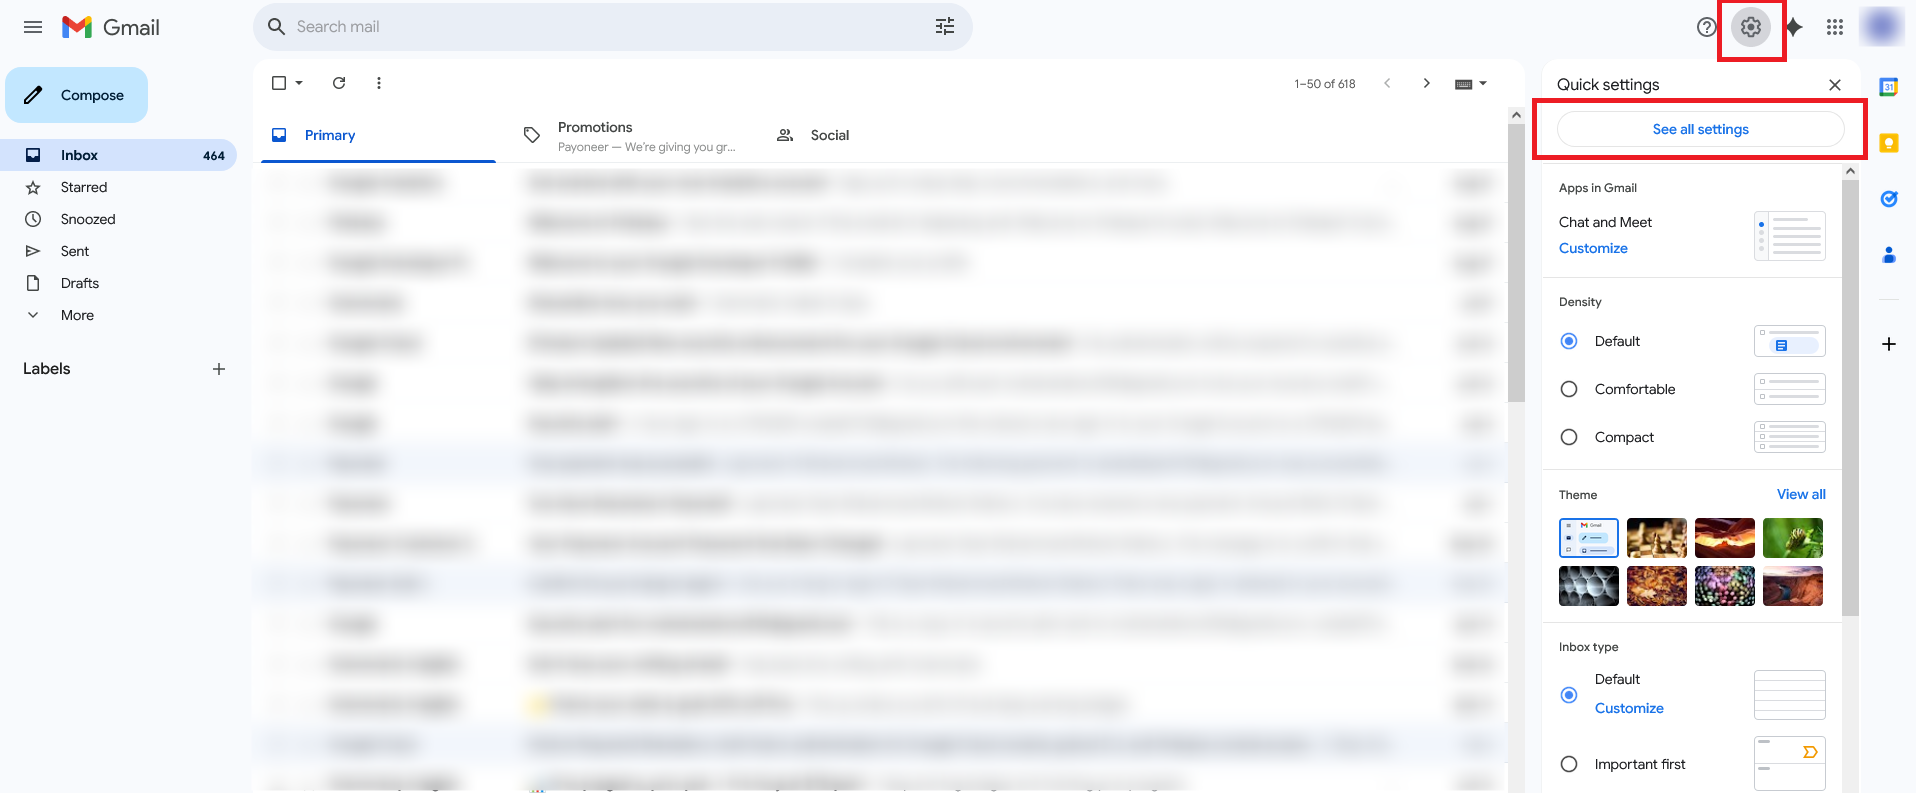
Click on the settings icon, the sidebar will open, then click on See all settings.

From Settings, click on “Forwarding and POP/IMAP,” then enable IMAP and click on Save Changes button.
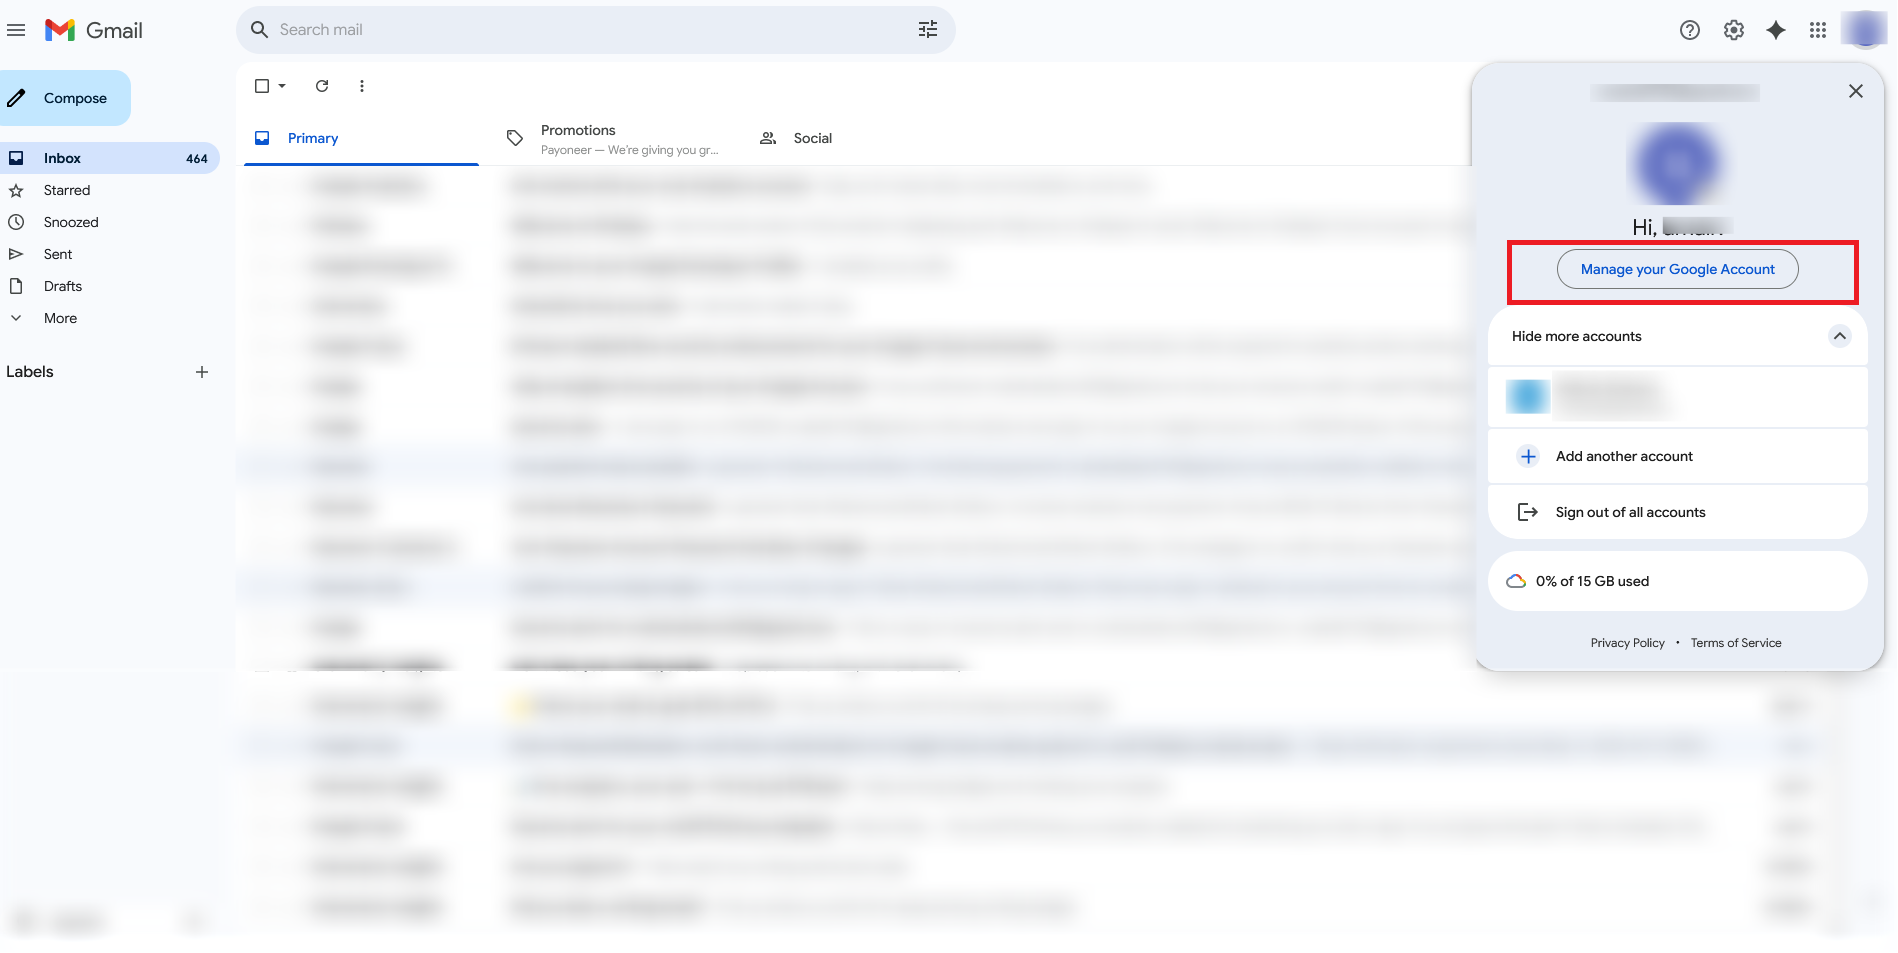
Click on Google Account a pop-up will appear on the screen, then click on Manage Your Google Account.
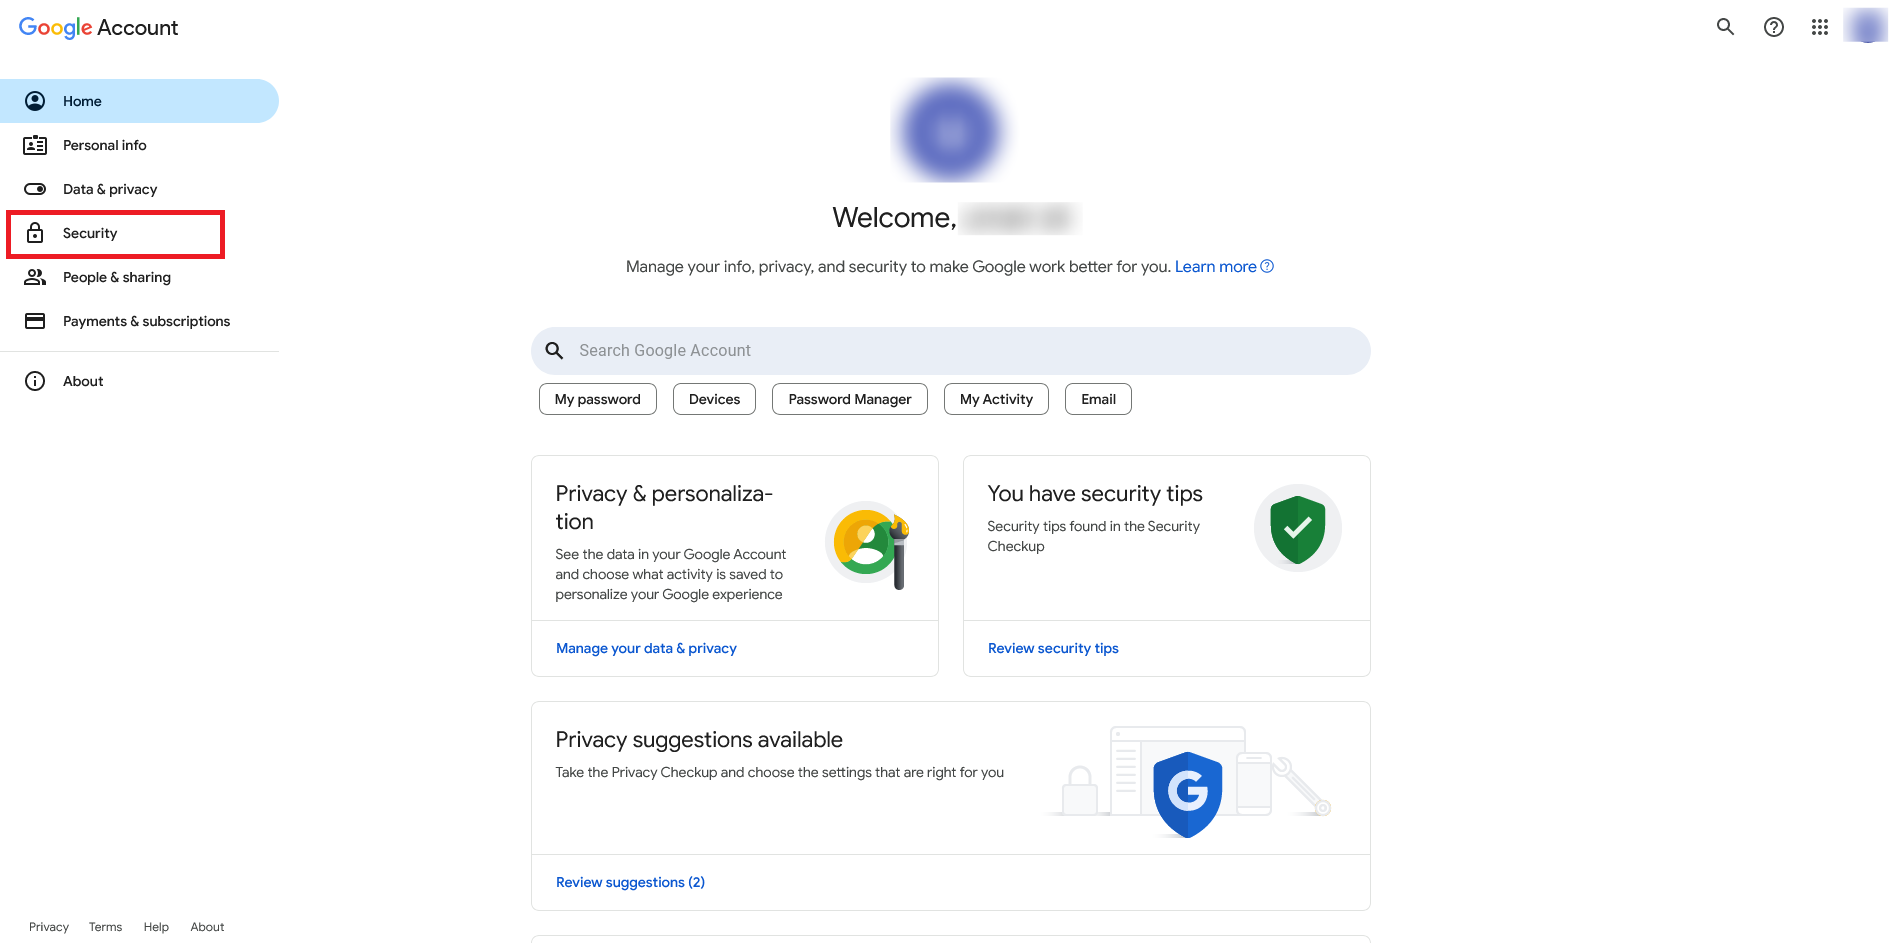
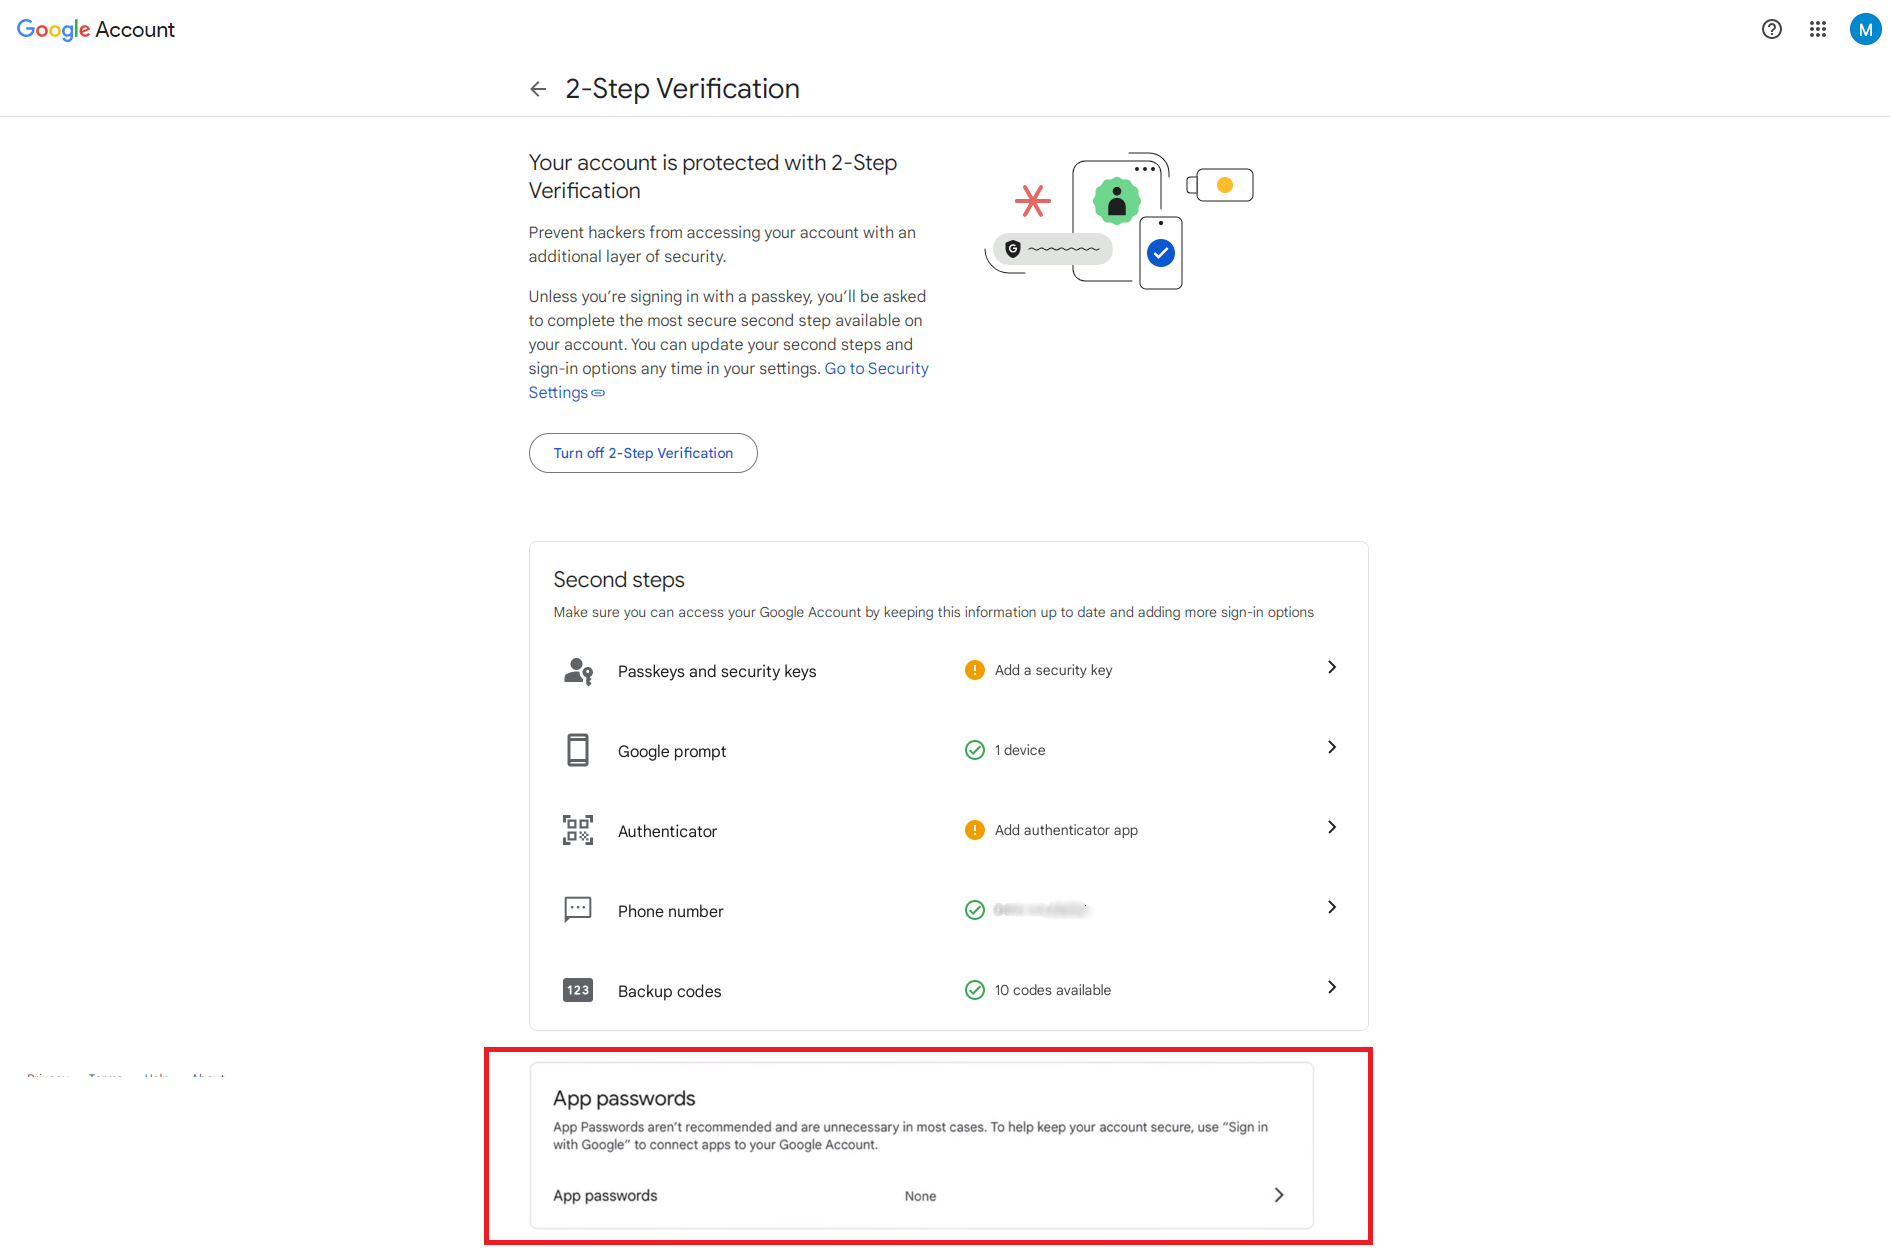
Select Security from the left menu.
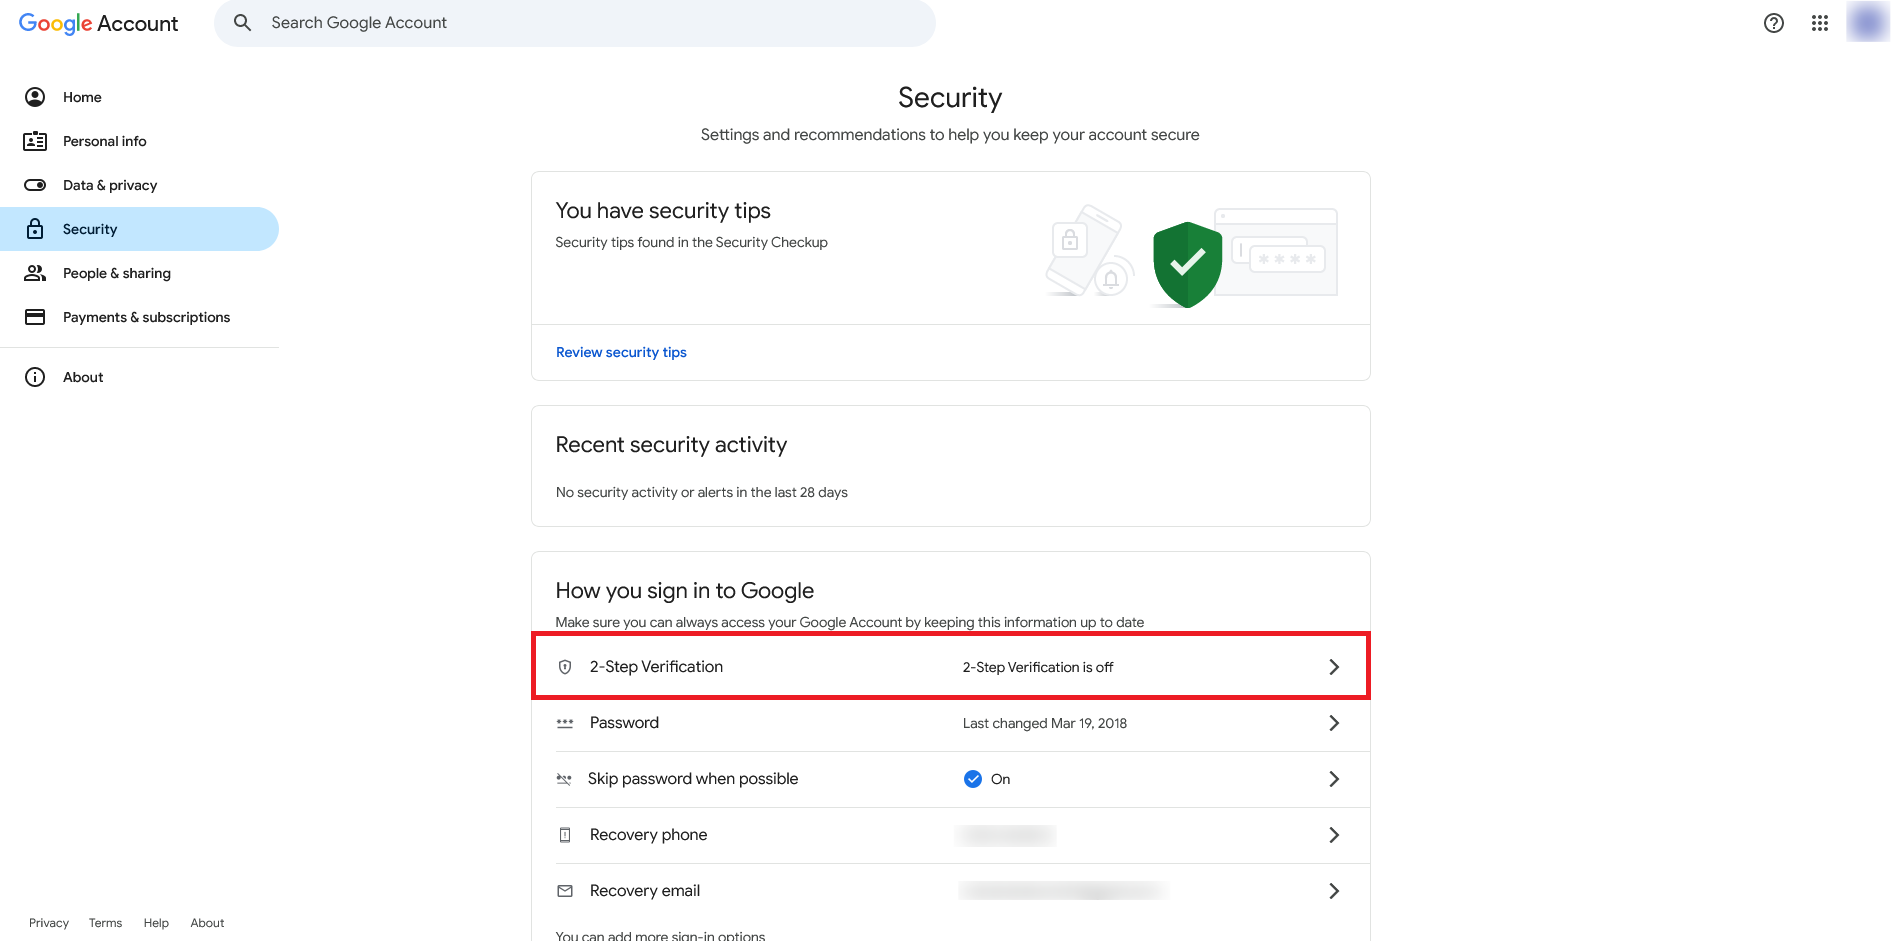
From the security page, select 2-Step Verification.
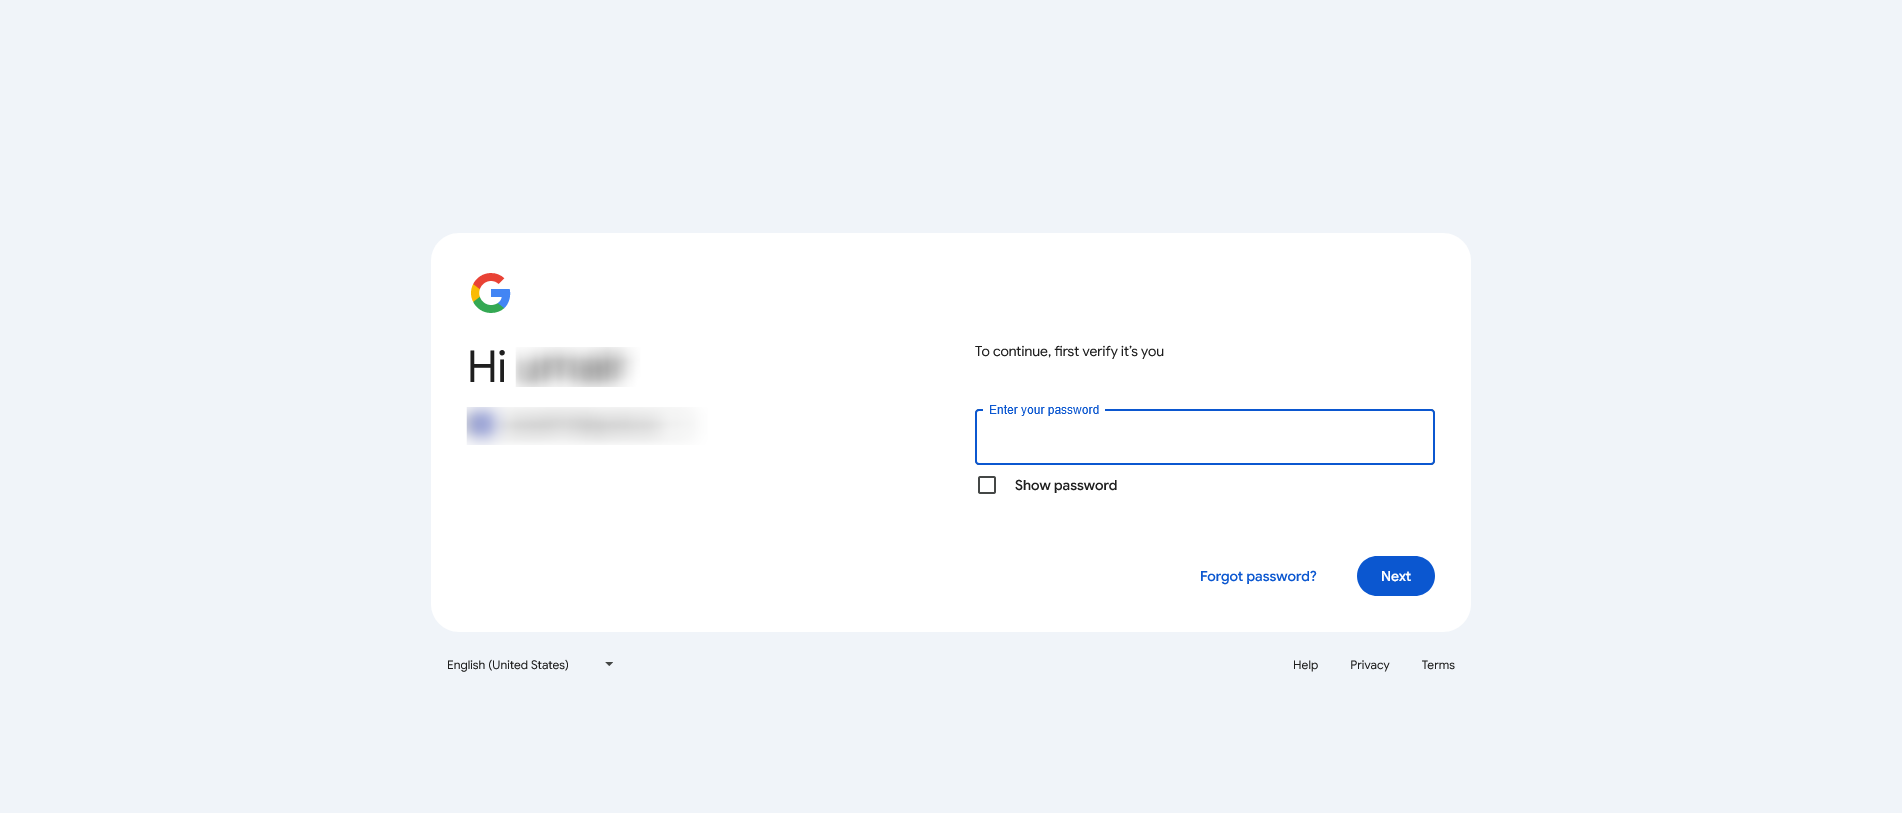
Enter the password to enable the 2-Step Verification.
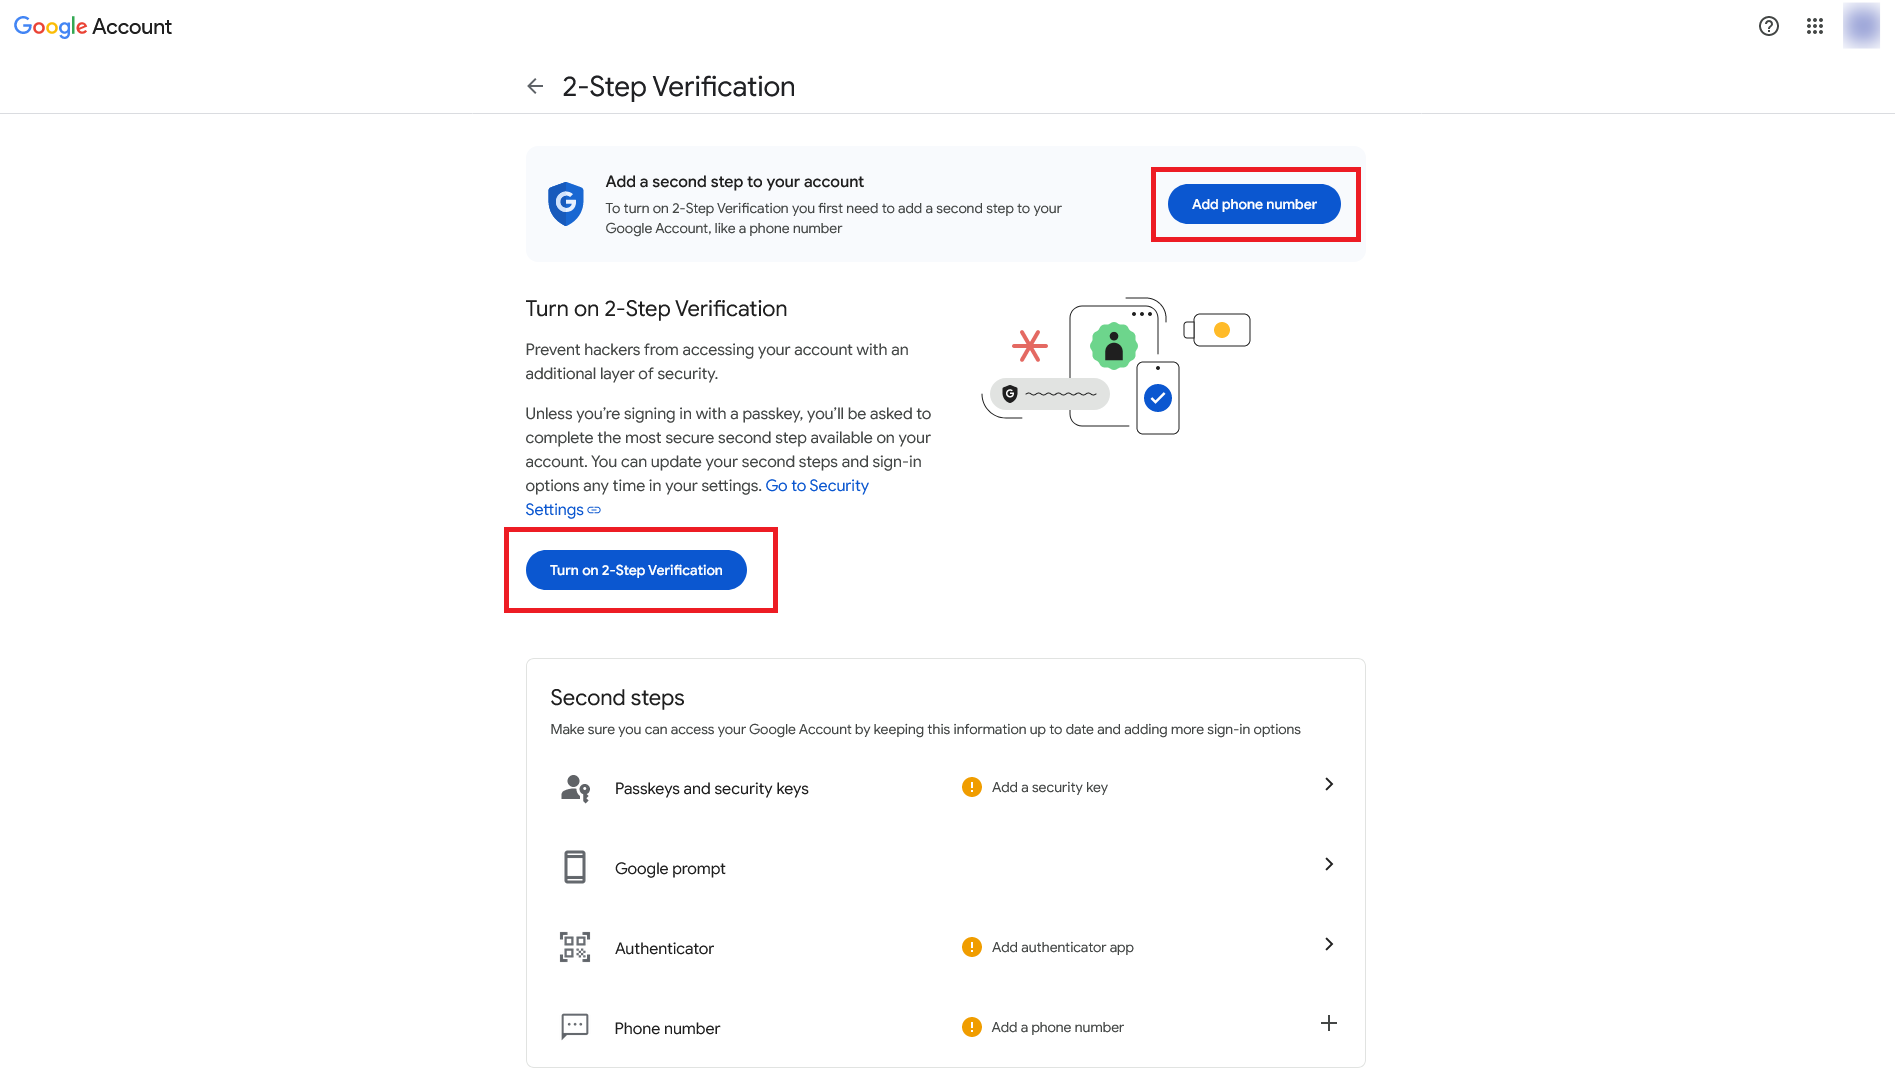
Add phone number to Turn On 2-Step Verification.
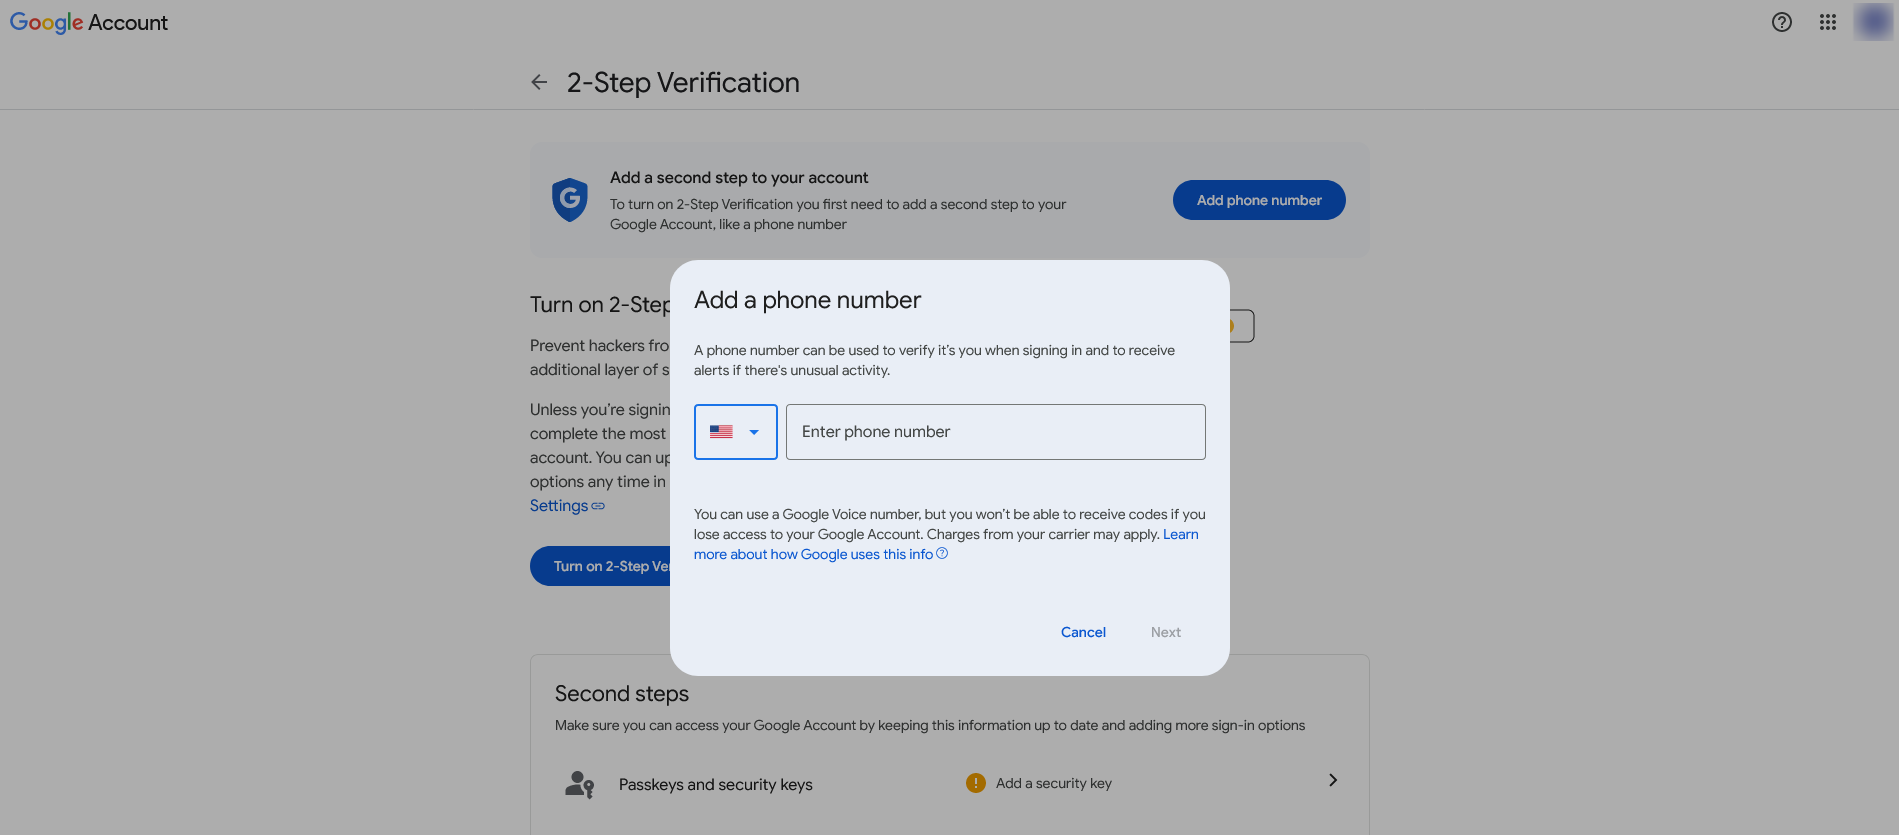
Enter the phone number and click on the next button.
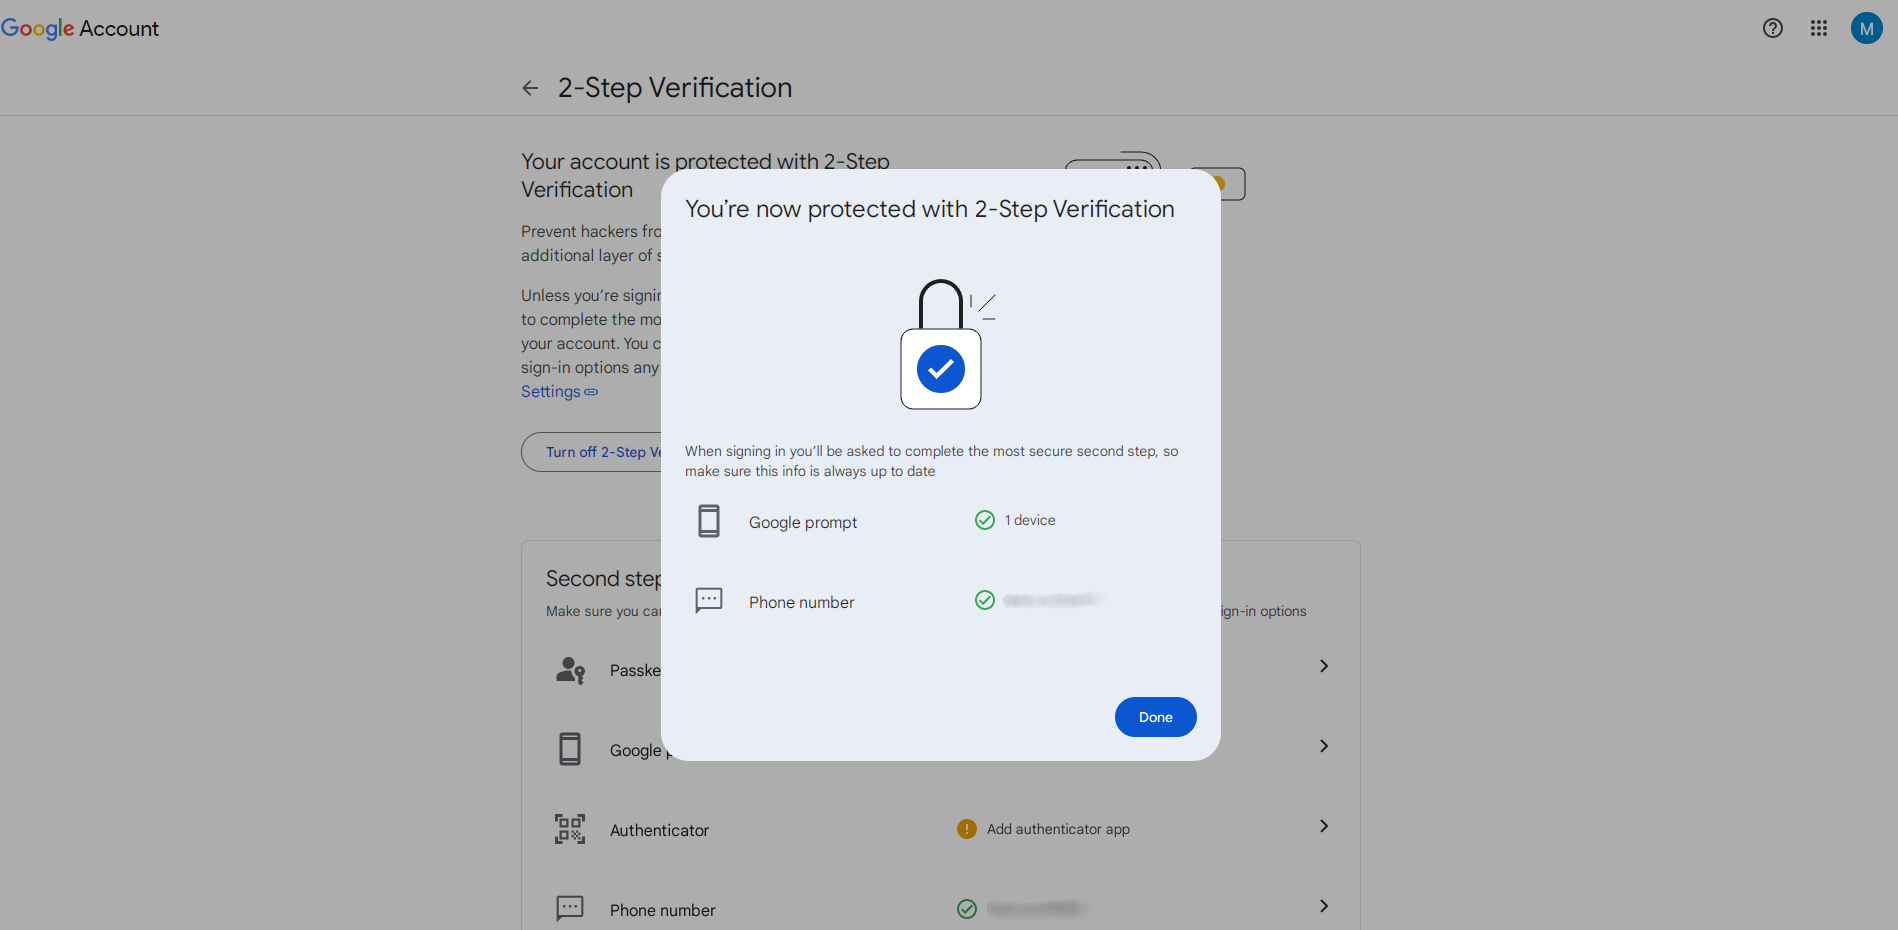
Click on the Done button.
App Password
Scroll down you see the app passwords option.
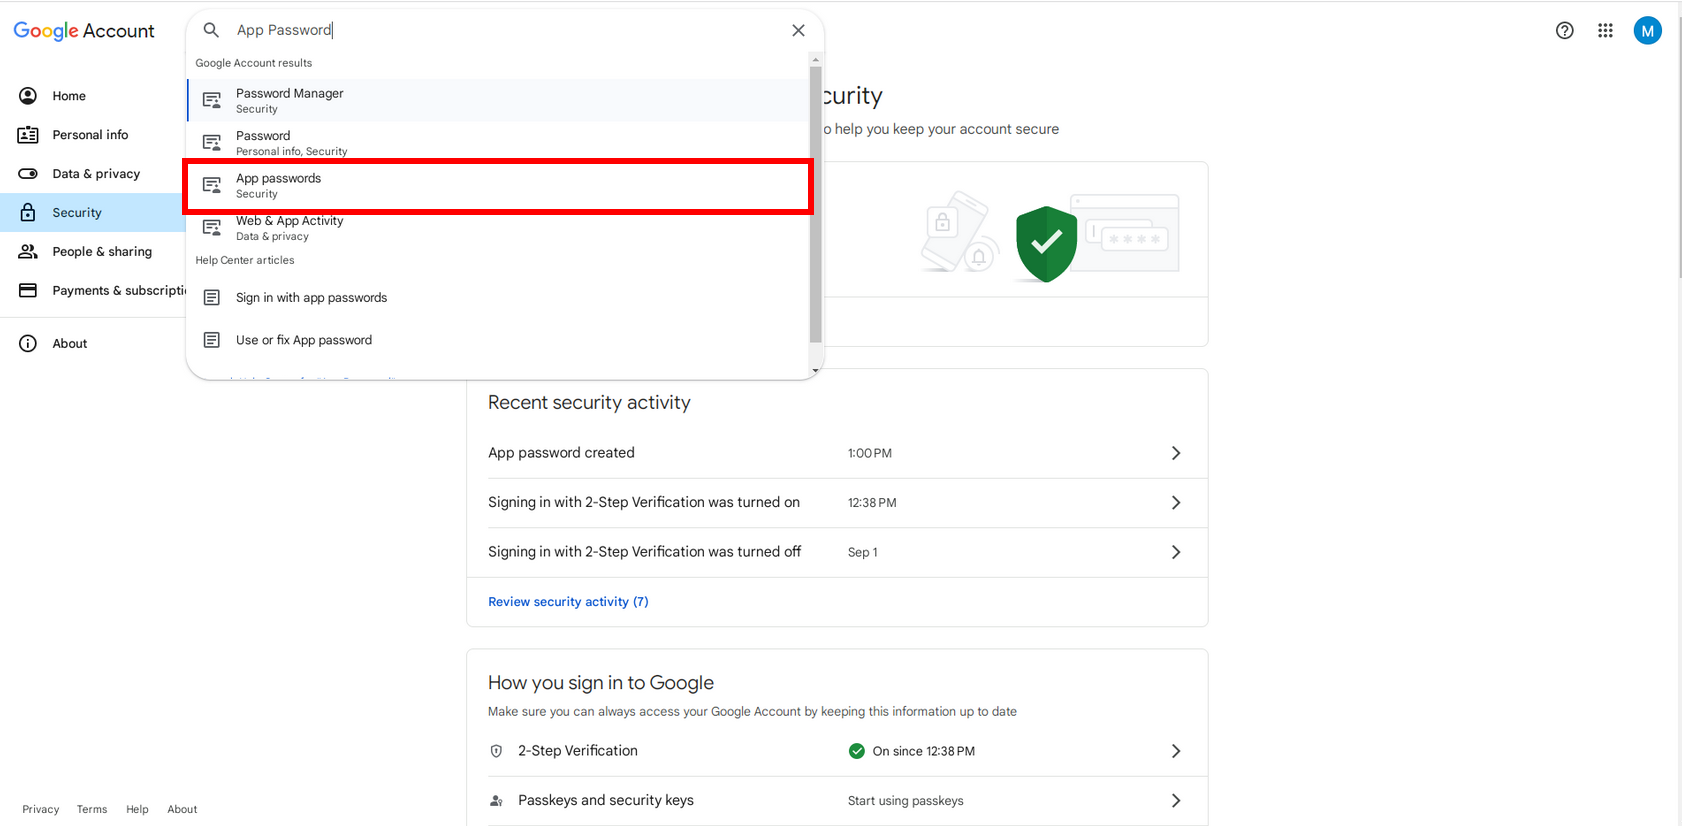
If the app password option does not show, then search in the security page search bar and click on it.
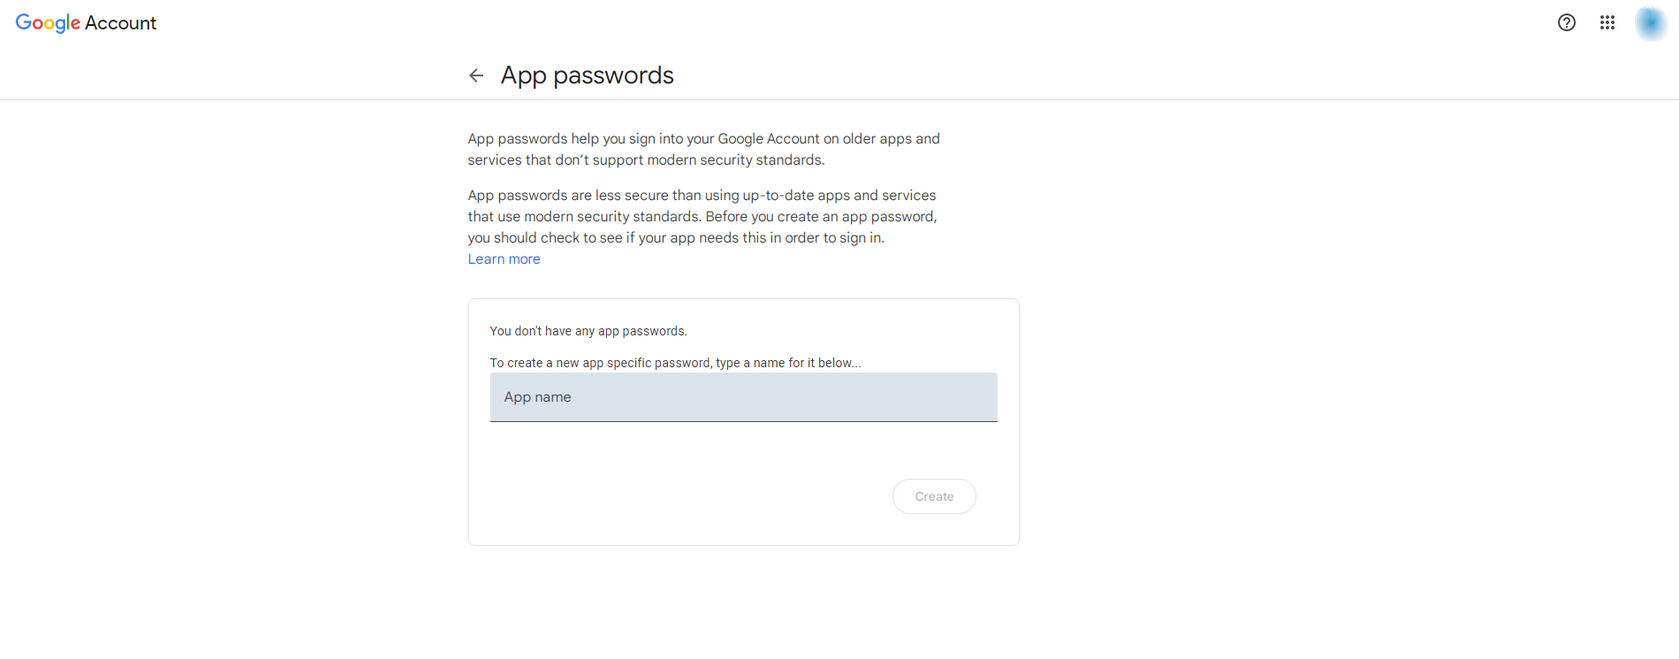
Enter the app name and click on the create button.
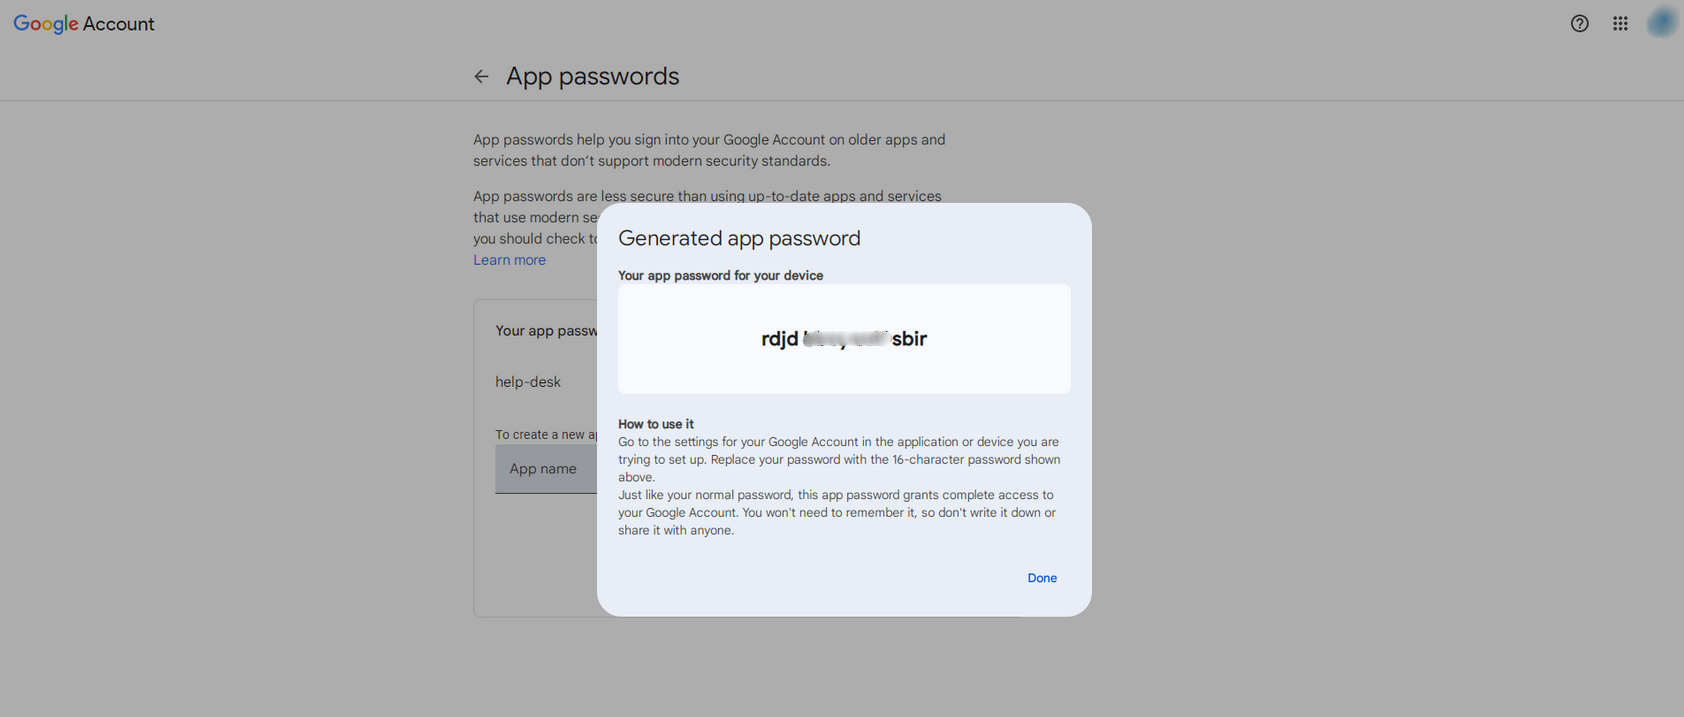
The app password is generated. Save this password in a notebook for further use.
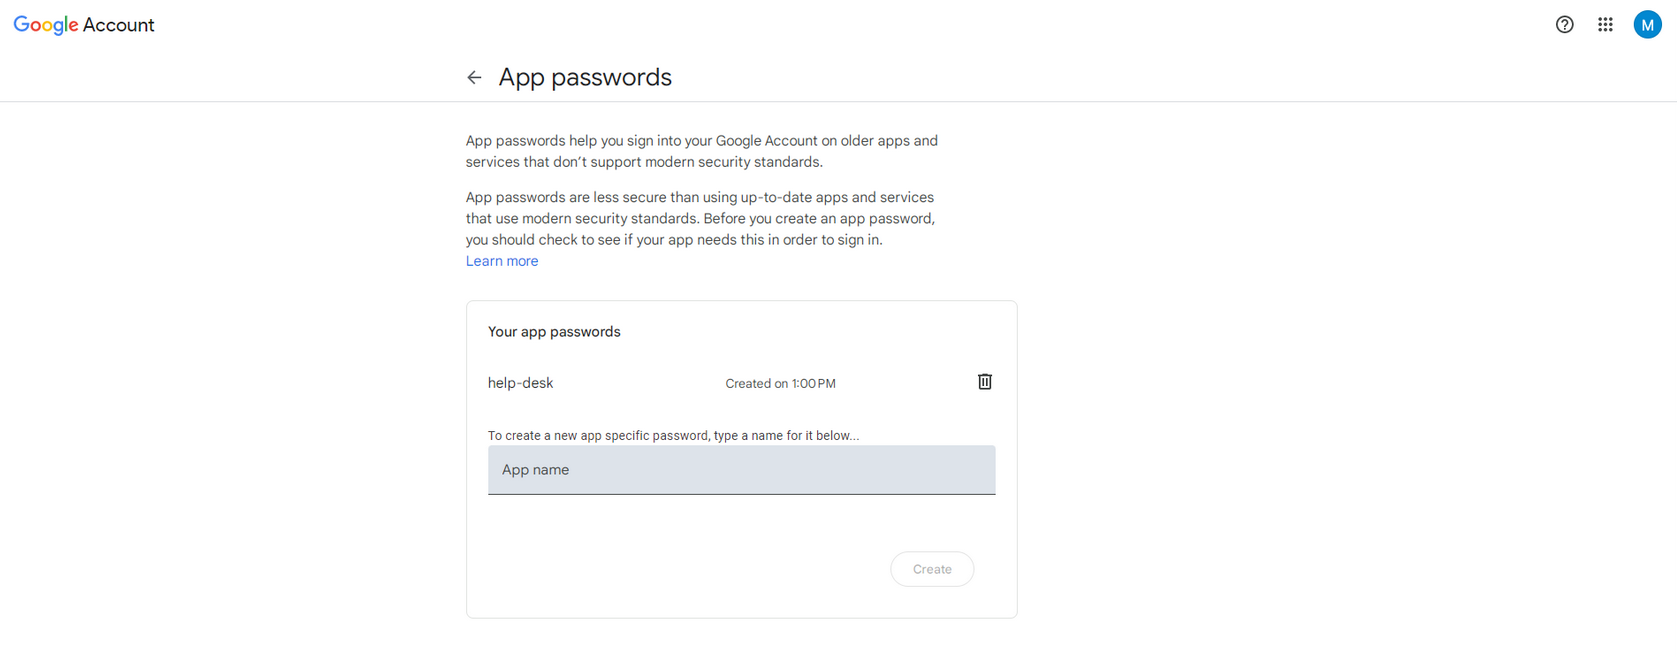
There is an option to create more app passwords, and you can also delete the existing app passwords.
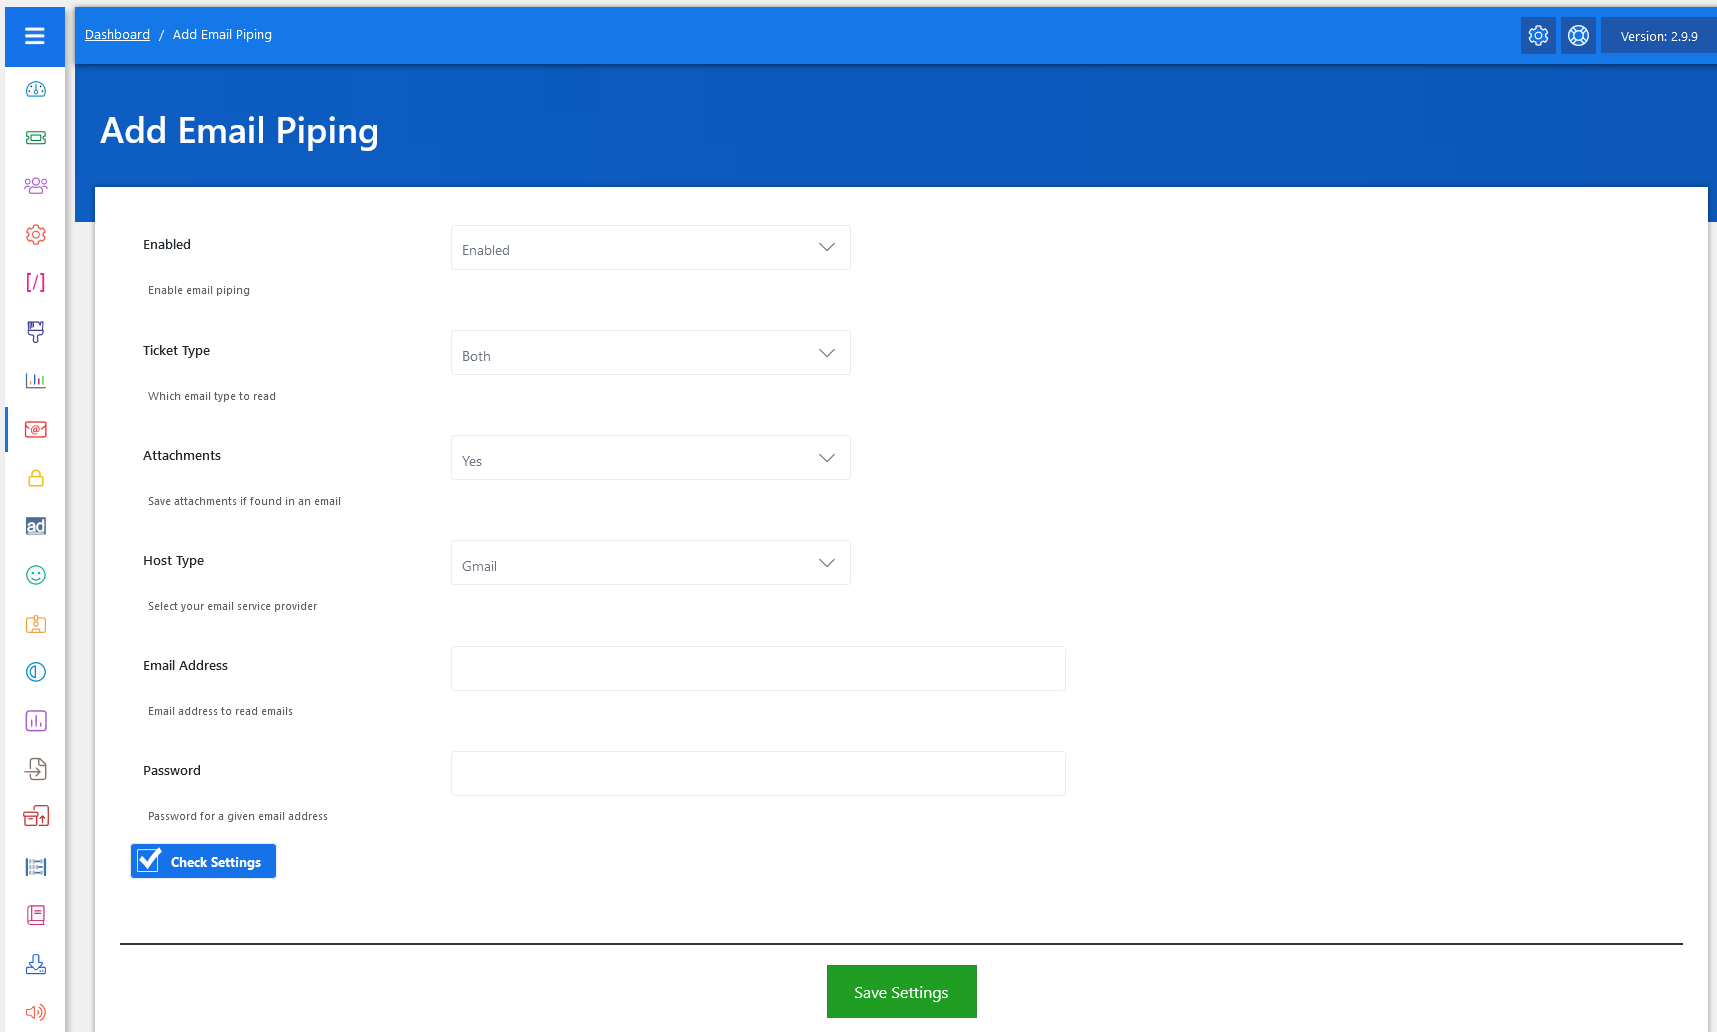
Now, let’s walk through the step-by-step process of adding an email piping from the admin end. From your admin dashboard, navigate to the Admin Dashboard > Dashboard Menu > Add Email Piping to start adding a response effectively. On the ‘Add Email Piping’ form, we will provide all the necessary details for adding an email piping.
When setting up Email Piping, the first step is to enable the feature. Once enabled, JS Help Desk starts monitoring the configured mailbox for incoming emails. The system can be configured to handle ticket creation emails, reply emails, or both, depending on your needs. For instance, if you choose “Both,” the system will create new tickets when customers send fresh emails and also add replies to existing tickets when customers respond.
Another useful option is handling attachments. Often, customers include screenshots, PDFs, or documents to better explain their issues. By enabling the “Attachments” option, JS Help Desk will automatically extract and save these files with the corresponding ticket.
The Host Type field allows you to select your email provider, such as Gmail, Yahoo, Hotmail, or Other. Each provider may have slightly different settings for incoming mail.
The Email Address and Password fields are critical since they allow the system to connect with your mailbox and fetch incoming emails. For security, you may use app-specific passwords if your email provider supports them. For example, with Gmail, you can generate a dedicated app password to use here instead of your main account password, which adds an extra layer of safety.
To avoid misconfigurations, JS Help Desk includes a Check Settings button. This feature tests the connection to your email server and ensures that the credentials are valid. For example, if you mistype your password or choose the wrong host type, the system will alert you before saving the settings. This proactive check prevents ticket creation from failing due to incorrect configurations.
After setting the Email Piping, click on the Save Settings button.
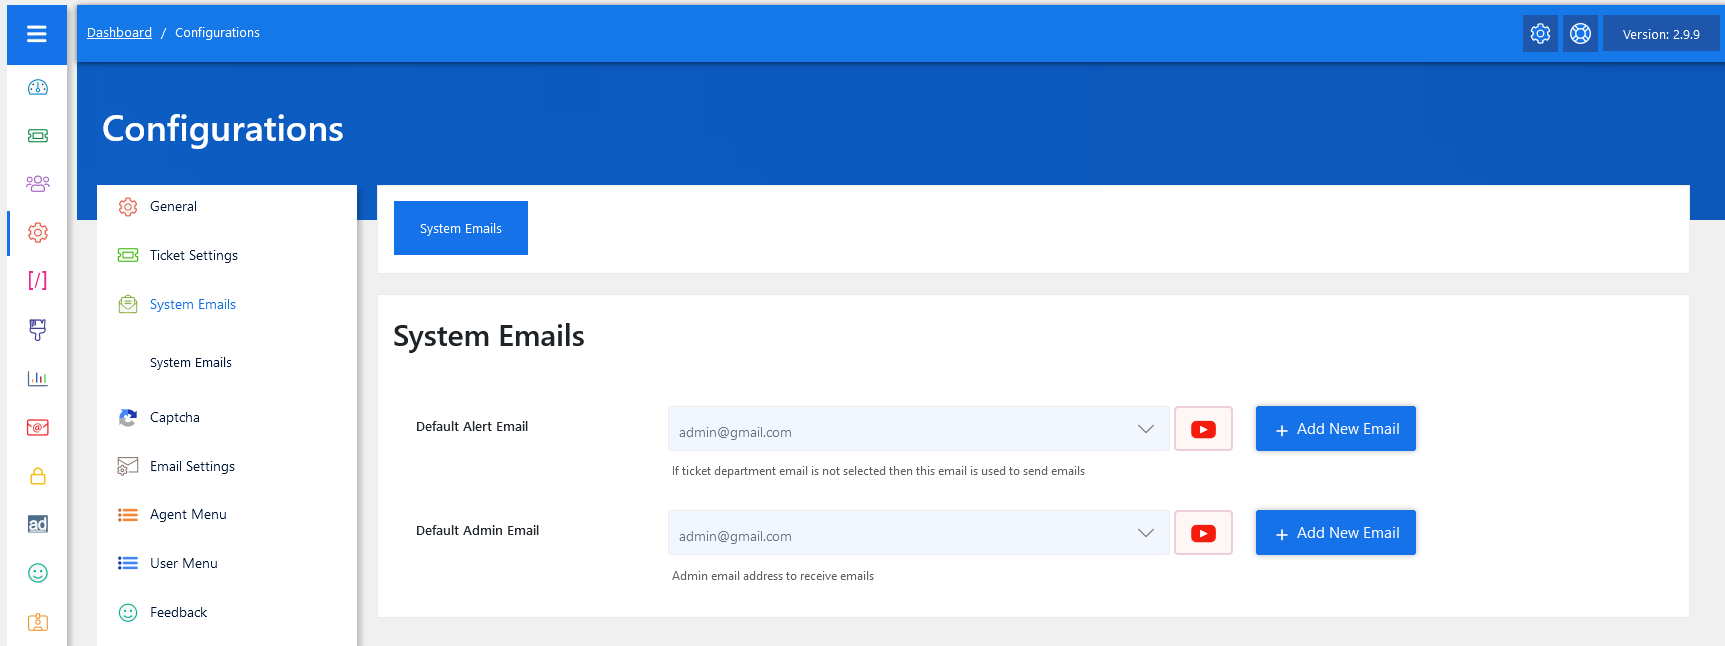
Navigate to System Emails in Configuration. In the JS Help Desk admin panel, go to Configuration > System Emails. This is the section where you can manage all the email addresses that the system will use for sending emails. From here, you can add new emails or set existing ones.
Testing Email Piping
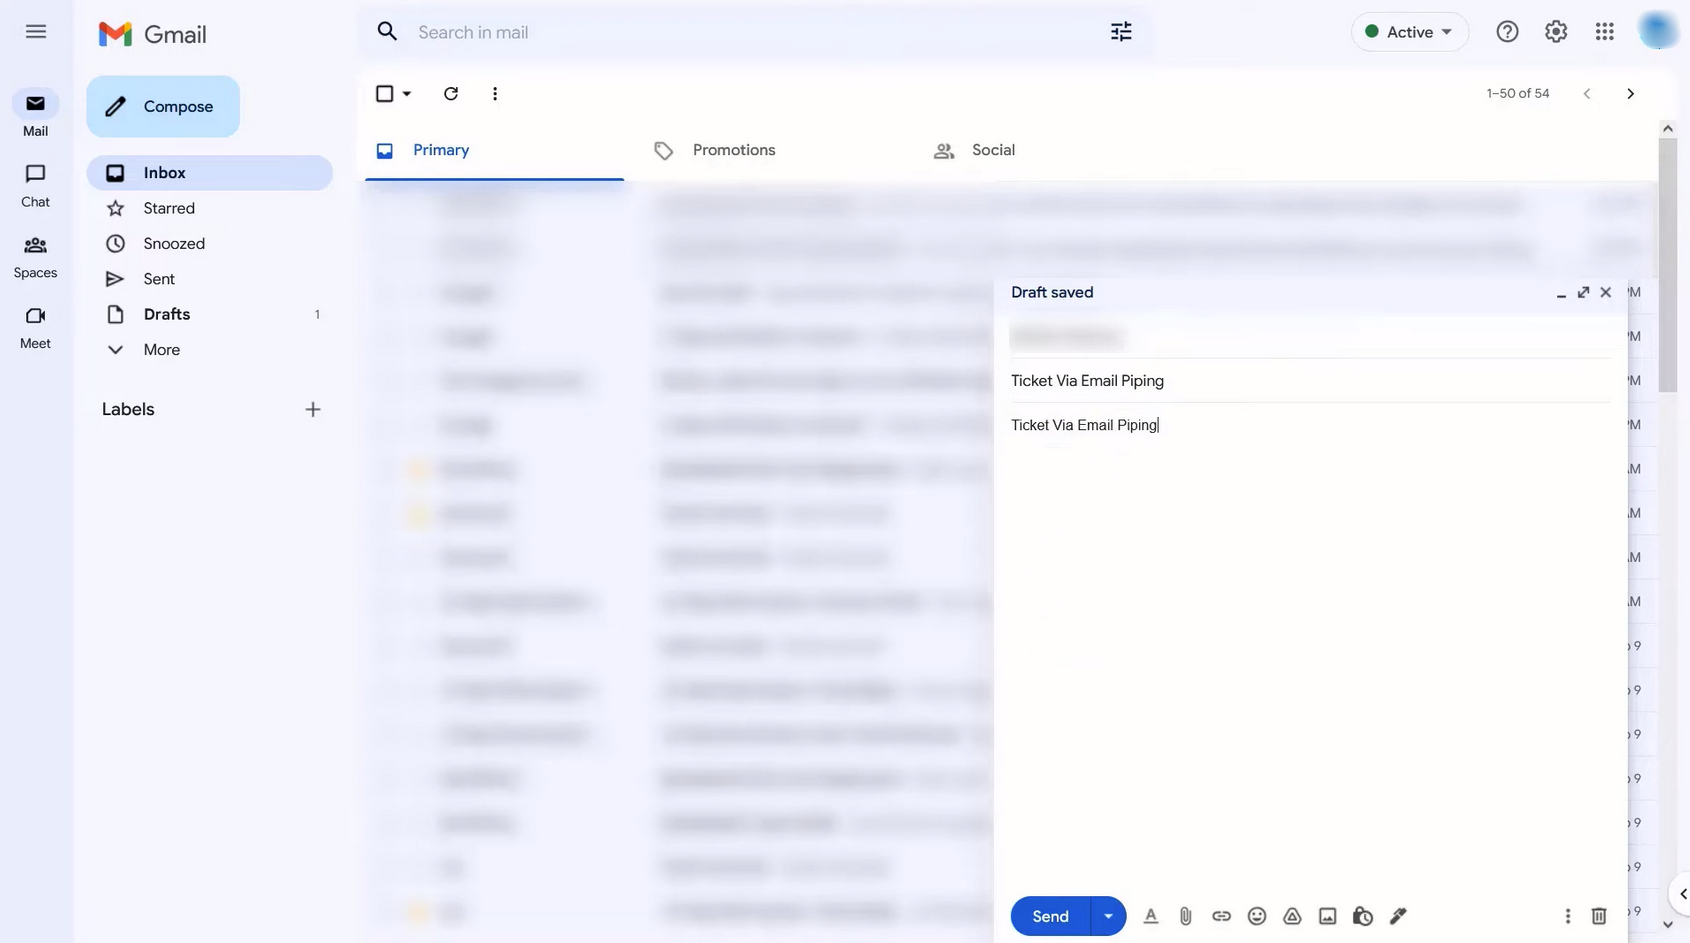
After entering the ticket subject and description, click on the send button.
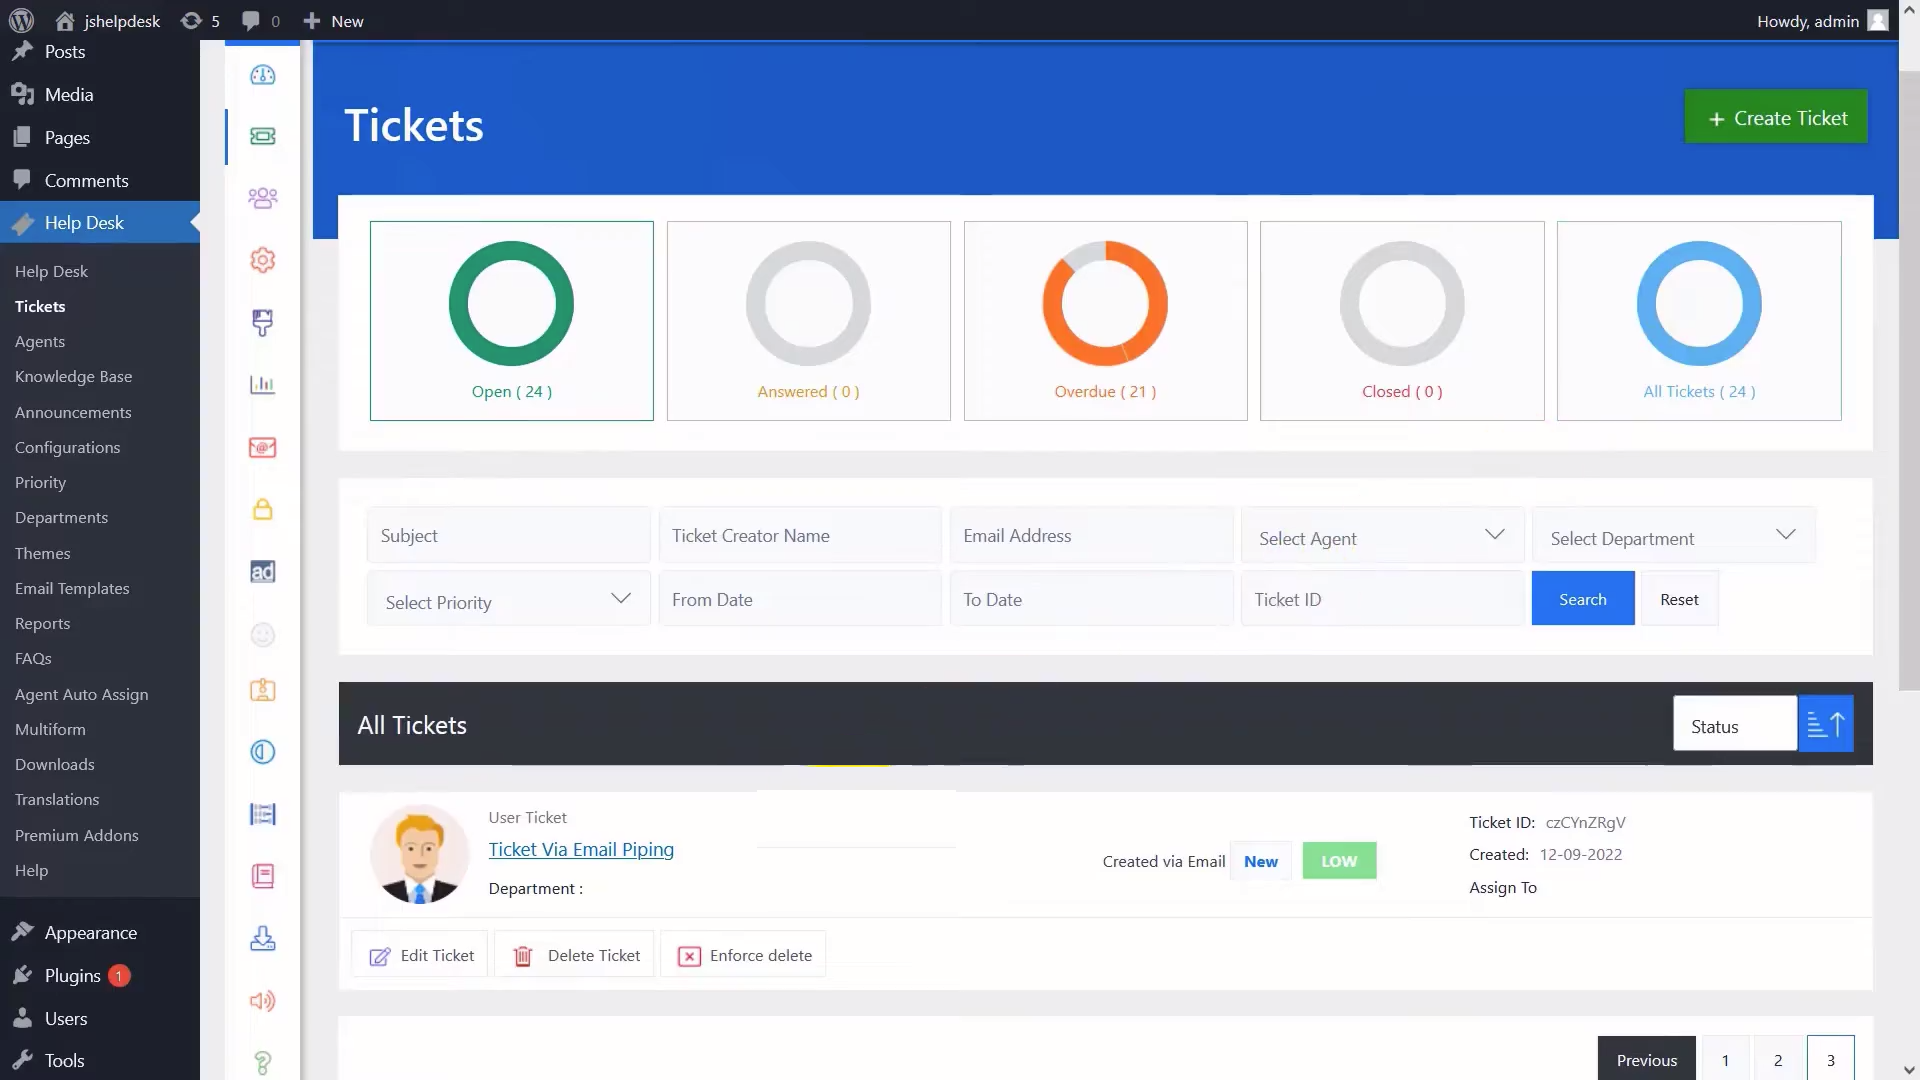
After a few minutes ticket will be generated.
Trobleshooting
IF the ticket is not created > open the Email Piping inbox email must be unread.

From your admin dashboard, navigate to the Admin Dashboard > Dashboard Menu > Add Email Piping > Scroll Down > Cron Job.

Select URL from Cron Job, copy the highlighted URL, and paste it into the browser. You see, the ticket will be generated successfully.