Agent Auto Assign In The JS Help Desk!
Add Rule
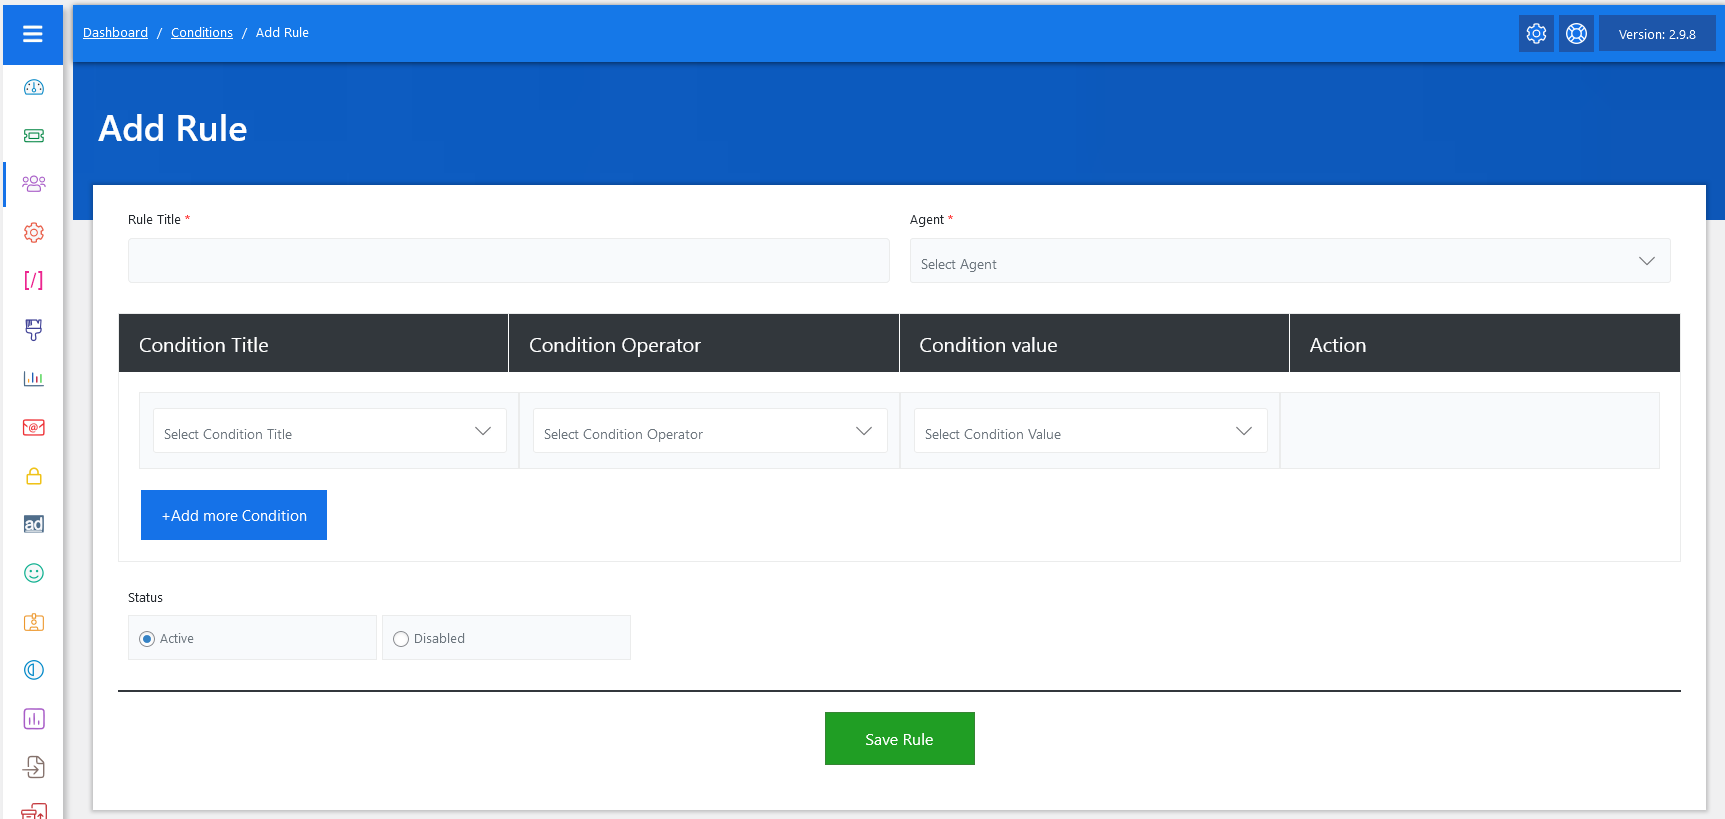
From your admin dashboard, navigate to the Admin Dashboard > Dashboard Menu > Agent Auto Assign, click on the Add Conditions button. To start adding rules effectively. On the ‘Add Rule’ form, we will provide all the necessary details for adding rules.
Agent Auto Assign is a rules-based system that routes tickets to agents automatically. The admin sets conditions, and when a new ticket is created that matches those conditions, the system assigns it to the specified agent. For example, if a user submits a ticket related to “Billing” and you have a rule set up for that, the ticket will automatically go to the billing support agent.
1: Rule Title
Start by entering a Rule Title, which is a descriptive name for your rule (e.g., “Assign Finance Tickets to Alice”).
2: Agent Selection
Then, choose an Agent from the dropdown list. This is the person who will be assigned tickets when the rule conditions are met.
3: Setting Condition

The heart of this system lies in the conditions panel, which is split into four columns: Condition Title, Condition Operator, Condition Value, and Action. The “Condition Title” refers to the ticket property or parameter you want to filter by—examples include “Department,” “Priority,” or “Subject.” Once selected, you define how the condition is evaluated using the “Condition Operator” (e.g., Equals, Contains, and “Matched”).
Each rule is built around one or more conditions. Each condition includes:
-
Condition Title: Select the condition title from the combo box; all available condition titles are (Full Name, Subject, Email Address, Description, User, Department, Priority, and Subject Type).
-
Condition Operator: How you want to match the value (e.g., equals, contains, and “Matched”).
-
Condition Value: The specific value to match (e.g., “Support”, “High”).
-
Action: If you added a condition by mistake, click the “Delete Condition” button next to that condition row. This keeps your rule clean and relevant.
For instance, to auto-assign high-priority tickets to an agent:
-
Condition Title: Priority
-
Condition Operator: Equals
-
Condition Value: High
4: Multiple Conditions
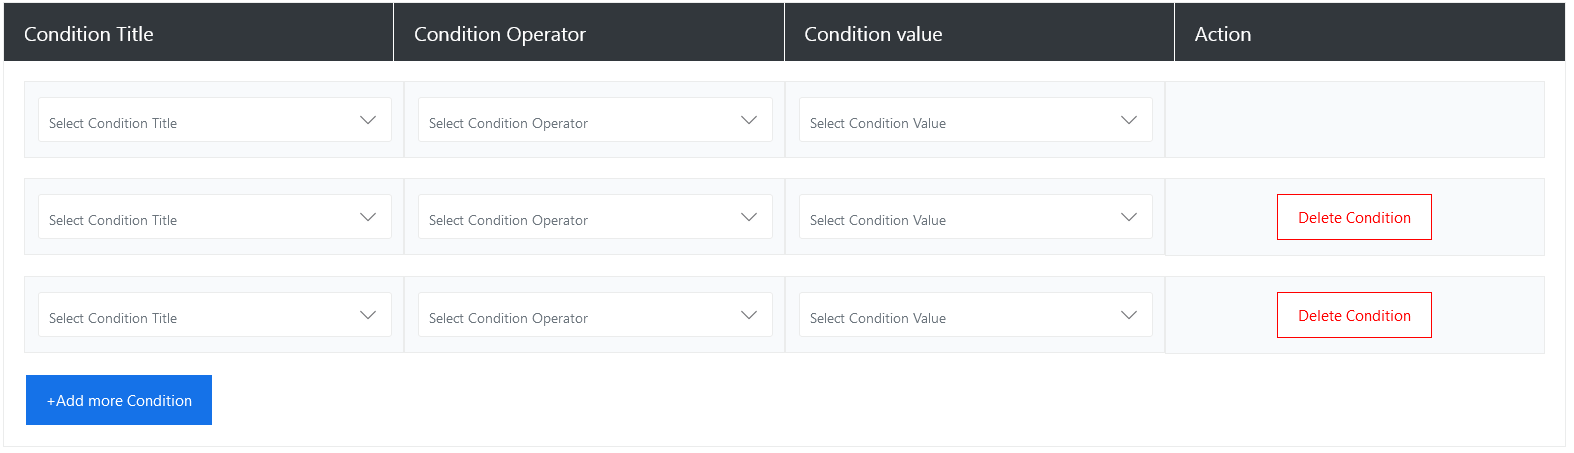
The interface allows multiple conditions per rule, so you can define complex scenarios. If you want to route tickets based on department or a specific priority, you can do so by adding another condition using the “+ Add more Condition” button. For example
Condition 1:
-
Condition: Department.
-
Operation: Equal.
- Value: IT.
Condition 2:
-
Condition: Priority.
-
Operation: Equal.
- Value: High.
Condition 3:
-
Condition Title: Subject.
-
Operator: Contains/Matched.
-
Value: Enter the value according to your requirement (e.g, “Password”).
If a ticket meets all the above criteria, it will be automatically assigned to the selected agent. This gives admins full control over which tickets go to which agents, based on a wide range of criteria.
5: Condition Operator
Among the various operators available, “Equal,” “Contain,” and “Matched” are three common options that determine how the system evaluates condition values when checking if a ticket meets the rule criteria.
How the “Equal” Operator Works
The Equal operator evaluates whether the selected field’s value is exactly equal to the value you define. But it is typically used in numeric, status-based, or ID-based comparisons rather than textual fields. This operator tells the system to check whether the value in the ticket exactly equals the value specified in the rule condition.
Example Use Case: Priority Equals High
-
Condition Title: Priority
-
Condition Operator: Equal
-
Condition Value: High
In this case, the rule will only apply to tickets where the priority is set to exactly “High.”
It will not apply to tickets with priorities like:
-
“Medium”
-
“Urgent”
-
“High Priority” (if that’s not the exact dropdown option).
How the “Contain” Operator Works
The “Contain” operator checks whether the condition value exists anywhere within the target field’s content. This operator is especially useful for broader or partial matching.
Example Use Case:
If you set a rule like:
-
Condition Title: Subject
-
Condition Operator: Contain
-
Condition Value: “Login”
Then this rule would match tickets with subjects such as:
-
“Unable to Log In to Account.”
-
“Login issue on mobile”
-
“The user can’t Login”
As long as the subject line contains the word “Login” (case-insensitive), the rule condition will pass.
How the “Matched” Operator Works
The “Matched” operator, on the other hand, checks for an exact match between the condition value and the content of the selected ticket field. It is stricter and ensures precise control.
-
Condition Title: Full Name
-
Condition Operator: Matched
-
Condition Value: John Wick
Then the rule will only apply to tickets where the Full Name is exactly “John Wick” — no more, no less.
If a full name is “James Wick” or “John Dosan,” it will not match because the text is not “exactly” the same.
6: Deleting Conditions
If you added a condition by mistake, click the “Delete Condition” button next to that condition row. This keeps your rule clean and relevant.
7: Saving the Rule
Once everything is configured, click the “Save Rule” button. The system will now automatically assign all matching tickets to the selected agent as per your rule.