Add Ticket In The JS Help Desk!
Select Form
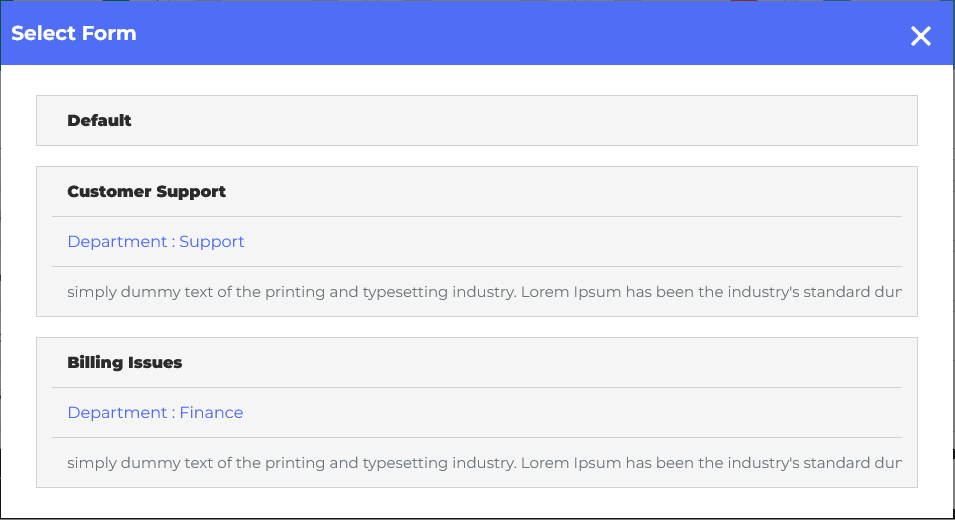
When you click the “Create Ticket” button, a pop-up will appear on the screen. You can select the form to create a ticket according to your requirements. The pop-up has multiple ticket forms that require a name, department, and description. For example, you might have one form for “Customer Support,” another for “Billing Issues,” and a third for “Product Feedback,” each form with its relevant fields.
Create Ticket
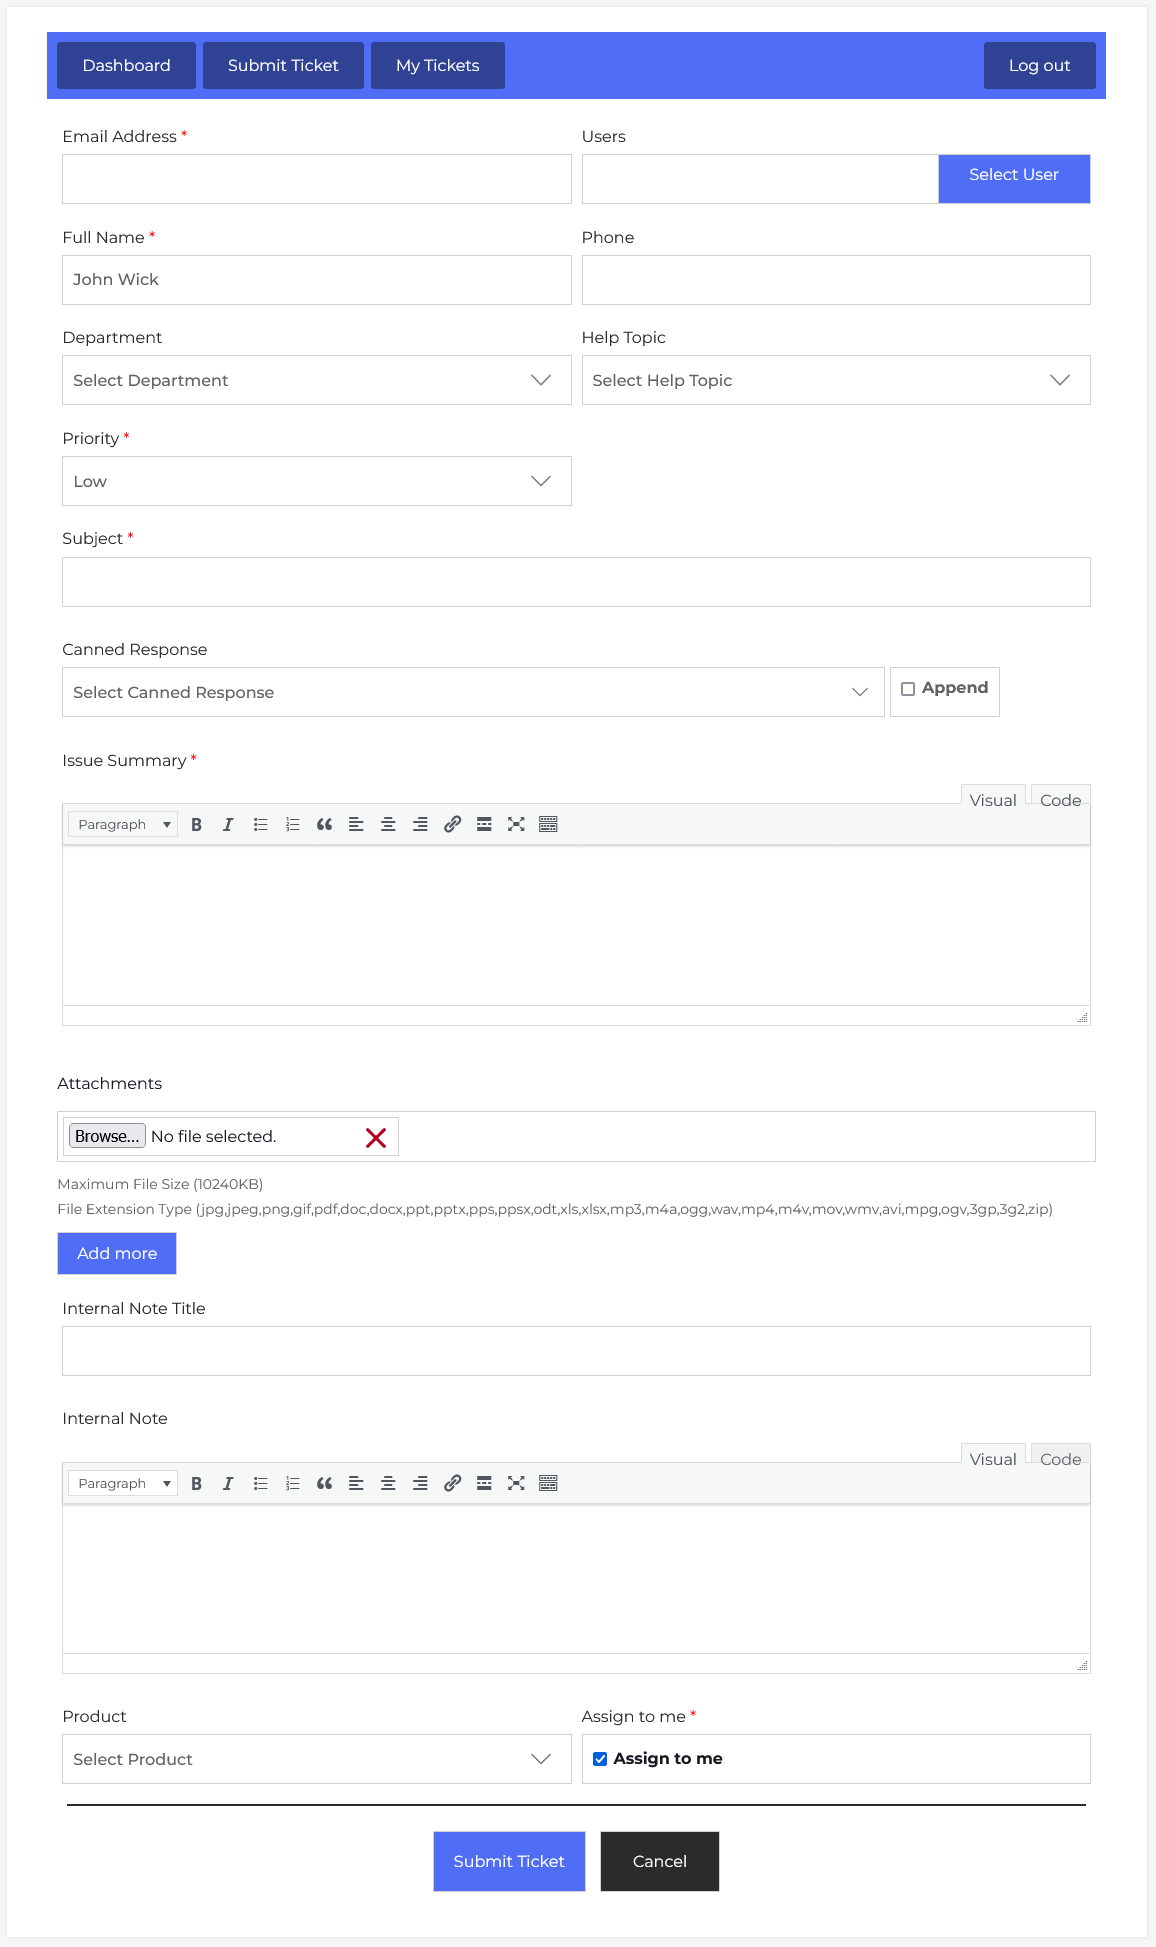
Now, let’s walk through the step-by-step process of creating a ticket from the agent’s end. From your agent dashboard, navigate to the Agent Dashboard > Dashboard Menu > Submit Ticket to start creating a ticket effectively. On the ‘Add Ticket’ form, we will provide all the necessary details for creating a ticket.
- Select User: Clicking on the select user button, a pop-up will appear on the screen, and will be used for selecting the user on whose behalf the ticket will be created.
- Email Address: Agent enters the email address.
- Full Name: Enter the full name.
- Phone: Enter the phone number.
- Department: Choose the relevant department from the dropdown field (e.g., Technical Support, IT, Finance).
- Help Topic: The help topic is a predefined category that classifies the type of issue or request a user is raising. Select a predefined help topic from the dropdown field.
- Priority: Set the priority of the ticket (Low, Normal, High, Urgent).
- Subject: Subject is the title of the ticket.
- Canned Response: To insert pre-written replies or disclaimers. For instance, when dealing with a common issue like “password reset”, a pre-written step-by-step solution can be appended to save time.
- Summary Issue: The issue summary supports rich text formatting, allowing the agent to add detailed descriptions, links, and even highlight key points for clarity.
- Attachments: The agent can attach files such as screenshots, PDFs, or logs. The system allows multiple attachments up to 10MB each, and it supports a wide range of file formats.
- Internal Note Title: Write the internal note title.
- Internal Note: Internal notes are visible only to agents. This can be used to communicate with the agent.
- Product: Agents can select a Product from a drop-down field (if the issue relates to a specific item or service).
- Assign to Me: Choose whether to assign the ticket to themselves using the checkbox. If unchecked, the ticket may remain unassigned.
After filling in all relevant fields and clicking the Submit Ticket button, the ticket will be saved in the system.