What can we help you with?
Add Priorities In The JS Help Desk!
Add Priorities
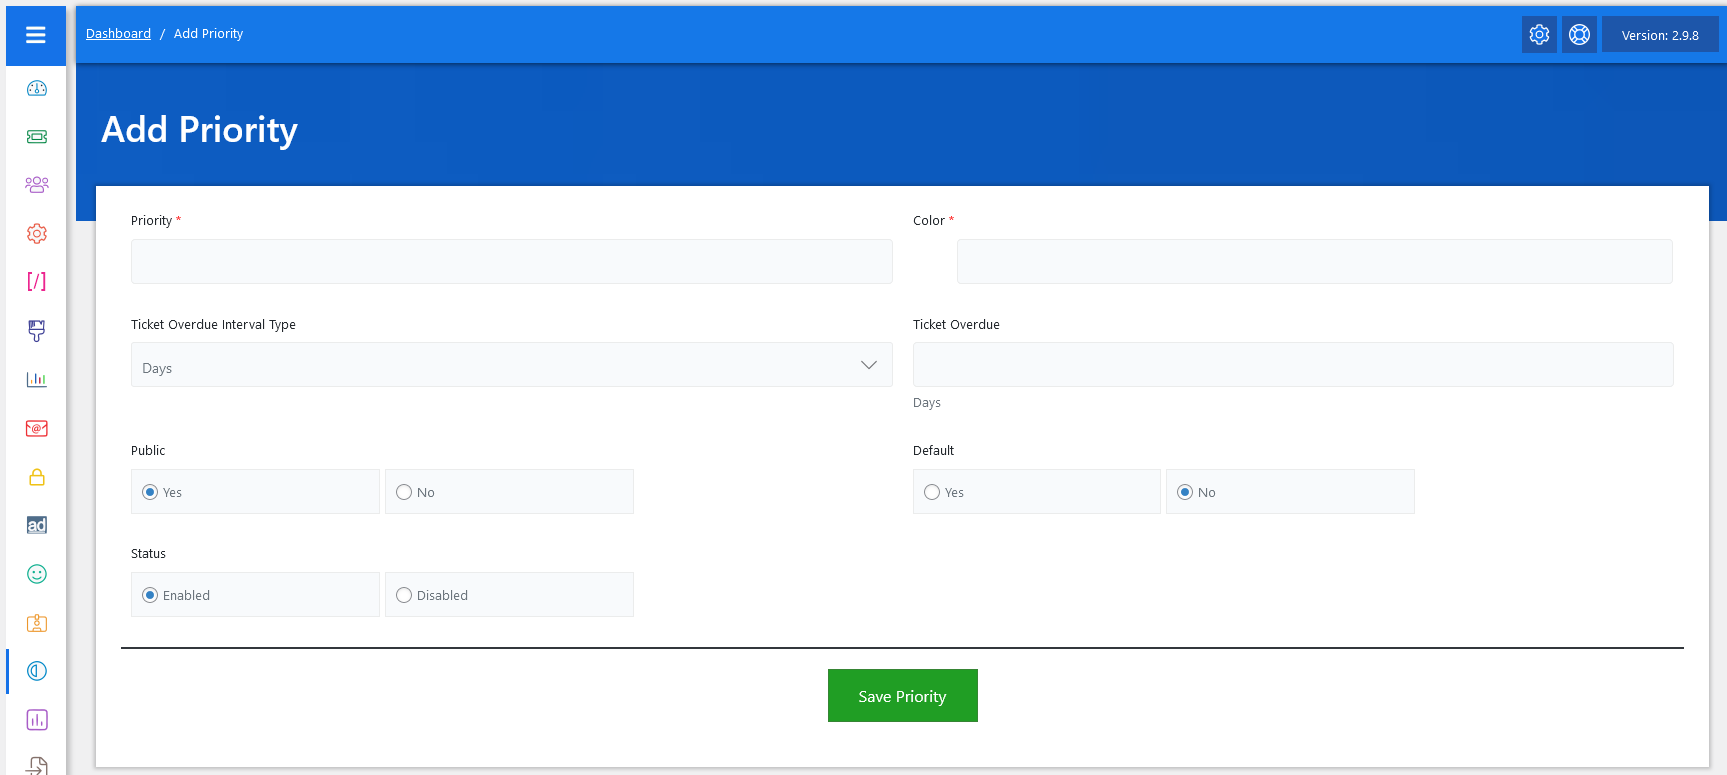
Now, let’s walk through the step-by-step process of adding a priority from the admin end. From your admin dashboard, navigate to the Admin Dashboard > Dashboard Menu > Add Priority to start adding a priority effectively. On the ‘Add Priority’ form, we will provide all the necessary details for adding a priority.
- Priority: Enter the priority title (e.g., Low, Normal, High, and Urgent).
- Color: Click on the color field to explore different shades.
- Ticket Overdue Interval Type: Set the ticket overdue interval type to Days/Hours.
- Ticket Overdue Days/Hours: Defines the number of days/hours when a ticket is considered overdue.
- Public: Here you can choose whether the priority should be public “YES” or “NO”.
- Default: You can also set a priority as the Default, meaning it will be automatically selected when no other priority is selected during ticket submission.
- Status: Here you can choose whether the department should be “Enabled” or “Disabled.”
After filling in all the relevant fields, simply click the green “Save Priority” button at the bottom of the form. The system will validate the inputs and create the new priority. If any required information is missing or incorrect, a notification will alert you to fix it before submission.