SMTP In The JS Help Desk!
SMTP
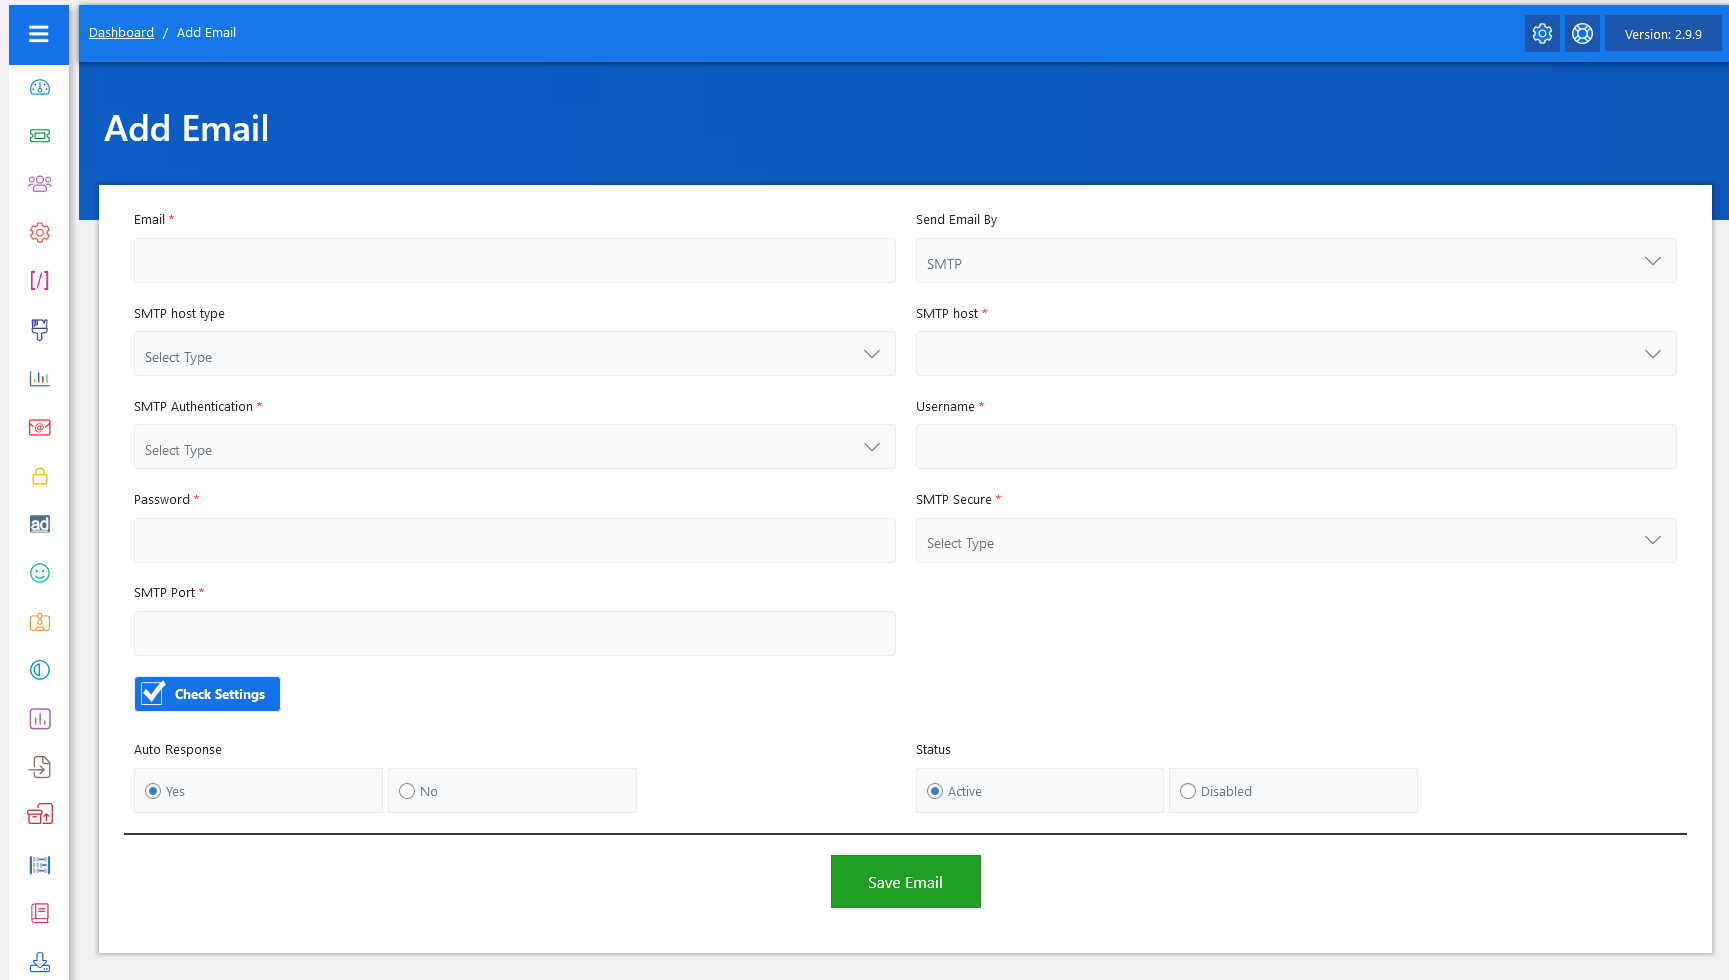
Now, let’s walk through the step-by-step process of adding an email from the admin end. From your admin dashboard, navigate to the Admin Dashboard > Dashboard Menu > Add Email to start adding a response effectively. On the ‘Add Email’ form, we will provide all the necessary details for adding an email.
The Add Email screen in JS Help Desk lets administrators configure outgoing email settings using SMTP so that all ticket notifications, agent replies, and auto-responses are reliably delivered. This setup ensures that your help desk communication is secure, authenticated, and professional, minimizing the chances of emails landing in spam.
- Email: The first required field is Email*, where you enter the email address you want the system to use. This could be a general support email (e.g., support@example.com).
- Send Email By: Next, you will find the Send Email By dropdown. This allows you to choose how outgoing emails are sent. Typically, this will be set to SMTP, but depending on your setup.
- SMTP Host Type: The host type usually depends on your email service provider (e.g., Gmail, Yahoo, Hotmail, or company mail server).
- SMTP host*: If you are using Gmail, your SMTP host will be smtp.gmail.com. This ensures that your help desk system knows exactly which mail server to use when sending outgoing emails.
- SMTP Authentication*: Field lets you select whether authentication is required. Most modern mail servers require authentication, meaning you need to provide valid credentials. That’s where the Username* and Password* fields come in. Here, you’ll enter your email account credentials so the help desk can securely log in to your mail server when sending messages.
- The SMTP Port* and SMTP Secure*: Fields define the technical details of how the connection is established. For example, Gmail typically uses port 587 with TLS security or port 465 with SSL. Selecting the correct security type ensures encryption, meaning your email communication remains safe from unauthorized access.
- Check Settings: A very useful option on this screen is the Check Settings button. After filling in the required fields, you can click this to test whether the connection works properly. If everything is correct, you’ll get confirmation that the help desk can successfully send emails. If not, it helps you troubleshoot immediately instead of running into delivery issues later.
- Auto Response: You can also configure Auto Response. When set to Yes, the system automatically replies to users when they submit a new ticket.
- Status: The Status setting allows you to mark the email as Active or Disabled. If active, the system will use it right away. If disabled, it won’t be used until re-enabled. This is useful if you have multiple configured accounts for different purposes and want to temporarily disable one.
Once done, simply click the Save Email button, and your configuration will be stored.
Set System Emails Configurations
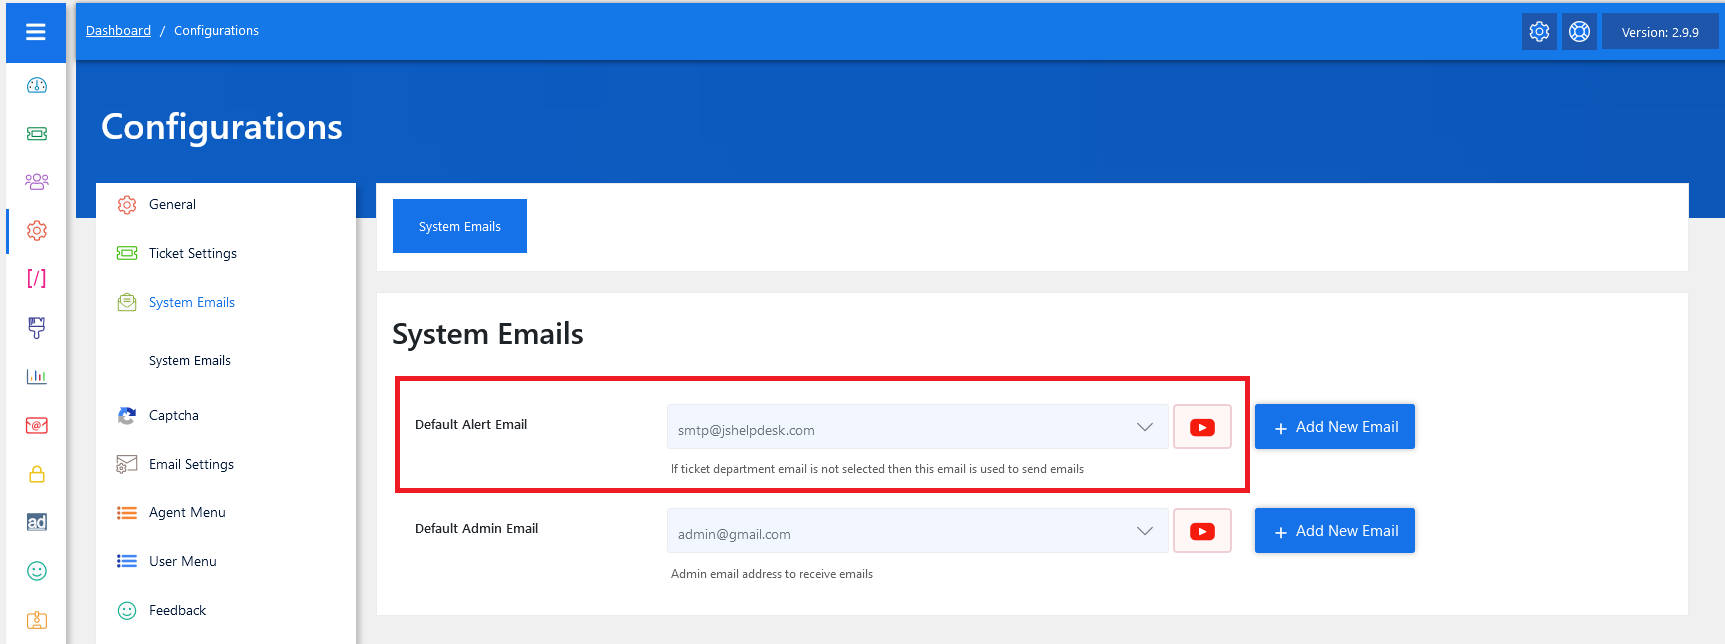
Navigate to System Emails in Configuration. In the JS Help Desk admin panel, go to Configuration > System Emails. This is the section where you can manage all the email addresses that the system will use for sending emails. From here, you can add new emails or set existing ones.
Set Department-Based Outgoing Email
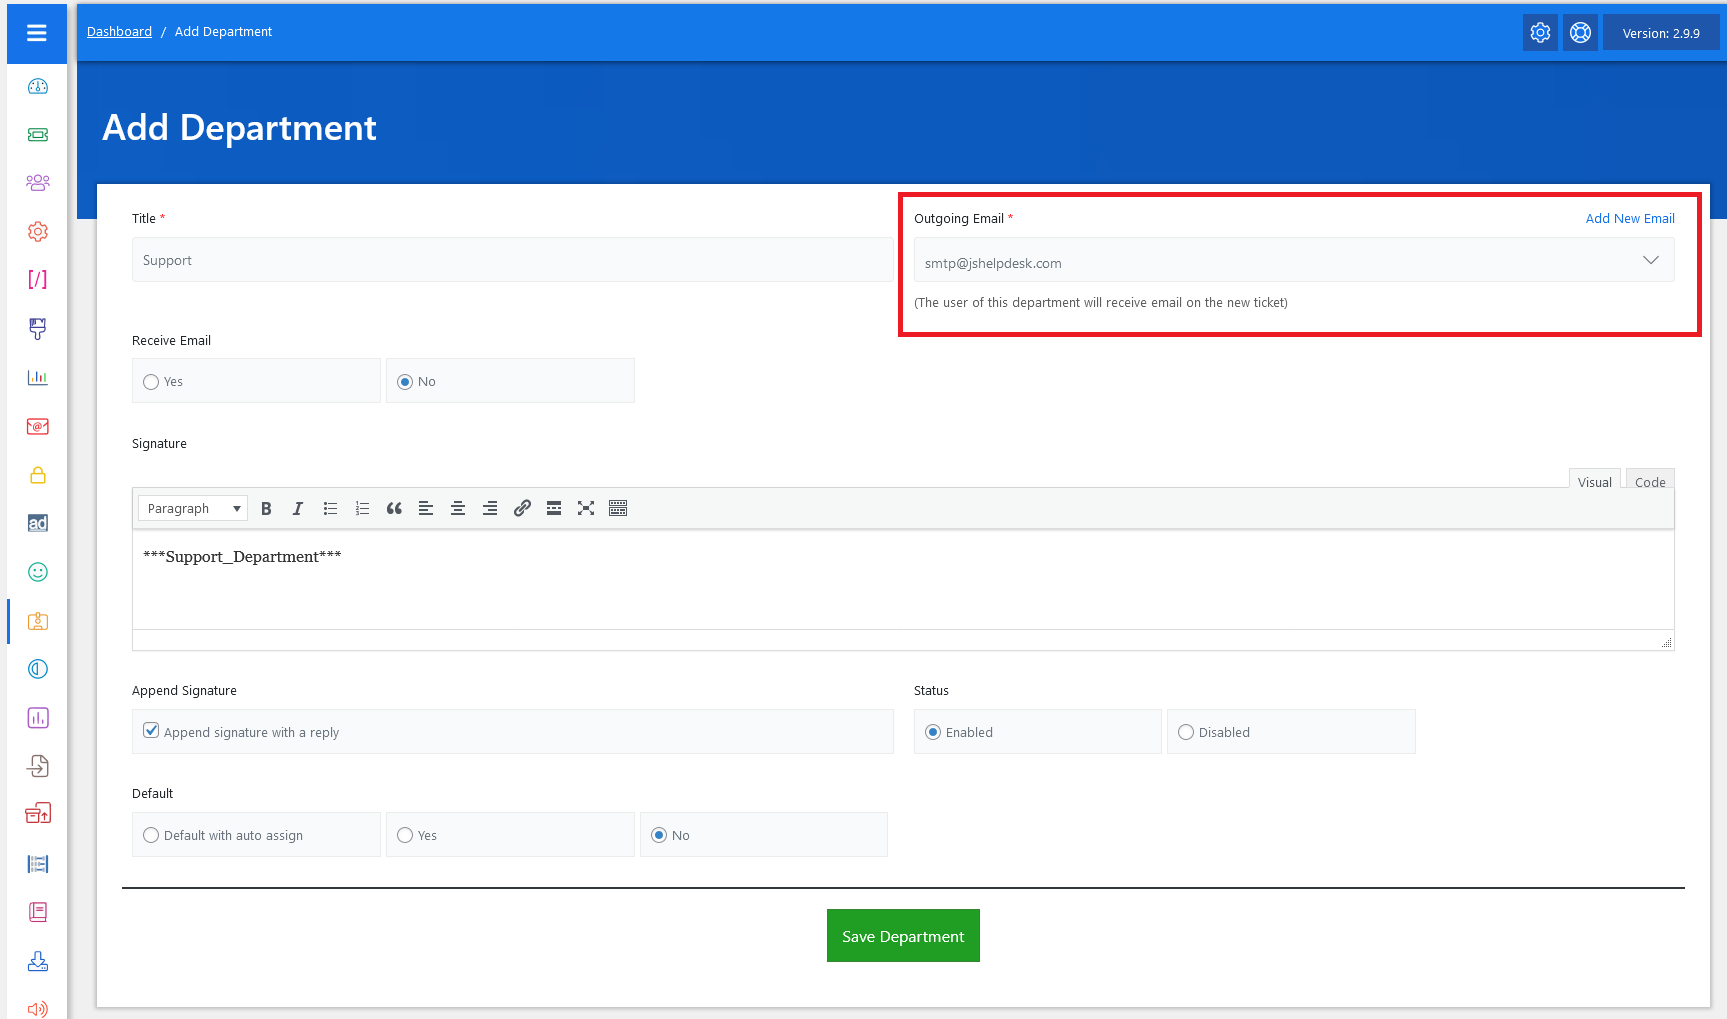
In JS Help Desk, setting up an outgoing email means configuring the email address that the system will use to send notifications, auto-responses, and ticket updates to customers and agents.