Ticket Detail In The JS Help Desk!
Ticket Detail
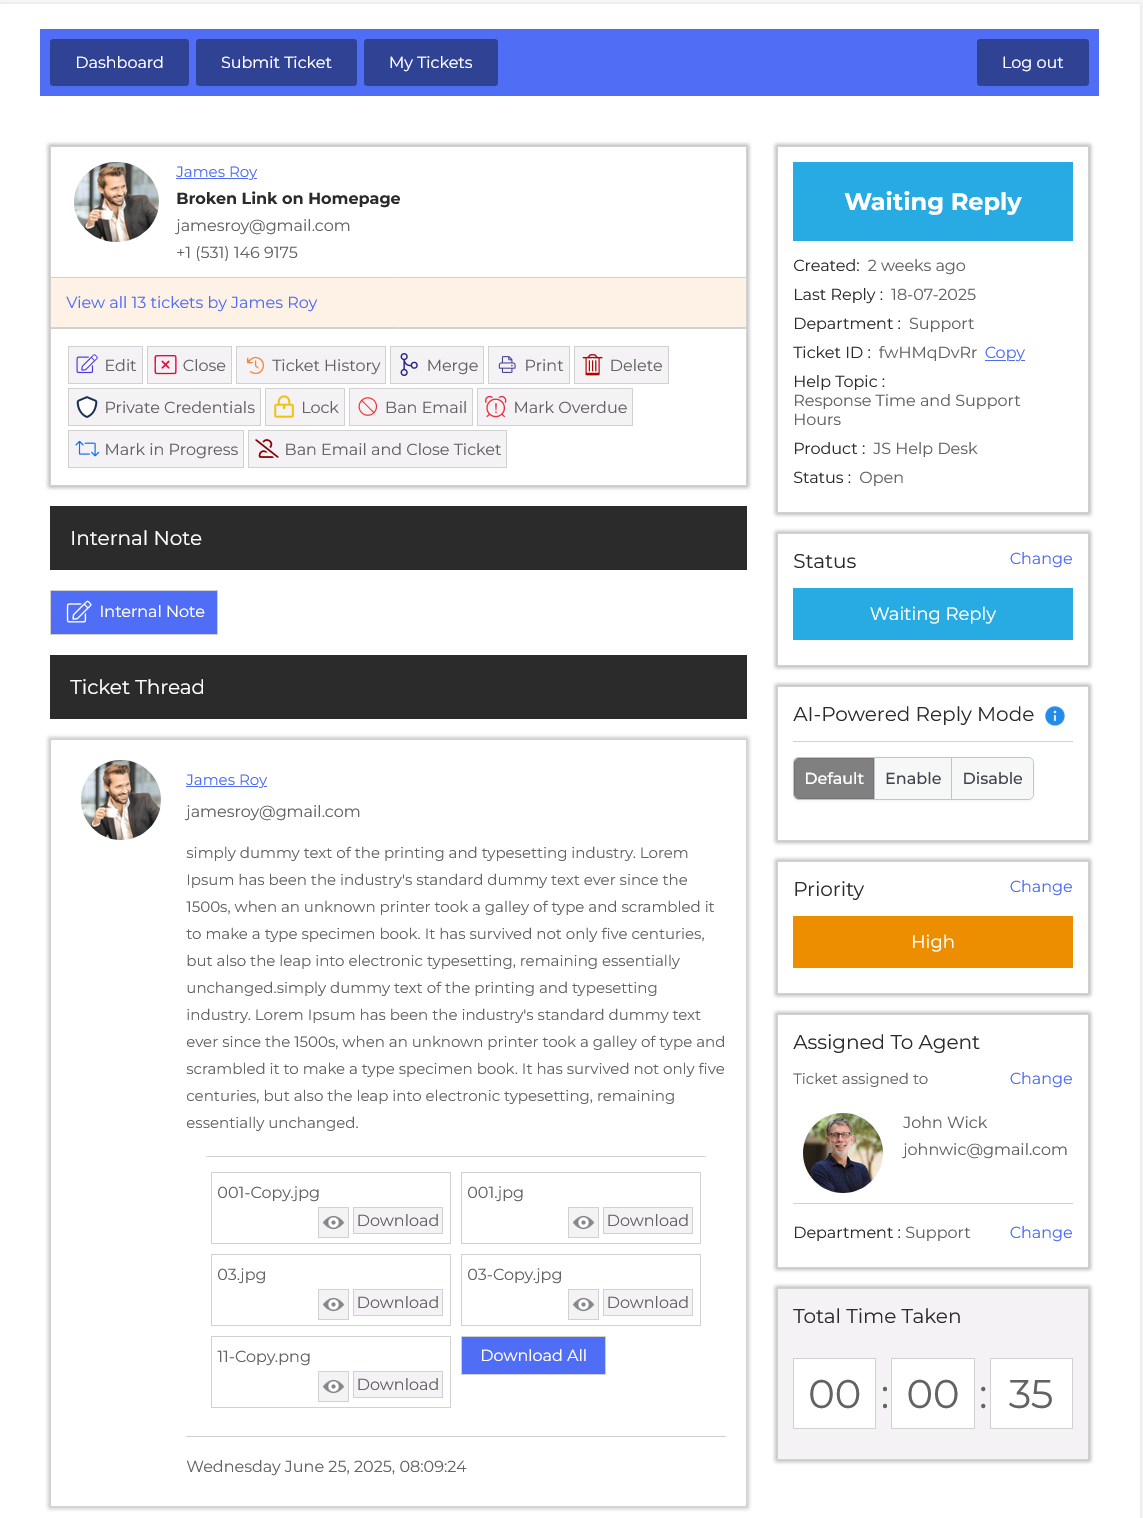
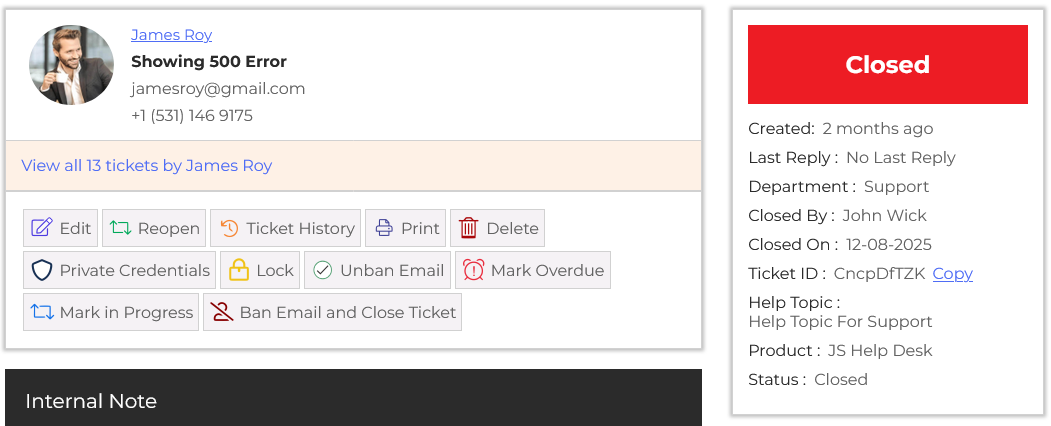
From your agent dashboard, navigate to Agent Dashboard > Dashboard Menu > My Tickets. To view the ticket detail page, click on the ticket subject. This page provides us with details about a ticket. All the attributes (Fields) of a ticket are shown here.
Ticket Actions
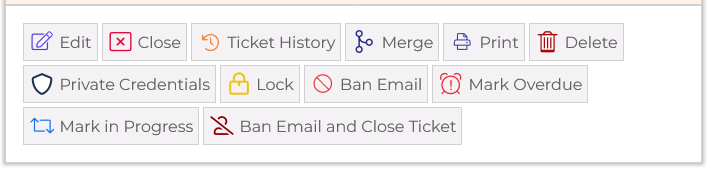
There are multiple action buttons, including Edit Ticket, Show History, Close Ticket, Print Ticket, Merge Ticket, Delete, Private Credentials, Lock Ticket, Ban Email, Mark Overdue, Mark in Progress, Ban Email, and Close Ticket. These allow the agent to take quick actions depending on the ticket’s current state. First, we talk about the Edit Ticket.
Edit Ticket
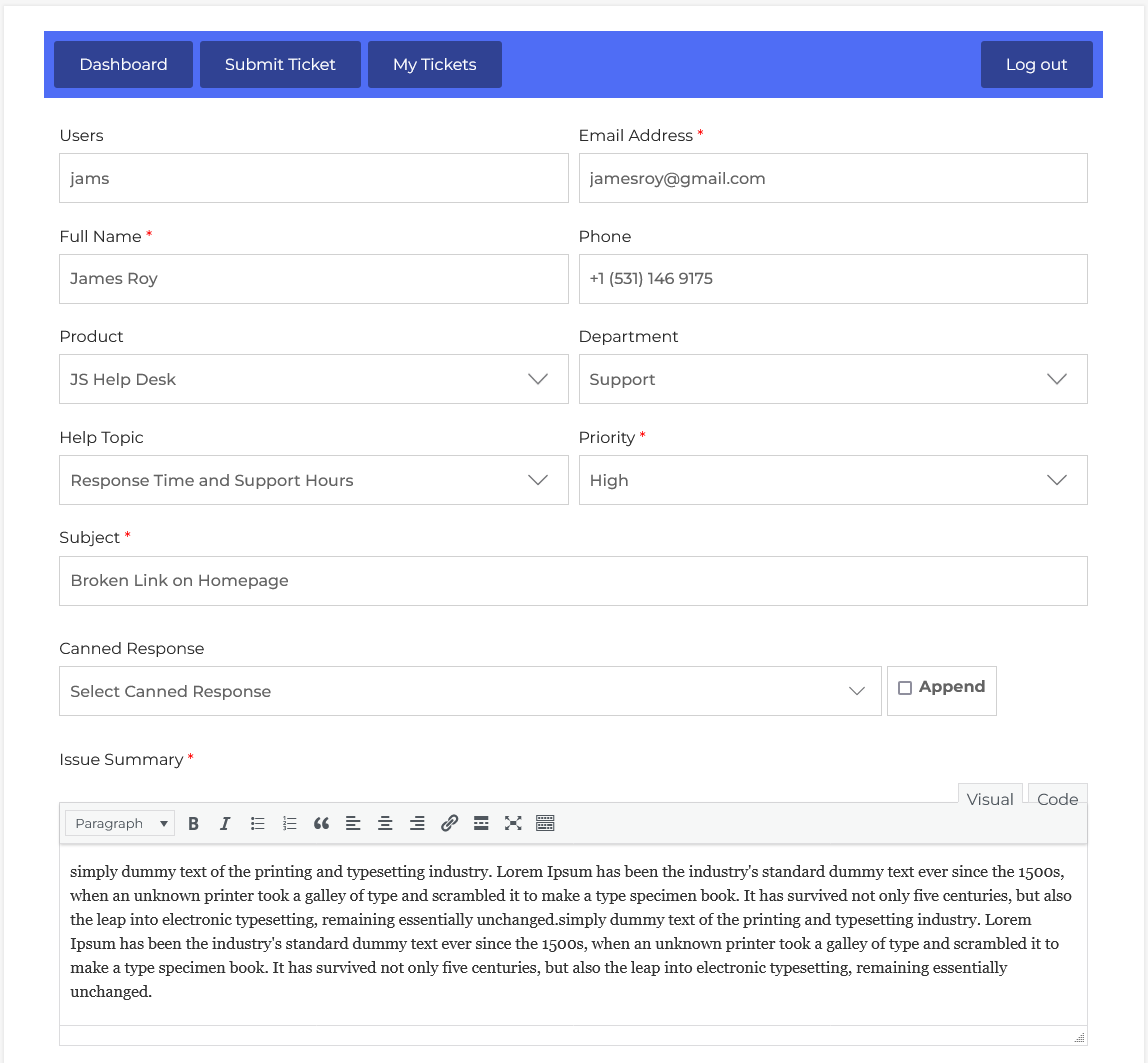
When the agent clicks on the edit ticket button, they will be taken to the add ticket page with the ticket details already filled ( edit case).
Close Ticket
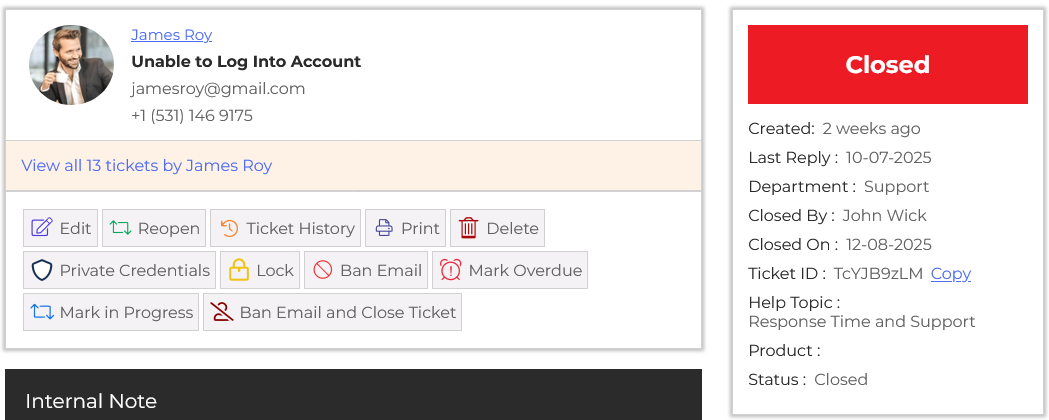
An agent can manually close a ticket at any time. The Close Ticket feature in your help desk plugin allows you to mark a ticket as resolved once an issue has been successfully solved. This action moves the ticket out of the active support queue. When a ticket is closed, its status is updated in the system and is typically locked for further replies from the user. When the ticket is closed, some actions disappear from the closed ticket. However, help desk systems also offer a “Reopen” option, allowing users to reopen a ticket, and the user can take actions on the ticket.
Ticket History
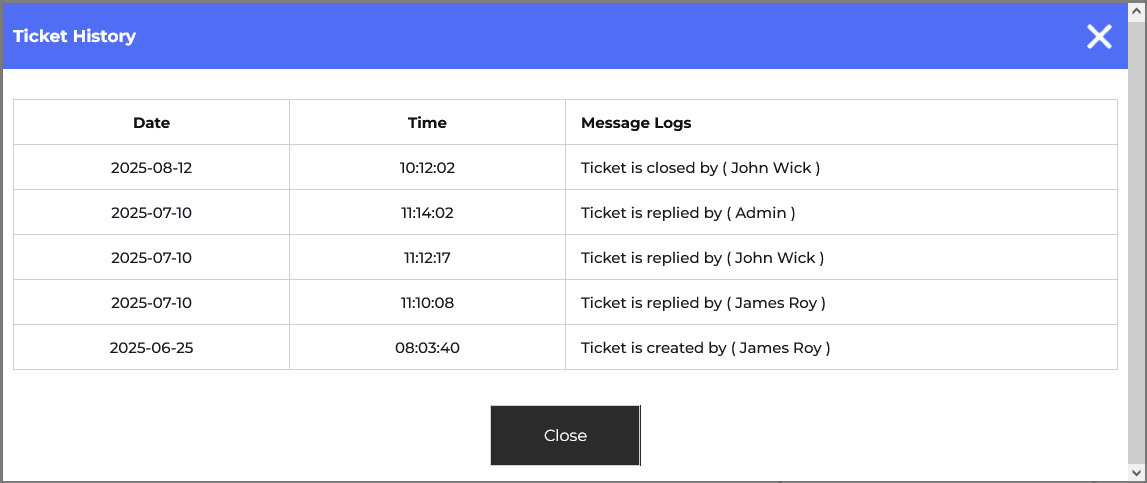
The Ticket History feature in your help desk plugin provides a complete chronological record of all interactions, updates, and actions related to a support ticket. Every time a reply is added, the status is changed, or an action is taken, it is logged in the ticket history. The ticket history pop-up has the action date, time, ticket action, and the action is taken by.
This video link is about Ticket History.
Merge Ticket

The Merge Ticket feature in your help desk plugin allows you to combine multiple tickets from the same user or related to the same issue into a single, unified thread. This is especially useful when a customer submits duplicate tickets. Merging tickets keeps the help desk organized, avoids confusion, and ensures that the entire conversation history is preserved in one place.
When the agent clicks on the merge ticket button, a pop-up will appear on the screen. The pop-up shows a highlighted ticket. A ticket that is highlighted in red “color” is the ticket that you want to merge with another ticket. This ticket is also known as a secondary ticket and represents the subject, from, departments, ticket status, ticket ID, and the created date of a ticket.
The pop-up shows highlighted tickets. Tickets that are highlighted in blue “color” are tickets in which your (secondary) ticket is merged. These tickets are also known as primary tickets. This portion shows all tickets of the same user.
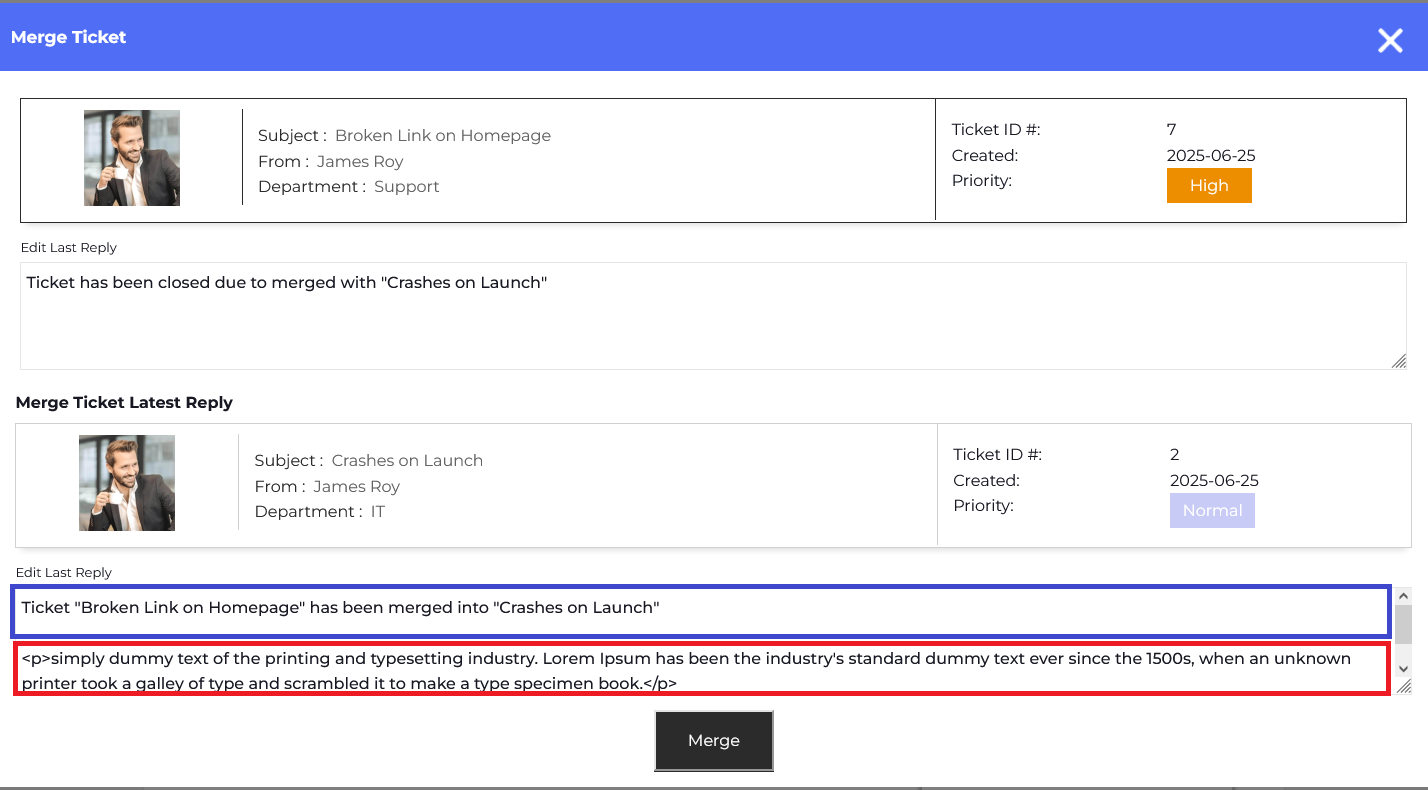
Two tickets are shown in this pop-up. The first one is secondary, which will be merged into another ticket. And the second one is primary. Both tickets have a default message as a reply. In the primary ticket, there are two messages, one is highlighted in blue “color” and the other in red “color”. Blue colored message is the default message, and the message that is highlighted in red color is the last reply of the ticket, which will be merged. After merging the ticket that you want to merge, the ticket will be closed, and no operation will be performed on it.
The secondary ticket is marked as “Closed due to Merged “ to indicate its new status, while the primary ticket remains active and continues to be used for communication.
Print Ticket
The Print Ticket feature in your help desk plugin allows the agent to generate a printer-friendly version of a support ticket for record-keeping, sharing, or offline use. This feature is especially useful for teams that require a physical copy of customer interactions for compliance, audits, internal reviews, or documentation. With just one click, the agent can print a ticket.
Delete
The agent can delete the ticket by clicking on the delete button. The reference of a ticket will remain the same, but the ticket will be deleted.
Private Credentials
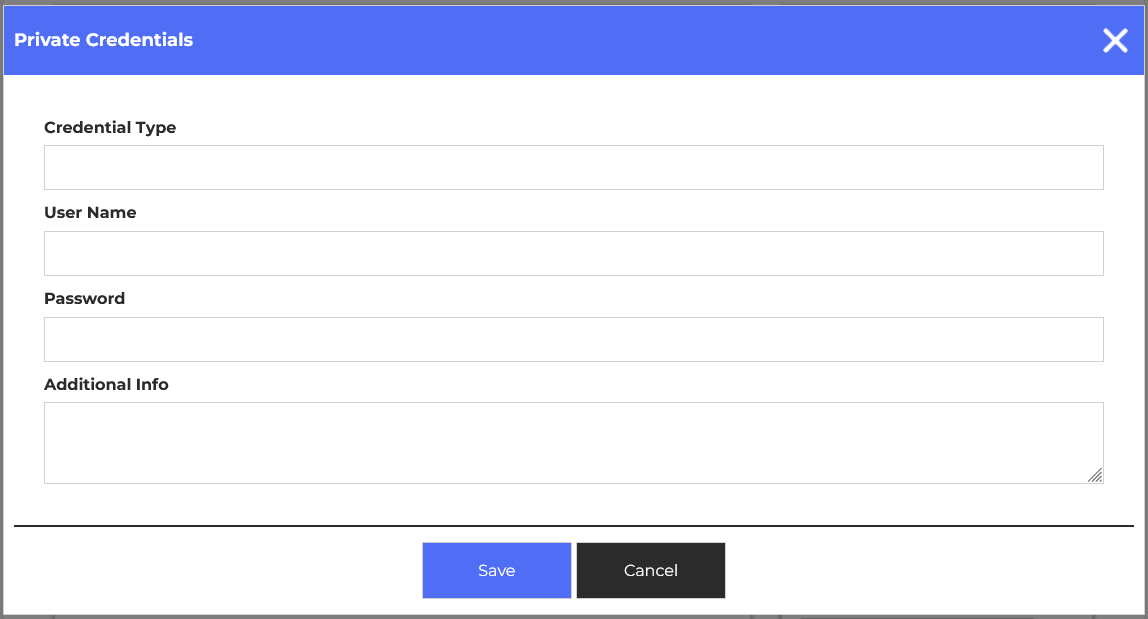
The Private Credentials feature in your help desk plugin allows the agent to securely share sensitive information, such as passwords or login details, without exposing them in public replies. This feature ensures that confidential data is kept secure and only visible to authorized personnel. For example, if a customer is facing issues accessing a premium tool and needs to share their login credentials, they can submit them using the private credentials field instead of typing them into the regular message box.
When the agent clicks on the private credentials button, a pop-up will appear on the screen. Fill the fields and click on the save button. Your credentials have been successfully saved.
- Credentials Type: Enter the credentials type in the text field.
- Username: Enter the username.
- Password: Enter the password.
- Additional Information: Enter the additional information related to the credentials.
This video link is about Private Credentials.
Lock Ticket

The Lock Ticket feature in your help desk plugin is designed to prevent further replies to a ticket, either by the user. This function is especially useful in situations where a ticket has been resolved or needs to be restricted for compliance or auditing purposes. When a ticket is locked, the reply box is typically disabled for the user. However, help desk systems also offer an “Unlock Ticket” option, allowing the agent to unlock a ticket to enable further replies to a ticket, either by the user.
Ban Email

The Ban Email Ticket feature in your help desk plugin allows agents to block specific email addresses from submitting new tickets. This is particularly useful in managing spam, abuse, or repeated misuse of the support system. By banning a problematic email, you can prevent unnecessary clutter in your ticket queue and maintain a healthier support environment for both agents and genuine users.
When an email address is banned, any attempt to submit a ticket using that address is automatically rejected. For example, if a user consistently submits offensive or irrelevant content, their email can be added to the banned list. The next time they try to reach out, the system will block the request before it creates a ticket. However, help desk systems also offer a “Unban” option, allowing agents to unban specific email addresses for submitting new tickets.
Mark Overdue

The Mark Overdue Ticket feature is essential for maintaining timely and accountable support workflows. It ensures that every customer receives a response within the timeframe and empowers support teams to act swiftly on delayed issues. By using this feature effectively, your help desk can improve response quality, reduce resolution times, and enhance customer satisfaction. The agent can manually mark a ticket as overdue by clicking on the Mark Overdue button. However, help desk systems also offer a “Unmark Overdue” option, allowing agents to manually remove the “Overdue” status from a ticket when appropriate.
For example, if a ticket was marked overdue because a reply was slightly delayed over a holiday weekend. The agent can unmark the overdue status to reflect that the ticket is still being handled within a reasonable timeframe.
Mark In Progress

The Mark In Progress Ticket feature in your help desk plugin allows agents to indicate that a ticket is actively being worked on. This status helps both the support team and the customer understand that the issue is not idle or forgotten, but is currently under investigation or resolution.
Ban Email and Close Ticket
The Ban Email and Close Ticket feature in your help desk plugin is designed to help support teams efficiently deal with spam, abuse, or repeated misuse of the support system. With this feature, the agent can instantly block a specific email address from submitting any future tickets while simultaneously closing the current active ticket. It’s a one-click action that ensures your support desk remains clean, safe, and focused on helping genuine users.
When a user sends inappropriate, spammy, or irrelevant messages through a ticket, the agent can use this option to prevent further interaction from that email address. For example, if a spam bot sends multiple fake tickets promoting unrelated content, the agent can simply use the Ban Email and Close Ticket action to block the sender and mark the ticket as closed.
Internal Note Section
The “Internal Note” feature is designed for team collaboration. It allows the agent to post internal comments that are not visible to the customer. This is useful for leaving reminders, sharing investigative steps, or tagging another teammate for follow-up. Clicking the “Internal Note” button, a pop-up will appear on the screen that has a text area where the admin can add these internal messages.
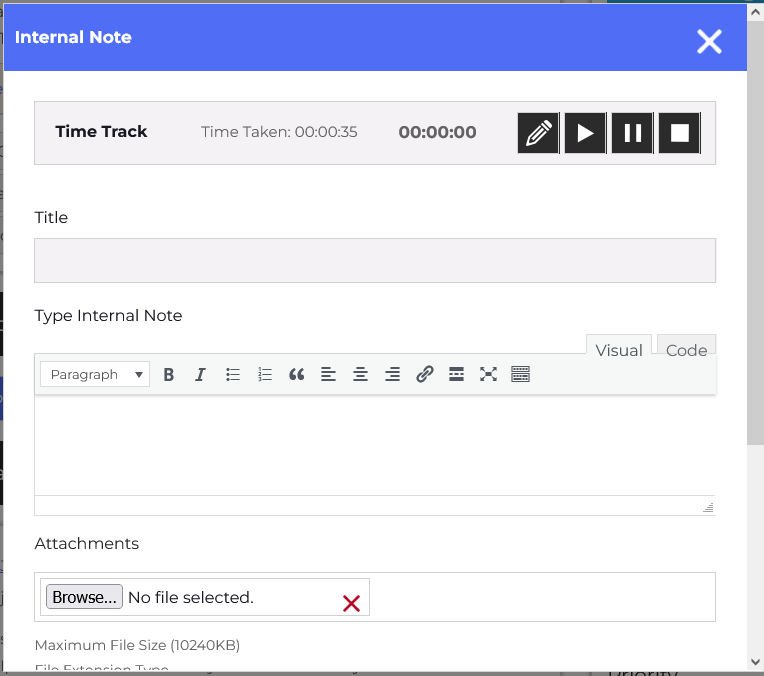
- Time Tracking: Allows the agent to track the time spent specifically on writing or investigating for this note. The agent can start, pause, resume, or stop the timer using the icon buttons. This is useful for accurate logging and reporting.
- Time Taken: Shows the total time already spent on this ticket.
- Note Title: Text field where the agent can add the note title.
- Internal Note: A Text area where the agent can add these internal messages.
-
Ticket Status: The agent can choose to close the ticket by selecting the “Close on reply” checkbox.
-
Attachments: Agent can attach files such as screenshots, PDFs, or logs. The system allows multiple attachments up to 10MB each, and it supports a wide range of file formats.
- Ticket Status: Before posting the reply, the Ticket Status control allows the agent to close the ticket automatically after posting an internal note by selecting “Close on reply.”
After composing the internal note, hit the Post Internal Note button, internal note has been successfully saved.
This video link is about the Post Internal Note.
Ticket Thread
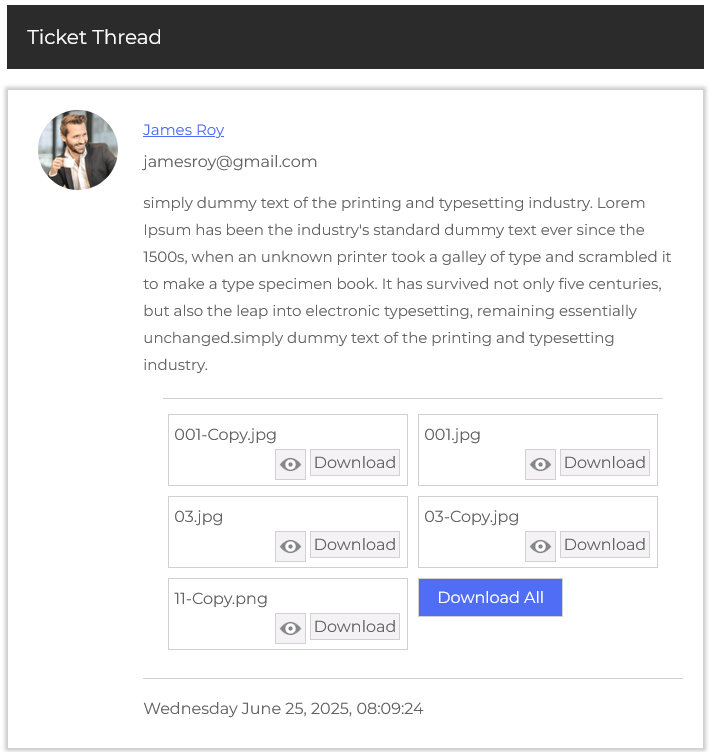
This section shows the conversation history between the user and the support team in a threaded format. Each reply shows the sender’s name, profile picture, role (user/admin/agent), message, and timestamp. File attachments, such as screenshots or error logs, can also be previewed and downloaded.
Role-Based Replies
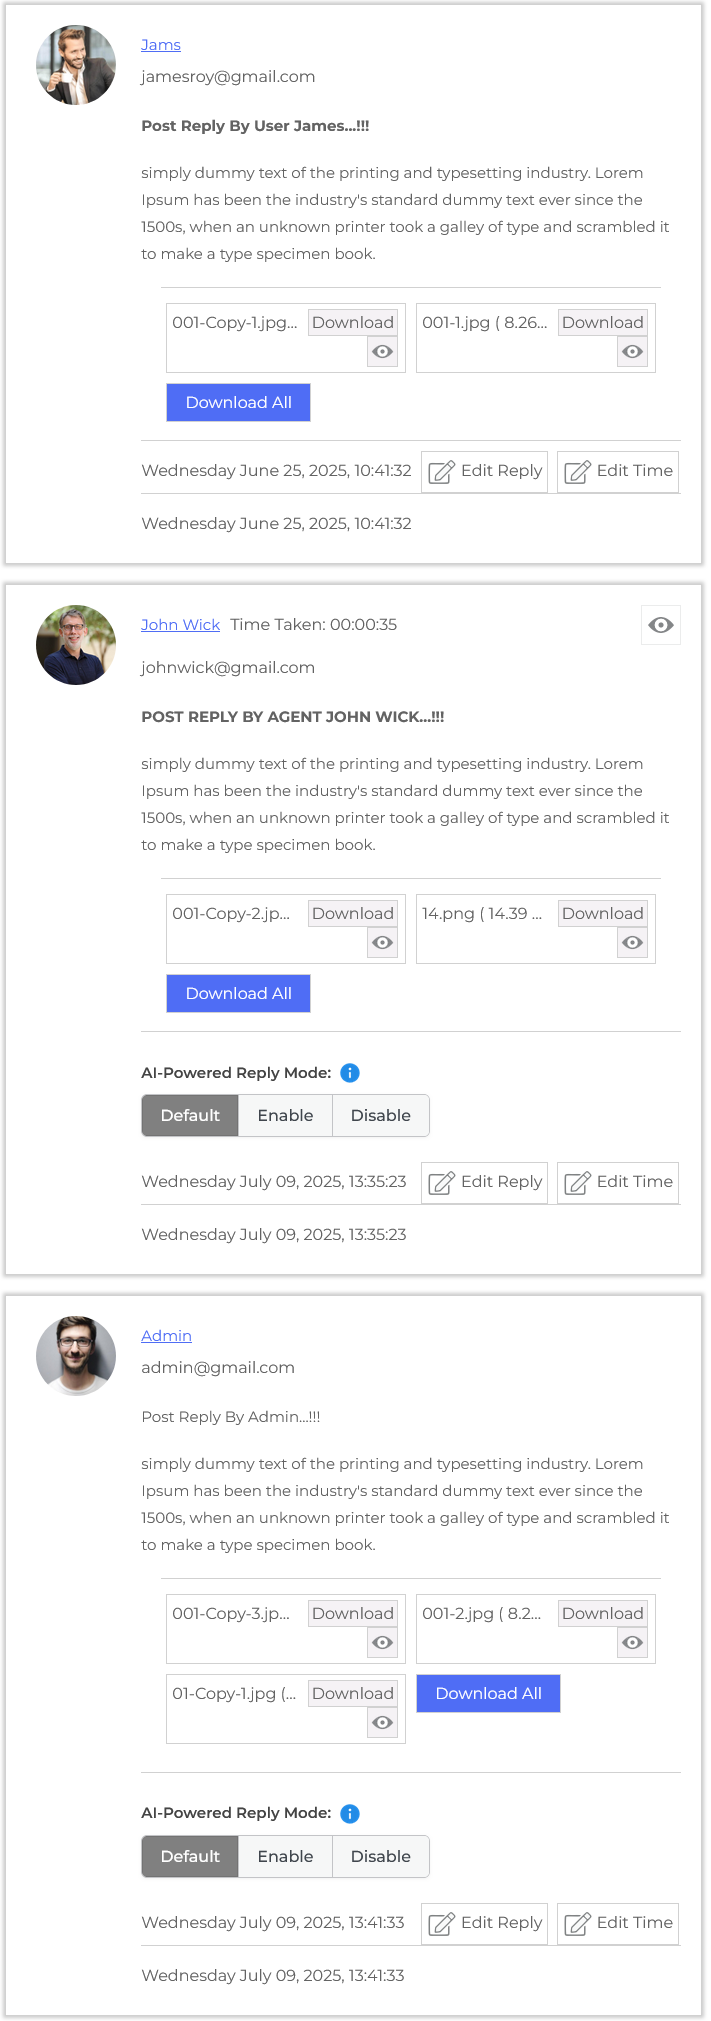
Replies are clearly labeled to show whether they were made by a User, Admin, or Agent, with styling that separates each role. This distinction adds transparency to the conversation, helping the agent see the last responder and determine the next required action. Each role also has access to slightly different tools and actions relevant to their permissions.
Smart Reply Learning Control
Edit Time
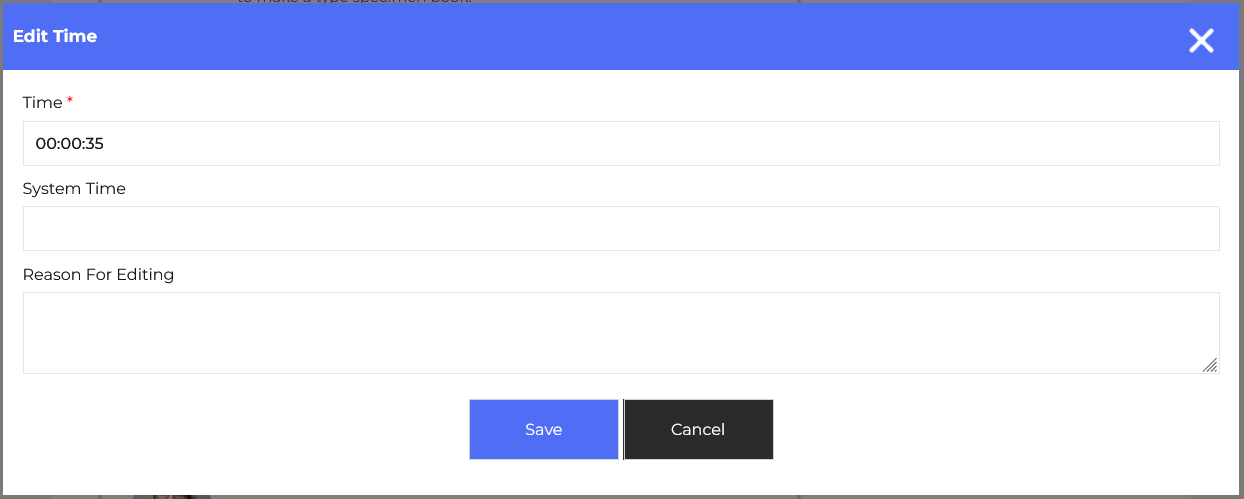
There is an edit time button on the right side of the ticket. When clicking on this button, a pop-up will show you, and you can edit the time by using this button. There are fields for time and reason for editing.
- Time: You can edit the time in hours, minutes, and seconds.
- Reason for Editing: Write a reason why you would edit the time of the ticket.
There are two buttons: save and cancel. The save button saves your edit time and reason for editing. The cancel button closes the pop-up.
Edit Reply
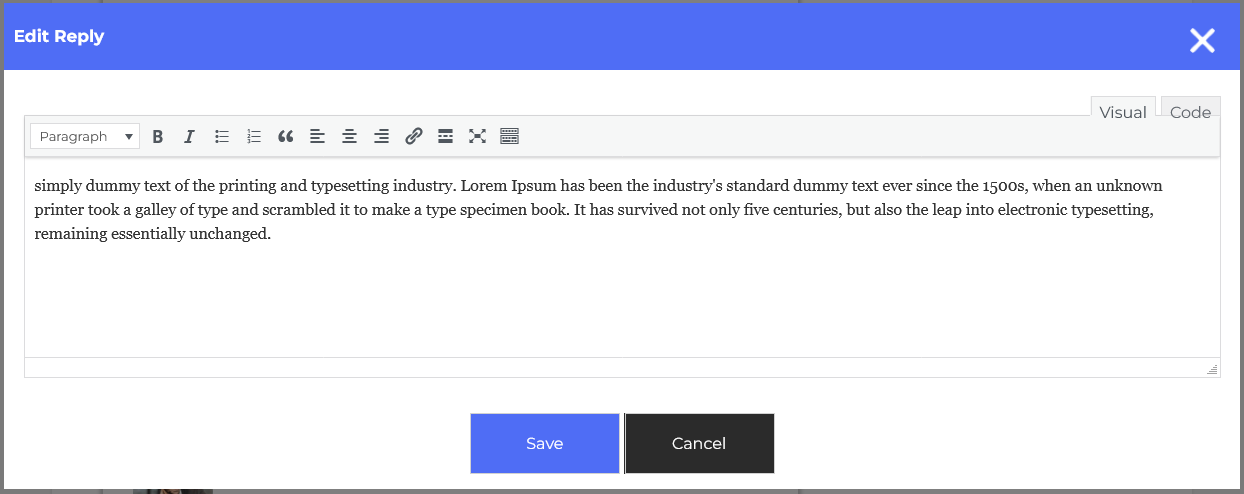
When clicking on the edit reply button, a pop-up will show you the ticket reply already filled ( edit case). There are two buttons: save and cancel.
Attachment Handling
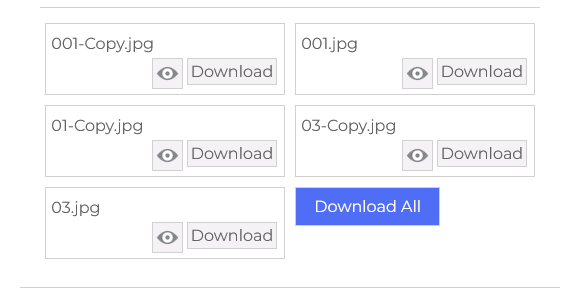
Within both the thread and reply sections, files can be attached and downloaded easily. Each message that includes attachments displays them in an organized list with file type, name, a view button, and a download button. This is especially helpful when troubleshooting issues that involve screenshots or documents.
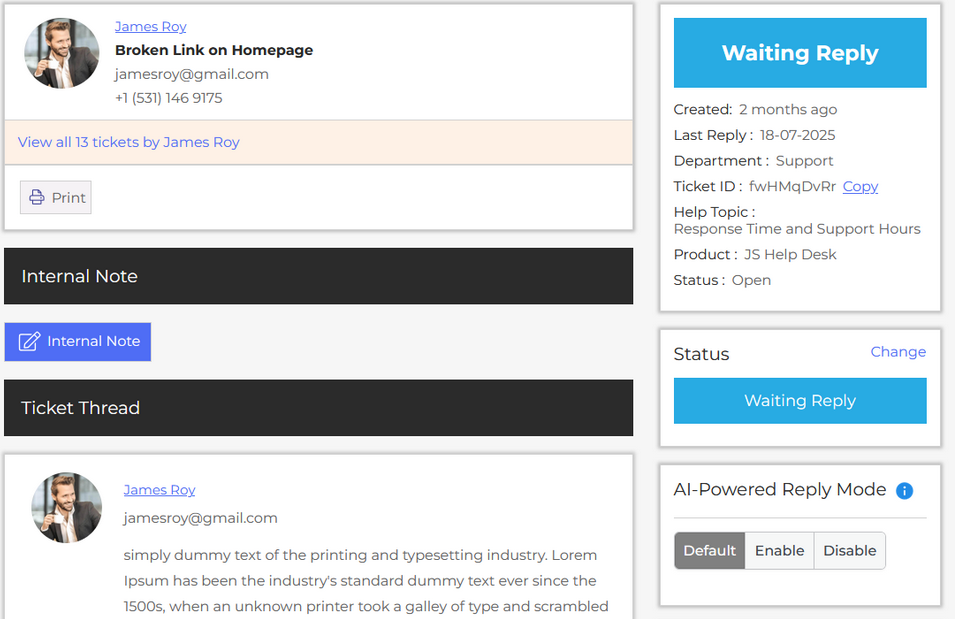
Ticket Metadata Sidebar
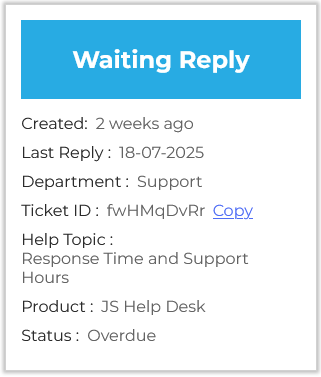
On the right-hand side, the sidebar shows quick ticket meta-info such as ticket status, created, last reply, help topic, product, ticket department, ticket ID, and ticket status.
Status
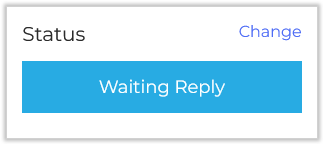
The Ticket Status feature in your help desk plugin is a crucial tool for tracking the progress of each support request from submission to resolution. It allows users to easily understand where a ticket stands at any given time by assigning it a clear status label such as Open, Waiting Reply, In Progress, Replied, Closed, or Closed due to Merge.
Status changes can also be automated based on ticket events. For instance, if a user replies to a ticket that was previously marked as “Replied,” the system can automatically “Reopen” the ticket by changing the ticket status.
Change Status
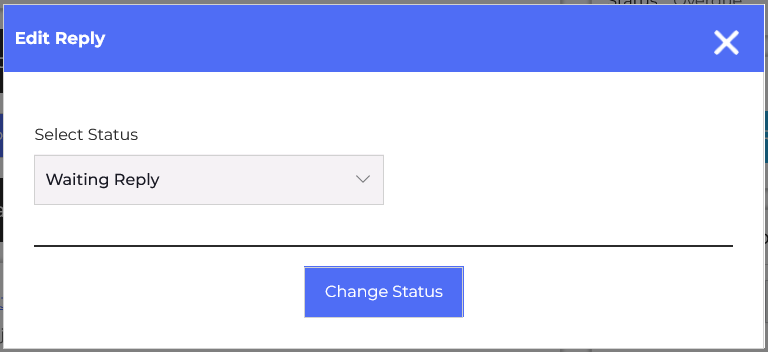
An agent can manually change a ticket’s status from one state to another, such as from Open to In Progress, or from Replied to Closed, depending on what actions have been taken. When the agent clicks on the change link, a pop-up will appear on the screen. Select the ticket status from the combo box and click on the change status button. Ticket status has been successfully changed.
AI-Powered Reply Mode
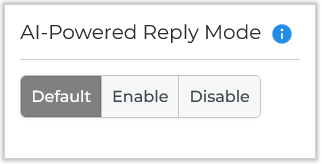
This panel allows agents to manage how the current ticket is considered for future reply suggestions. By enabling or adjusting these settings, you can control whether this ticket and its response are included in the AI’s matching system, helping improve the accuracy and relevance of suggested replies for similar tickets in the future.
Default: Tickets and replies are included in all AI queries.
Enable: Tickets and replies are used only when the “Enable Ticket” filter is active.
Disable: Tickets and replies are excluded from AI queries.
Priority
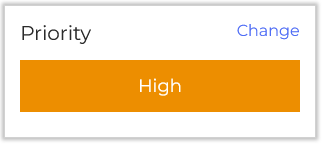
The Ticket Priority feature in your help desk plugin allows you to assign a level of urgency to each support ticket, ensuring that critical issues are addressed quickly while less urgent matters are handled appropriately. By categorizing tickets into priority levels such as Low, Normal, High, or Urgent, your team can manage workloads more efficiently and deliver faster response times where they matter most. You can set your ticket priority during ticket creation. An agent can change ticket priority by clicking on the change link.
Change Ticket Priority
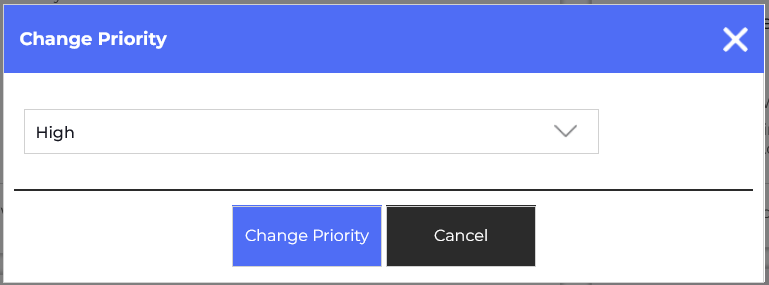
The agent can manually change the priority from options such as Low, Normal, High, or Urgent. For example, if a user originally submitted a ticket marked as “Normal” priority but later reports that the issue is affecting a live environment or causing downtime, the agent can upgrade it to “Urgent,” so it is addressed immediately. When the agent clicks on the change link, a pop-up will appear on the screen. Select ticket priority from the combo box and click on the change priority button. Ticket priority has been successfully changed.
Ticket Assign and Transfer
Ticket Assign
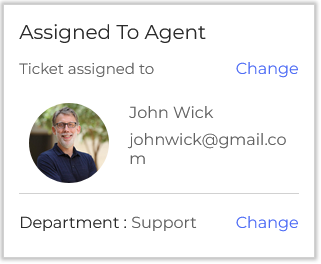
The Ticket Assign feature in your help desk plugin allows agents to designate a specific team member or department to handle a particular ticket. This feature makes it clear who is responsible for resolving each issue. Assigning tickets helps prevent confusion or duplication of effort and ensures that no ticket is left unattended. The agent can assign a ticket by clicking on the change link.
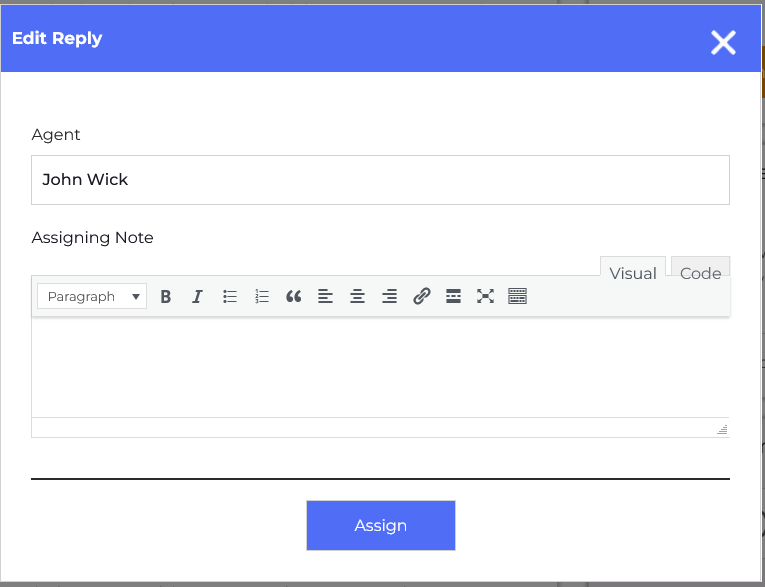
The agent can manually assign a ticket to another agent, which is helpful in situations where the agent knows the best agent to handle a unique or complex case. When the agent clicks on the change link, a pop-up will appear on the screen. Select an agent from the combo box, write a note for the agent in the internal note text area, and click on the assign button. The ticket has been successfully assigned to that particular agent.
Change Department

The Department Transfer feature in your help desk plugin allows you to move a ticket from one department to another when the issue is better suited to a different team’s expertise. It’s especially useful in multi-department setups where inquiries might relate to billing, technical support, sales, or customer service.
Department Transfer
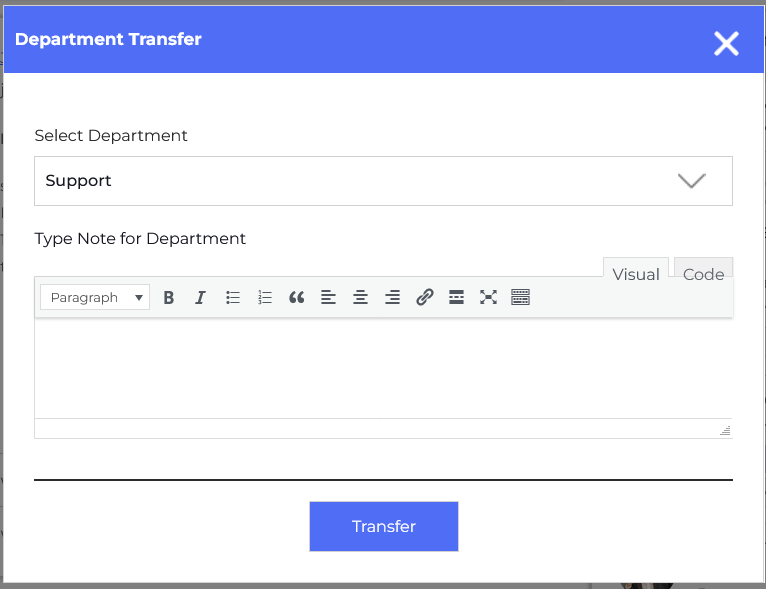
An agent can manually transfer a ticket from one department to another department. When the issue is better suited to a different team’s expertise. When the agent clicks on the change link, a pop-up will appear on the screen. Select a department from the combo box and write a reason for the department transfer in the text area, and click on the transfer button. The ticket has been successfully transferred to a new department.
Total Time Taken
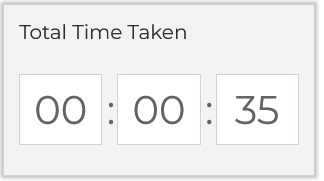
The Total Time Taken feature in your help desk plugin shows the exact amount of time spent working on a ticket. In the image you’ve provided, the system displays the time in the format HH: MM: SS. This feature is extremely useful for tracking agent productivity and monitoring support performance. Total Time Taken gives you a clear and measurable way to track how quickly and effectively your support team is handling tickets, which is key to delivering high-quality customer service.
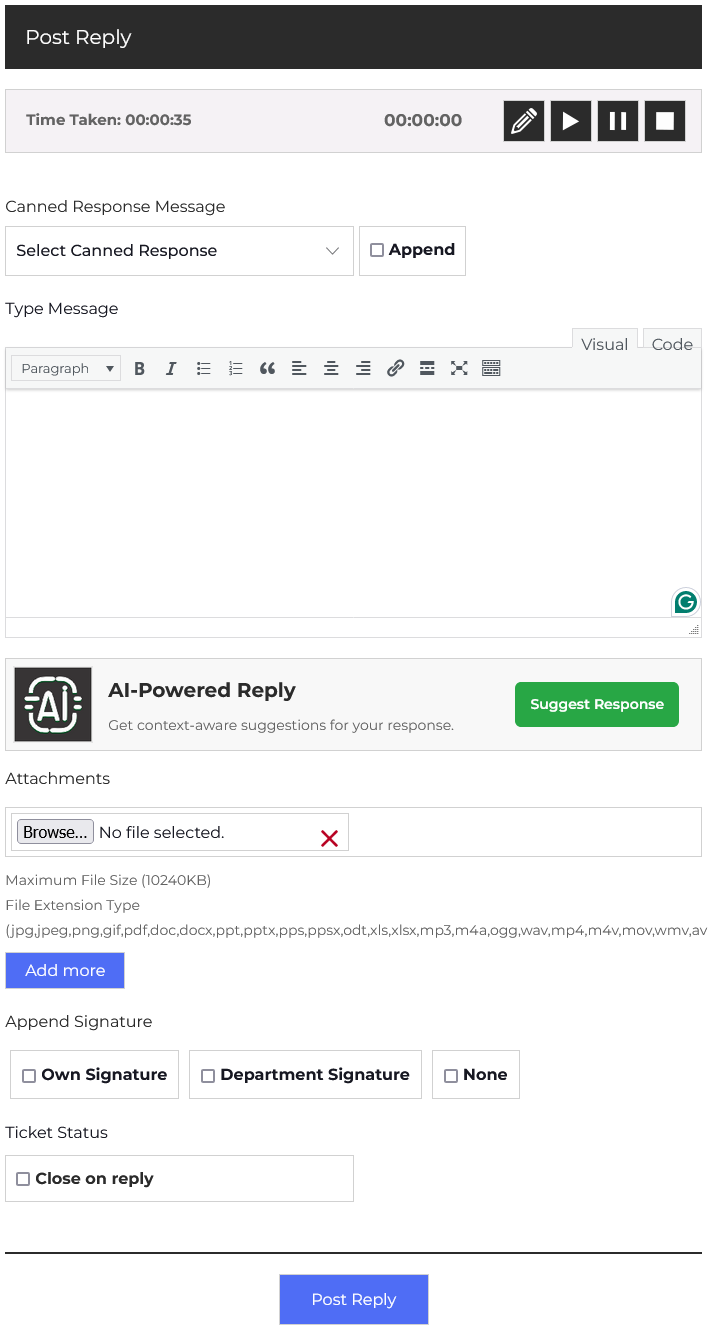
Post Reply
“Hi James, thank you for reaching out. Please try resetting your password using [this link]. Let us know if the problem continues.”
Time Tracking
- At the top of the reply window, you’ll see Time Tracking. Time Tracking allows the agent to track the time spent specifically on writing or investigating for this reply. The agent can start, pause, resume, or stop the timer using the icon buttons. Time Taken shows the total time already spent on this ticket. This helps monitor how long an agent spends responding to a ticket.
This video link is about Time Tracking.
Canned Response Message
- Before the response box, the agent can choose canned response tags such as Account/Login Problem, Password Reset, or Technical Issue to categorize and speed up responses. The Append checkbox allows the agent to include this canned content in addition to their custom reply.
Type Message
- In the Response field, replies can include rich text formatting, file attachments, links, and even predefined (canned) responses to help work faster and maintain consistency.
Attachments
- The interface also supports file attachments, which are crucial when sending logs, screenshots, or documents. Multiple files can be added using the “Add More Files” button, and supported formats are listed (e.g., PDF, DOCX, PNG, MP4, etc.).
Append Signature
- Furthermore, the agent can also control the signature they want to use, either their “Own Signature,” the “Department Signature,” or send the message without a signature, ensuring consistency and professionalism in communications.
Ticket Status
- Before posting the reply, the Ticket Status control allows the agent to close the ticket automatically after replying by selecting “Close on reply.” This is helpful when the agent is confident that the issue is resolved.
Once everything is ready, clicking the green Post Reply button will send the message, update the ticket thread, and perform any selected actions like attaching a signature or changing ticket status.
AI-Powered Reply
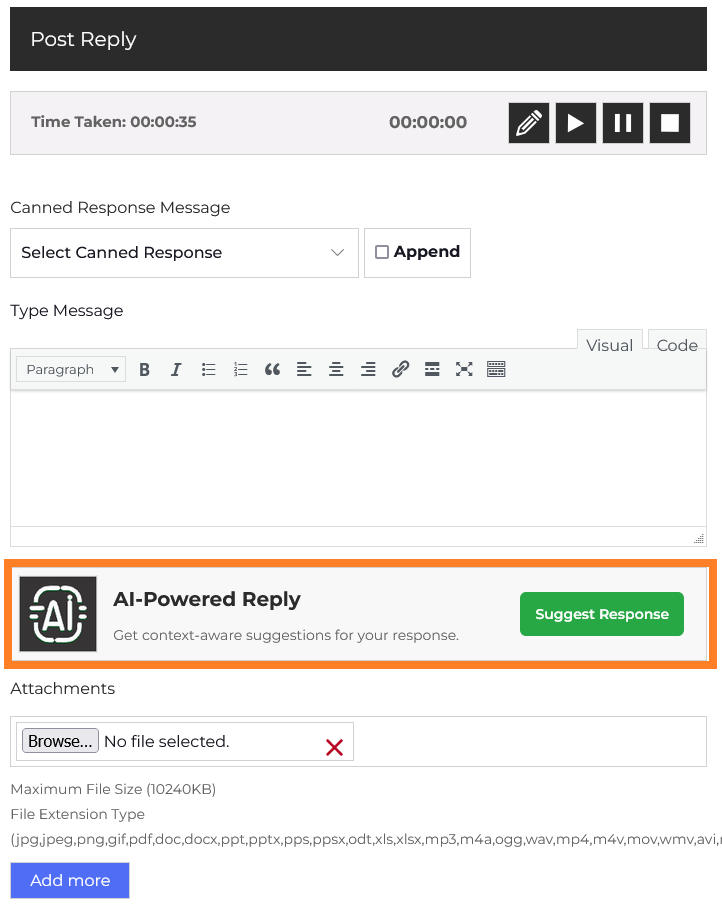
Suggested Reply Output
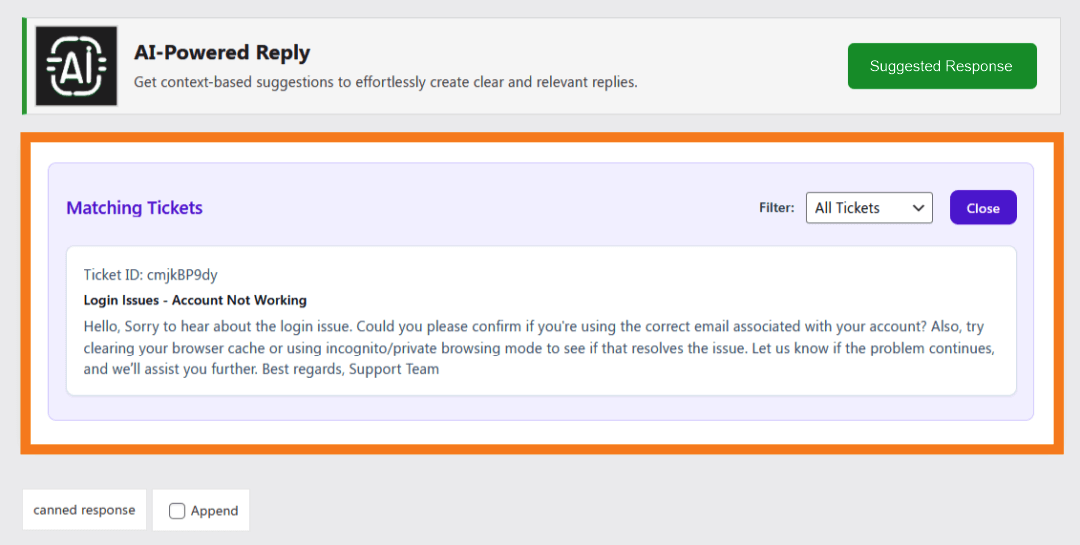
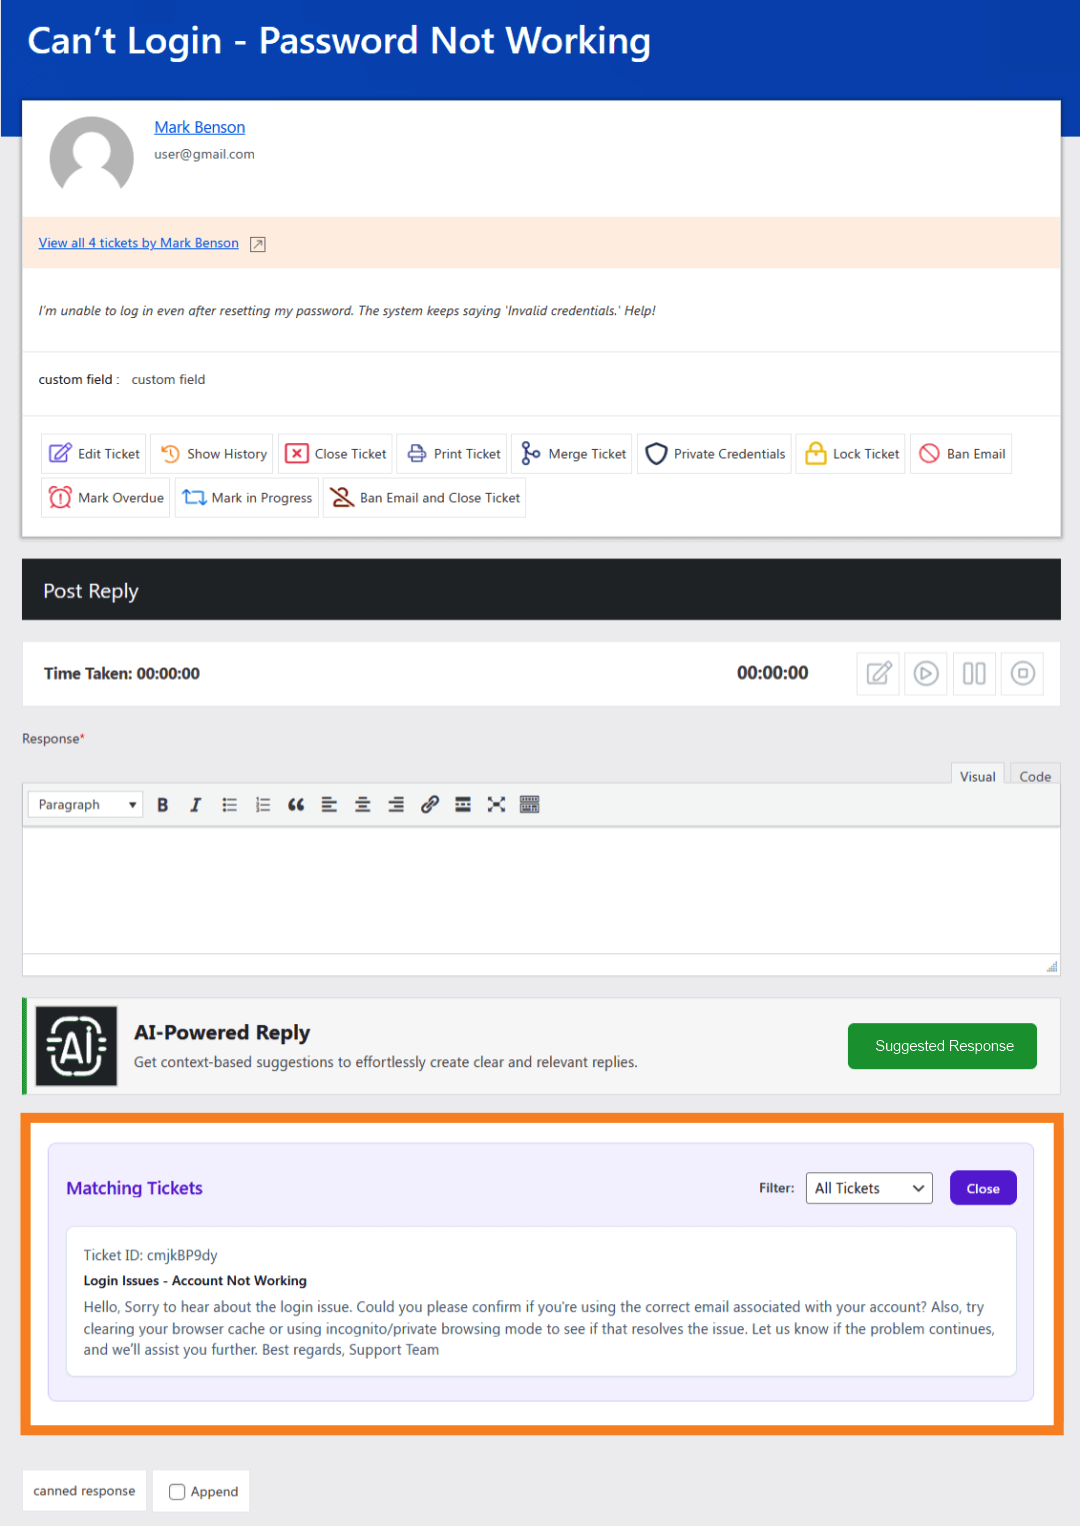
This section appears directly below the AI Reply Mode controls within the ticket interface. Once a suggestion is found, the output area becomes visible inline, seamlessly integrated into the existing layout. It displays the matched reply from a previous ticket in a clean, readable format, allowing agents to quickly review and insert it into the reply editor without disrupting the overall ticket view.
Manage Ticket-Based Reply Suggestions
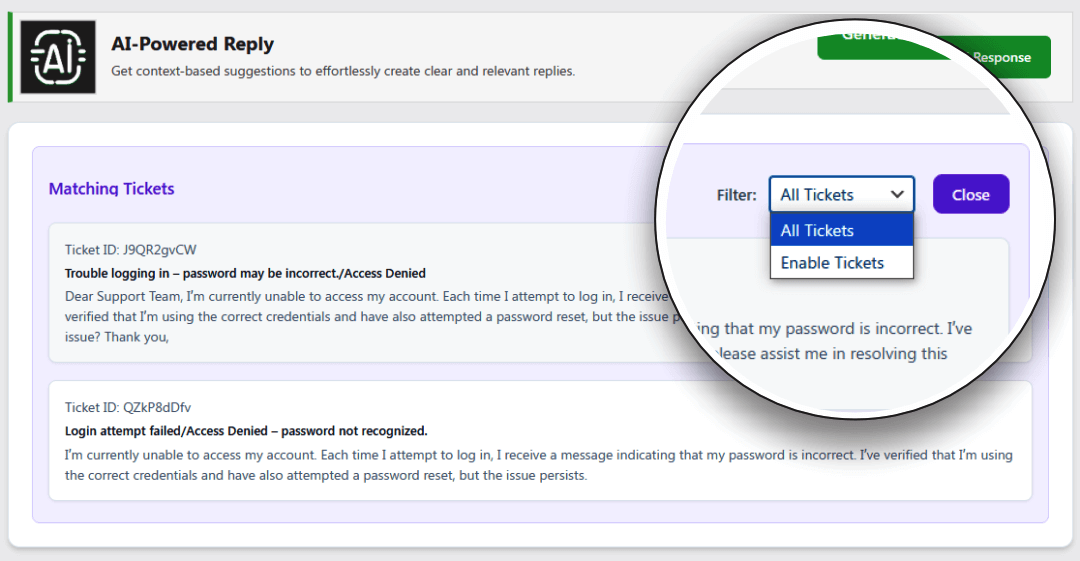
This section allows administrators to manage which tickets are used as sources for AI-powered reply suggestions. The combo box provides two filtering options: All Tickets and Enabled Tickets.
- All Tickets – Displays suggestions from all past replied tickets.
- Enabled Tickets – Displays suggestions only from tickets that have been specifically enabled for AI-based reply matching.
This filtering option gives you greater control over the scope of suggested replies, allowing for a balance between broader context and curated accuracy.
Detailed View of Suggested Reply
When a suggested reply is selected, agents can view the original ticket and its response in full context. This helps ensure the reply is relevant and accurate before being inserted, supporting consistent, high-quality responses.
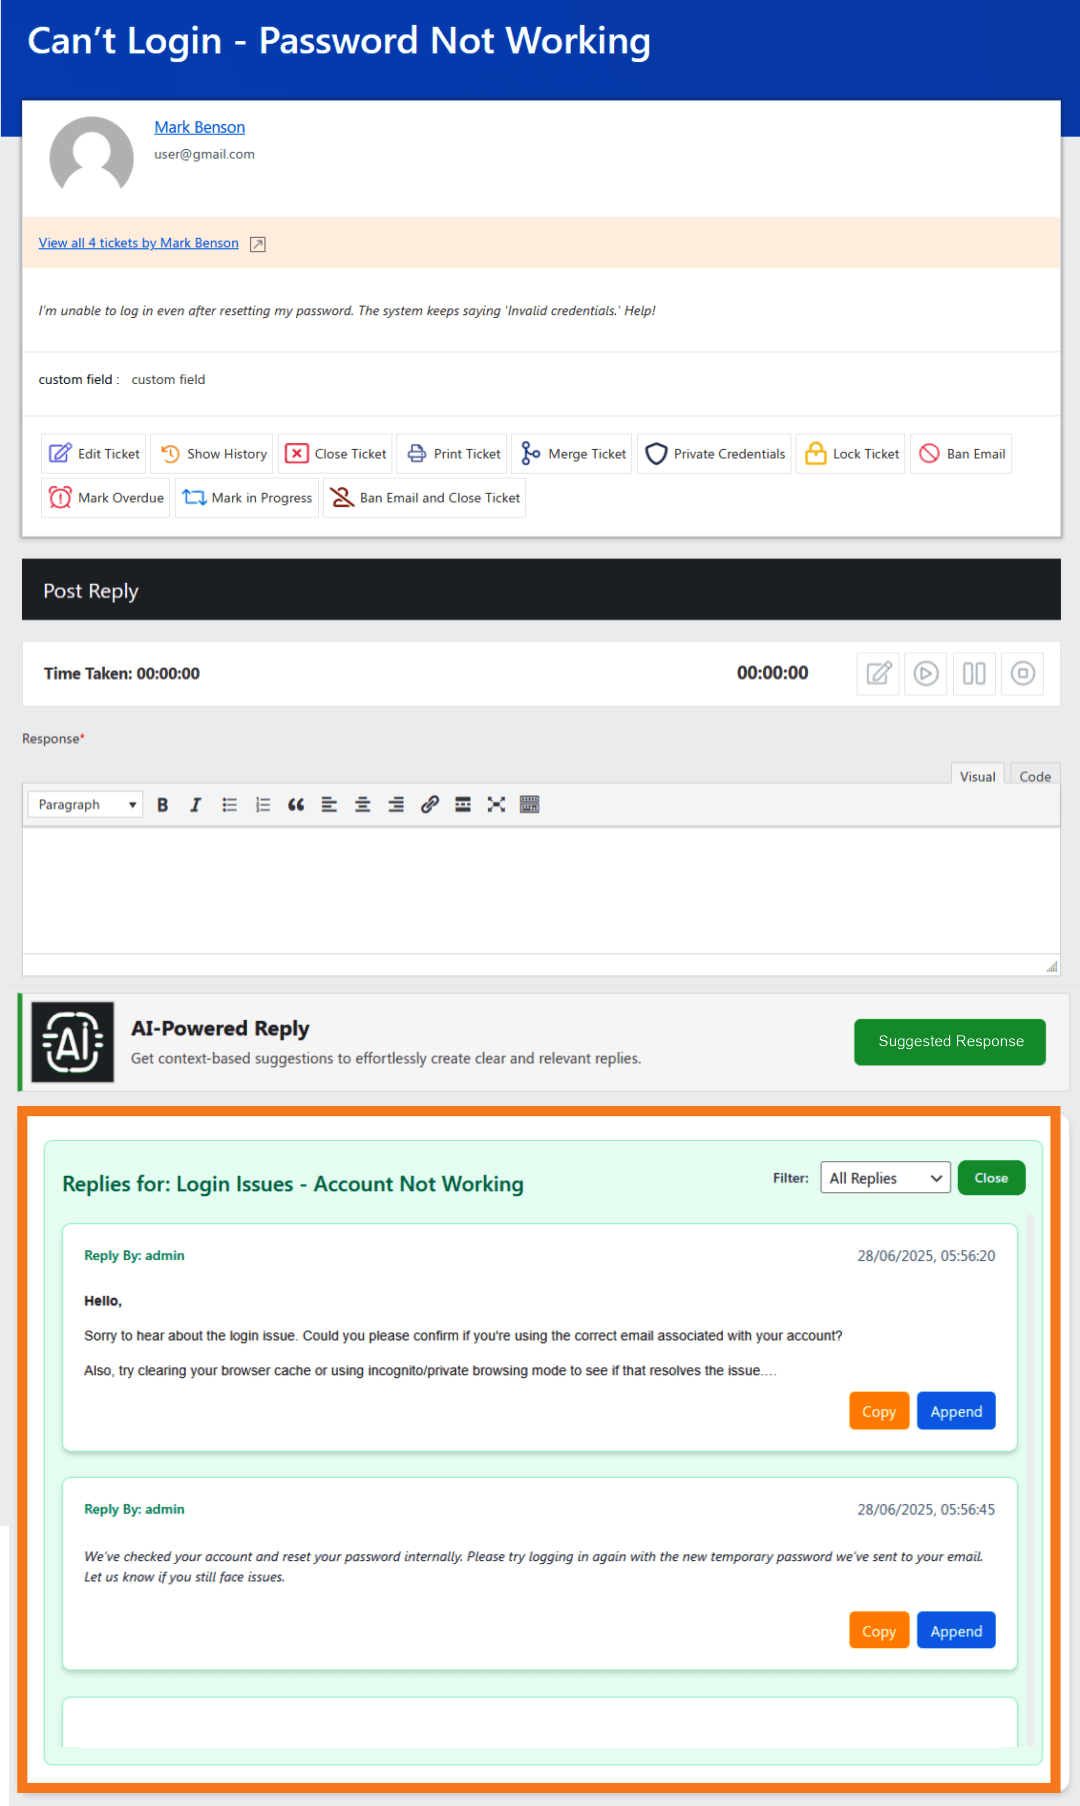
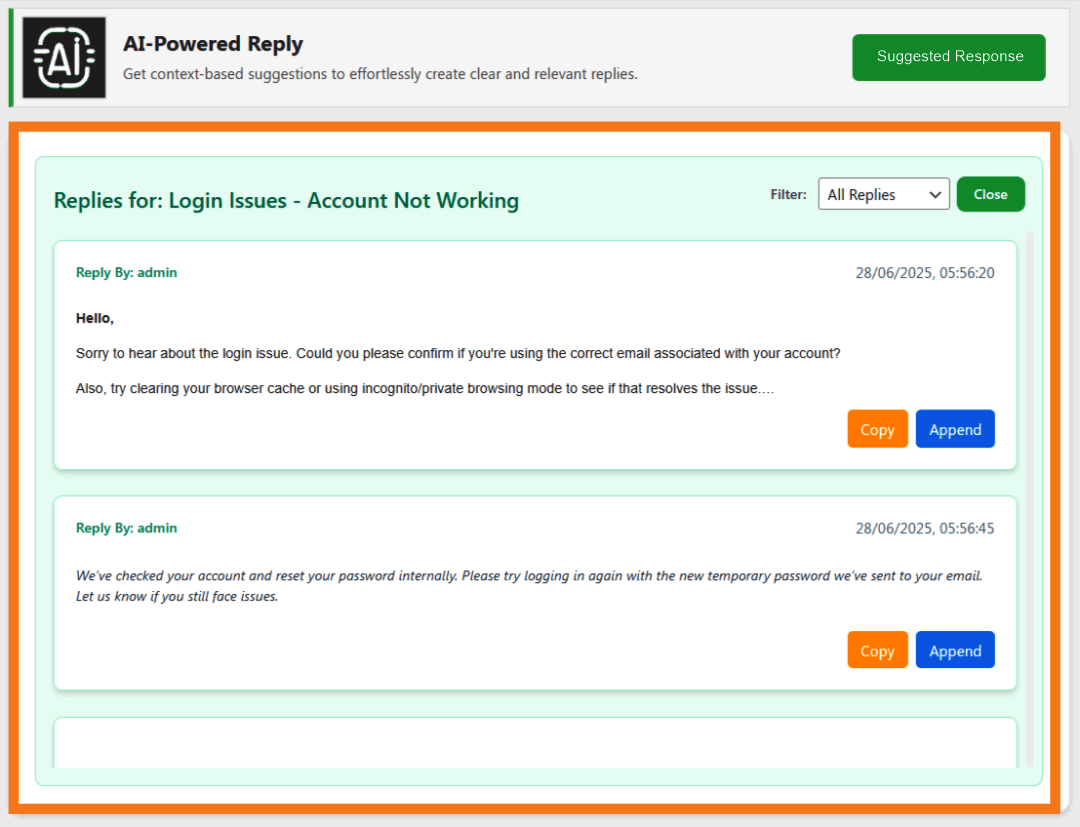
Manage Suggested Replies
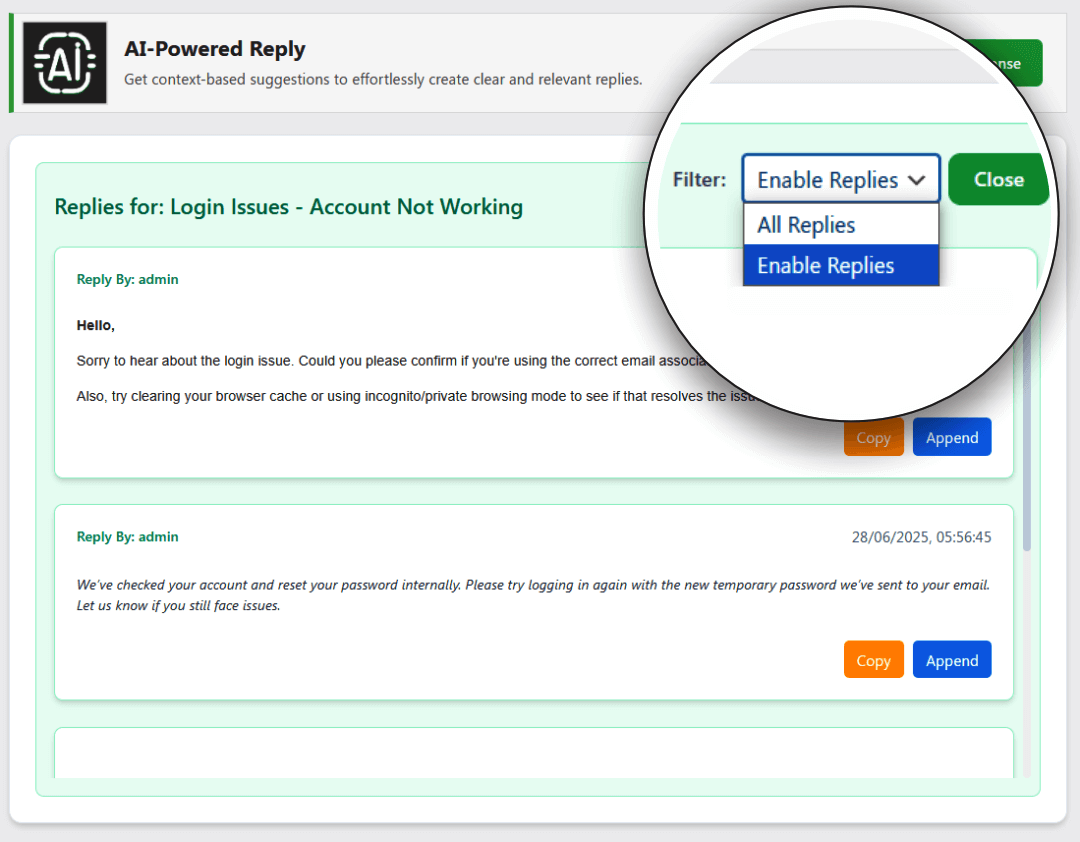
This section allows administrators to manage manually marked replies for AI suggestions from the selected ticket. A filter at the top right provides two options: All Replies and Enabled Replies.
- Enabled Replies – Displays only those replies from the selected ticket that have been manually marked for AI suggestions.
- All Replies – Displays all replies placed within the selected ticket.
This targeted view helps maintain precise control over which responses from the ticket are available for future AI-driven suggestions, ensuring relevance and quality in every recommended reply.