Agent Auto Assign In The JS Help Desk!
Conditions
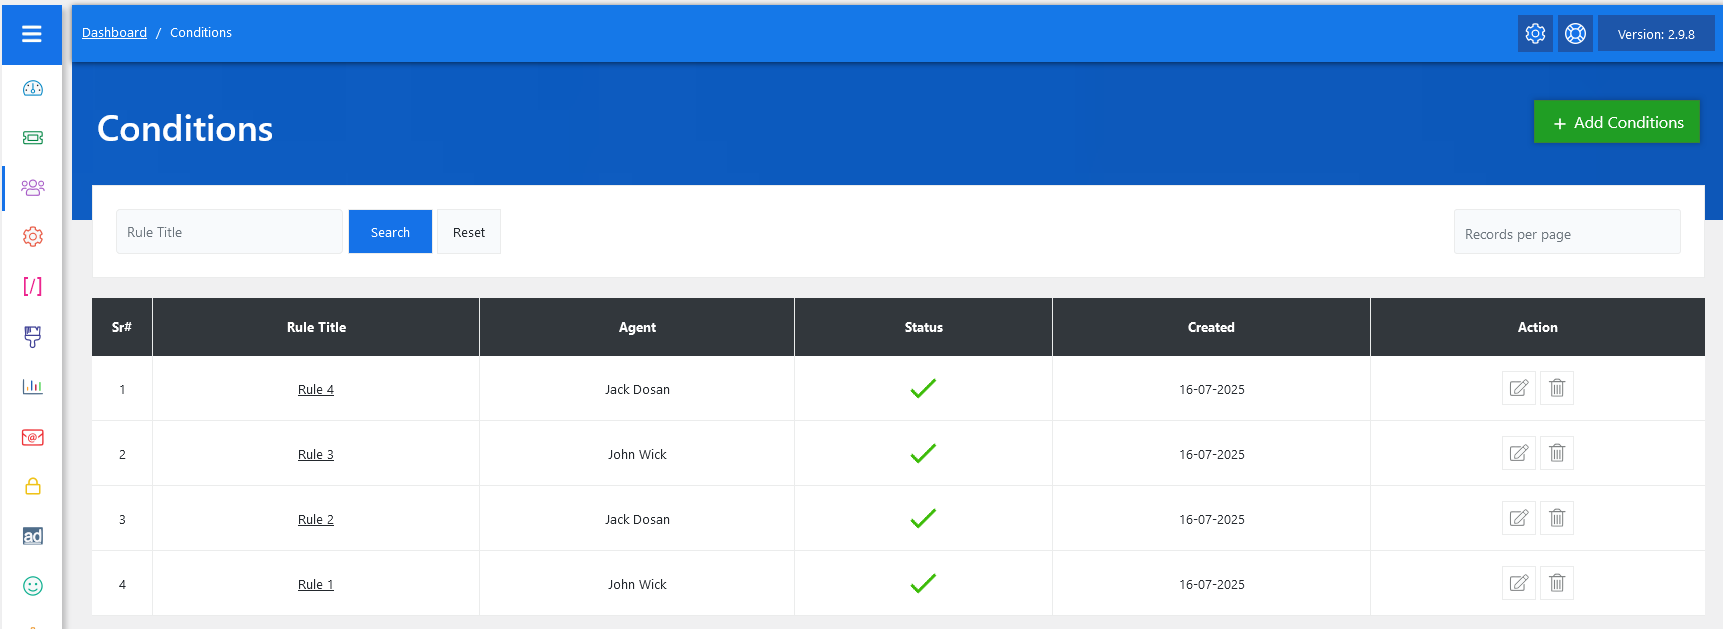
From your admin dashboard, navigate to the Admin Dashboard > Dashboard Menu > Agent Auto Assign. On the conditions page, you will find various options for the admin to manage the agent conditions. All the details about the agents’ conditions and how the admin handled the agents’ conditions are discussed here.
In JS Help Desk, the Conditions feature is a powerful tool that allows administrators to automate the assignment of tickets to agents based on specific rules. These rules, also referred to as “conditions,” streamline workflow by reducing the need for manual intervention in assigning tickets, thus improving efficiency and consistency in customer support operations.
Search

You can use the search filters above the conditions table to quickly find conditions. You can search by Rule Title, and clicking on the Search button will show the rules of that criteria. The Reset button clears the filters and restores the full list.
Listing
Each condition is defined with a Rule Title, a designated Agent, and a set of criteria (or filters) that must be met for a ticket to be automatically assigned to that agent. For example, if you want to ensure that all tickets related to the “IT” department with “High” priority go to a particular agent, you can create a rule named “High Priority IT Tickets” and define the conditions accordingly.
The conditions are managed under the “Conditions” section accessible from the admin dashboard. As shown in the image, this section displays a list of all active rules along with their assigned agent, current status (active/inactive), and the date the rule was created. You can easily take action using the edit or delete buttons under the Action column.
To create a new condition, the admin can click the “Add Conditions” button, which opens a rule builder where multiple conditions can be added along with the agent.