How to Set Up JS Help Desk!
Set up JS Help Desk
This article will guide you through setting up the JS Help Desk plugin, including initial setup and customizing configurations to suit your specific Help Desk needs. We guide you step-by-step through the JS Help Desk plugin to meet your needs and requirements.
Create Page Using Shortcode
To create a JS Help Desk control panel using the shortcode in the JS Help Desk, follow these steps:
- Admin Dashboard Access: Log in as an administrator and go to your JS Help Desk Admin Dashboard.
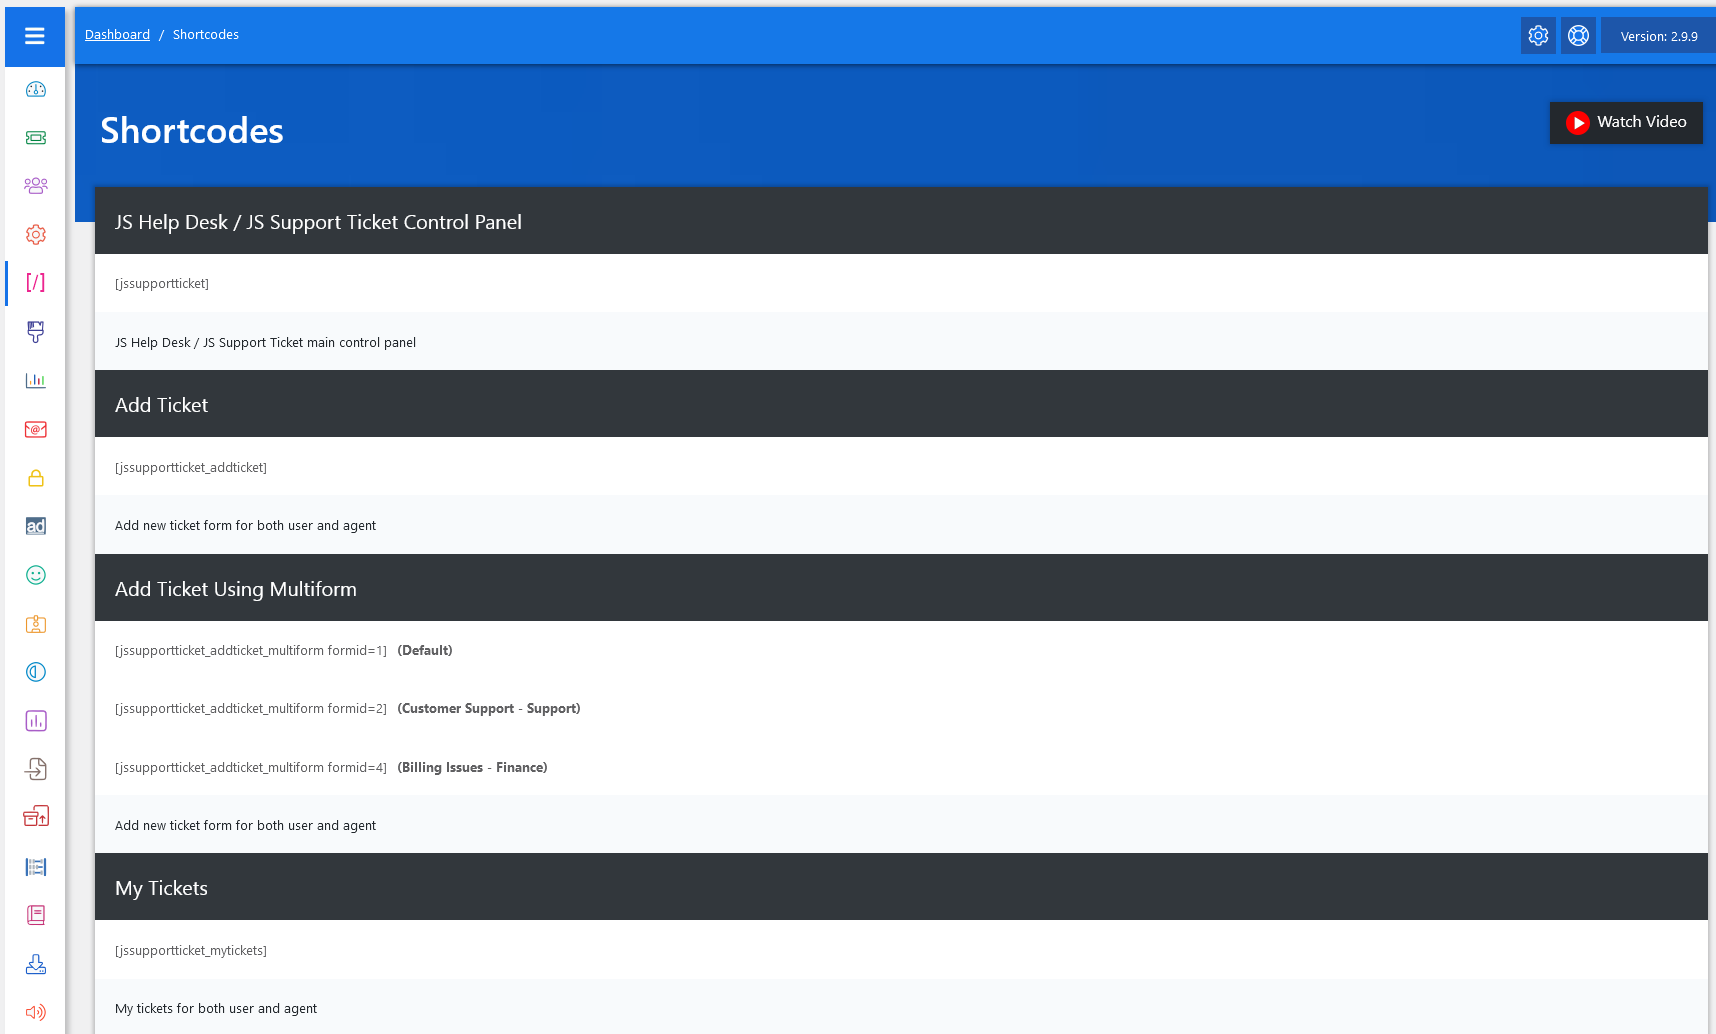
- Navigate to Shortcodes: From the Dashboard Menu, go to Shortcodes and click on it. This section contains a list of all available shortcodes.
- Locate the JS Help Desk Control Panel Shortcode: Find the shortcode for the JS Help Desk Control Panel. This shortcode will provide a control panel to manage their tickets, tickets by status, department, or priority, and take actions. It provides a clear, organized interface that allows users to access key features and monitor overall system performance.
- Copy the Shortcode: Once you find the shortcode, copy it. The shortcode might look something like ” [jssupportticket]“.
- Create a New Page: Now, navigate to Pages and click on Add New to create a new page.
- Paste the Shortcode: In the page editor, give your page a relevant title, like “Help Desk Control Panel,” and paste the copied shortcode into the page content.
- Publish the Page: Once the shortcode is in place, click the Publish button to make the page live.
The JS Help Desk Control Panel will now be available on your site, providing easy access to their dashboard where they can manage tickets, ticket status, and account settings.
Add New Page
To add a new page in WordPress, follow these steps:
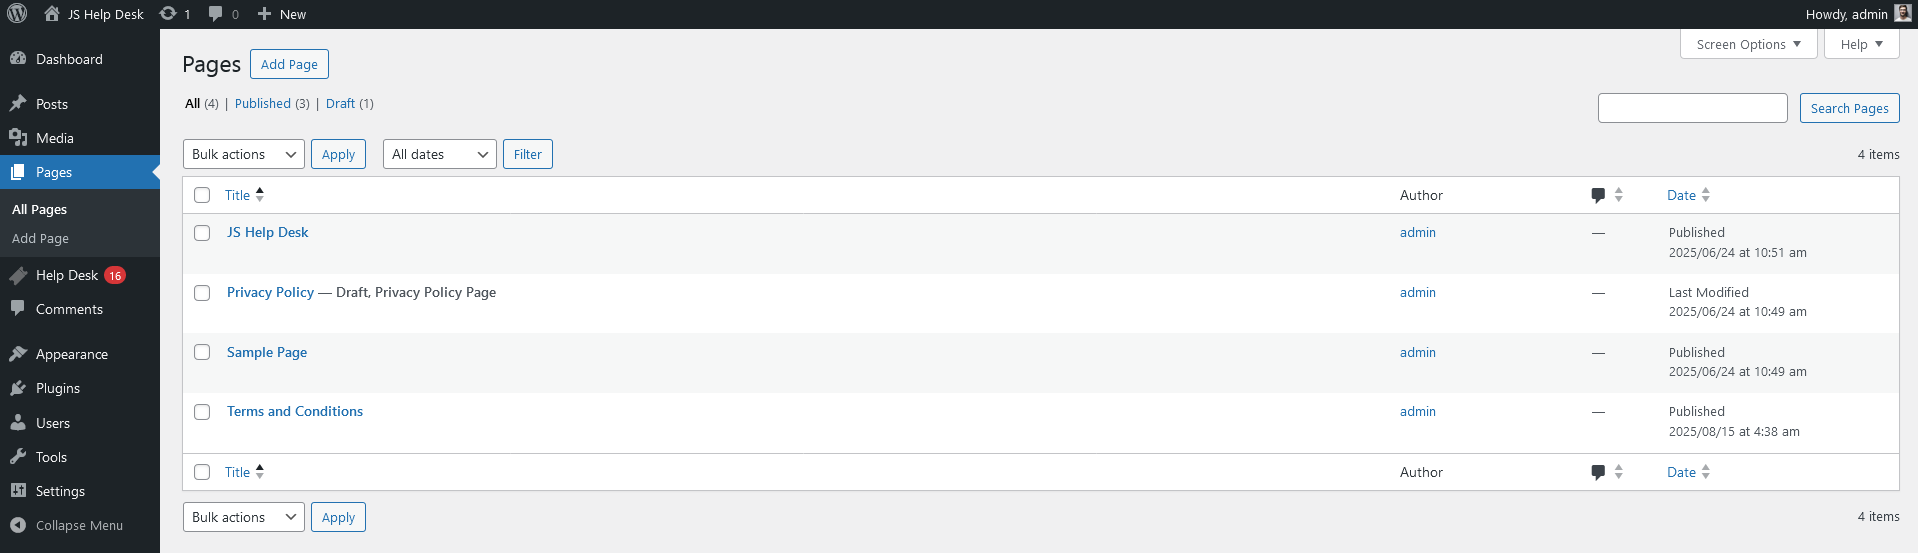
- Navigate to Pages: From the WordPress Dashboard, look at the WordPress Sidebar on the left.
- Click on ‘Pages’: Find and click on Pages to expand the options.
- Click on ‘Add New’: Once the Pages section opens, click on the Add New button at the top to create a new page.
This will open the page editor where you can add a title, content, and any shortcodes to customize your page.

To create and set up your Help Desk Control Panel page, follow these steps:
- Give the Page a Title: In the new page editor, add a title like ‘Help Desk Control Panel’.
- Paste the Shortcode: In the content section of the page, paste the JS Help Desk shortcode for the JS Help Desk control panel.
- Publish the Page: Once you’ve pasted the shortcode, click on the Publish button to save the page.
- View the Page: After publishing, click the View Page button to see the JS Help Desk control panel live on your site.
This will allow users to access the control panel directly from this new page
Add Page to Website Menu
To make the Help Desk Control Panel easily accessible from your website’s menu, follow these steps:
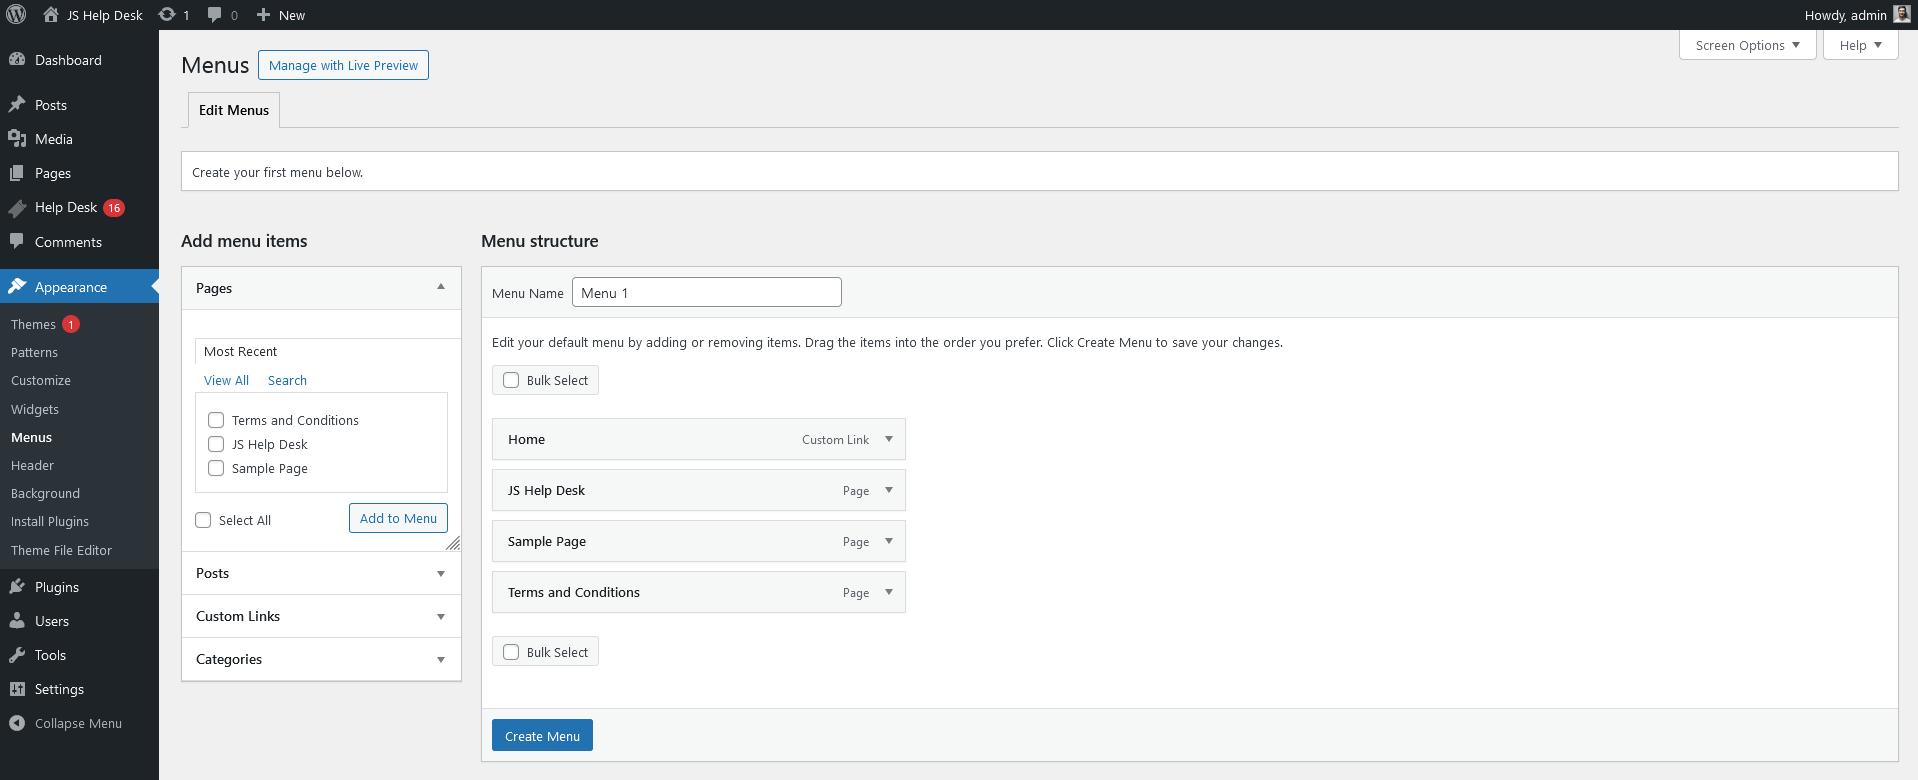
- Navigate to Menus: From the WordPress Dashboard, go to Appearance > Menus.
- Add the JS Help Desk Control Panel Page: In the Add Menu Items section, find the JS Help Desk Control Panel page you created. Check the box next to it and click Add to Menu.
- Organize Menu: Drag and drop the page in the desired position within the menu structure.
- Save the Menu: Once you’re satisfied with the menu arrangement, click Save Menu to apply the changes.
Now, the Help Desk Control Panel page will appear in your website’s menu, providing quick and easy access for users. This method streamlines the process of using shortcodes and pages, ensuring a user-friendly experience.
Set Default Page In Configuration
- Admin Dashboard Access: Log in as an administrator and go to your JS Help Desk Admin Dashboard.
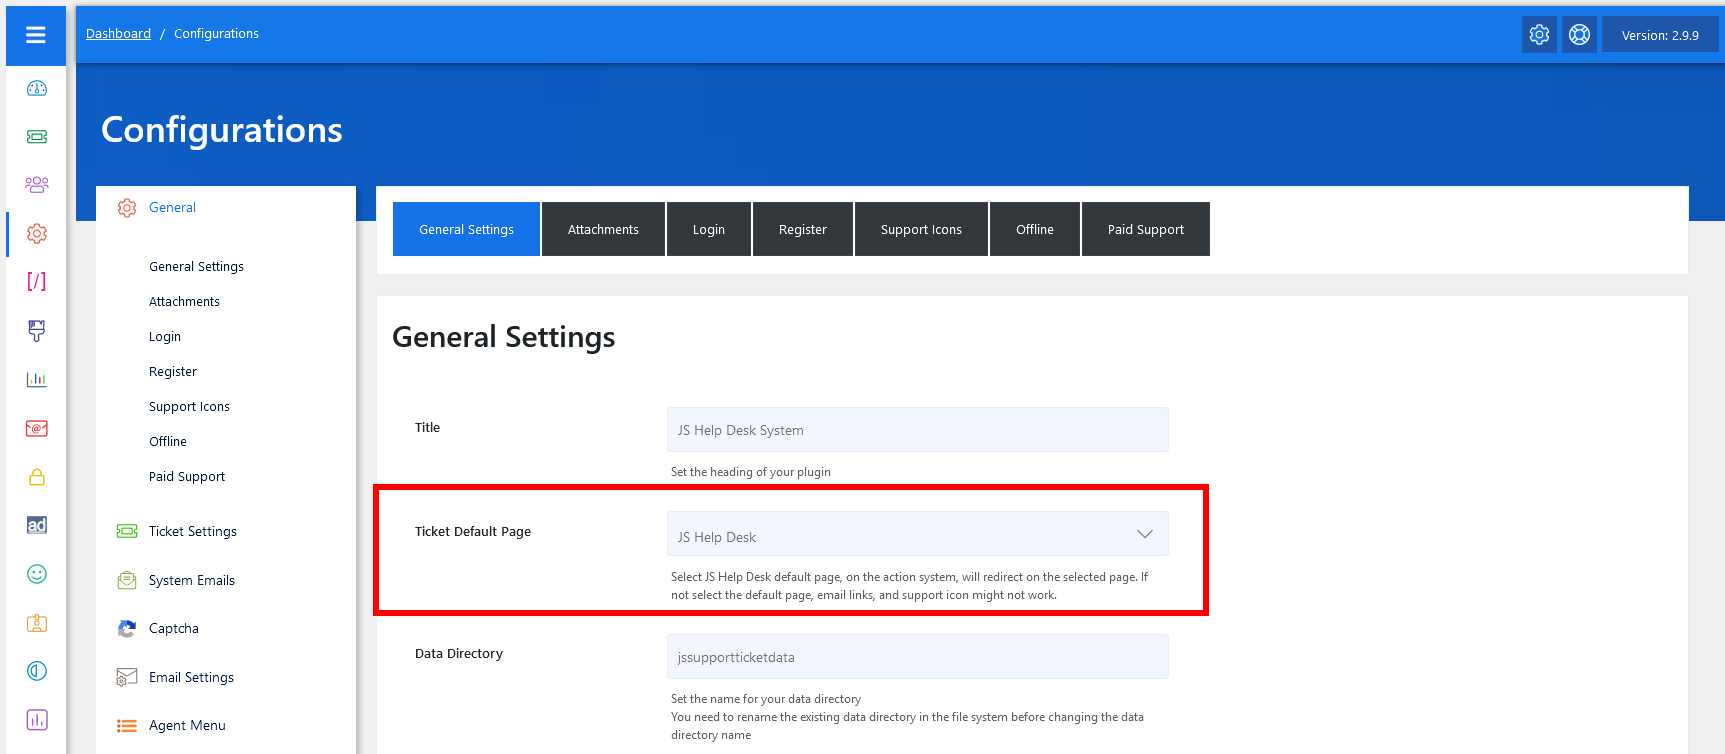
- Navigate to Configurations: From the Dashboard Menu, go to Configurations and click on it. This section contains a list of all General Settings > Ticket Default Page.
- Select JS Help Desk default page, on the action system, will redirect to the selected page. If not select the default page, email links, and support icon might not work.